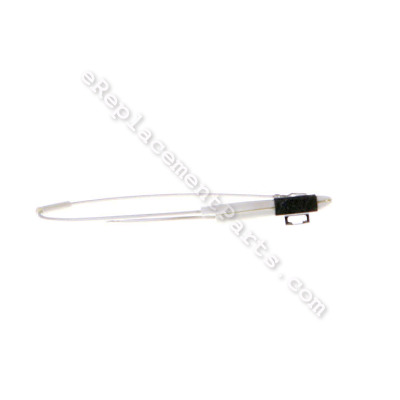
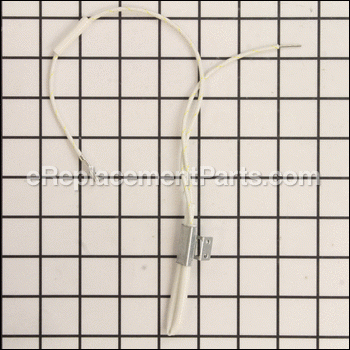


Fuse Assembly SP0010484
OEM part for: Breville
Part Number: SP0010484
$4.99
In Stock
Compatibility
This part will fit the following 1 machine
Breville
BOV450XL The Mini Smart Oven View Diagrams & Manuals
This item works with the following types of products:
- Oven Parts
This part replaces obsolete part #: BOV450XL/63, BOV450XL63
Customer Part Reviews ?
Average Rating (out of 5):
Click to filter by ratings:
5 stars
4
4 stars
0
3 stars
1
2 stars
0
1 stars
0
< PREV
- 1
Moderately easy repair with the new part identical to the original part.
Arrived quickly and well packed
Guest -
April 23, 2023
Verified Purchase
Medium Level of Difficulty
All went well. Now let’s see if it will last!
Very pleased with the part availability!
Guest -
January 23, 2020
Verified Purchase
Part made it easier to repair
The part was just like the original so it made it easier to repair. Getting into the Breville Oven and fitting the part in the proper place was not so easy. Lots of screws and difficult fitting the part to the controller. You will need an electrical crimper
Guest -
May 7, 2019
Verified Purchase
Great Service
The part I replaced worked great. I’ll definitely use this service again!
Guest -
May 3, 2019
Verified Purchase
Part was exactly like the original part.
Unfortunately after taking the time to install the new part, which was somewhat time consuming, I plugged it in to my kitchen outlet and it blew the circuit and scared the receptacle. Im an electrician by trade, so the repair was done correctly. I originally had no display on my toaster oven, but it never tripped the breaker. I guess it wasnt the fuse after all oh well, I tried. Going to buy a cheap Black and Decker and toss this overpriced thing I bought, into the trash. No idea asked with the part, it showed up quick and very reasonably priced.
Guest -
July 25, 2023
Verified Purchase
t
t
t -
t days ago
Verified Purchase
eReplacementParts Team
t
Questions & Answers ?
Our customer Service team is at the ready daily to answer your part and product questions.

Ask our Team
We have a dedicated staff with decades of collective experience in helping customers just like you purchase parts to repair their products.
Does this fit my product?Questions & Answers for Fuse Assembly
No questions have been asked yet
Customer Repair Instructions ?
All our customer repair instructions are solicited directly from other customers just like you who have purchased and replaced this exact part.
Stopped working totally
Connie - November 9, 2016
👍 7 of 8 people found this instruction helpful
Tool Type
Toaster
Difficulty
Medium
Time
30-60 minutes
Tools Used
Screwdriver
Parts Used
1. Removed tons of screws
2. Peeled outside back, removed more screws
3. Replaced fuse after cutting all plastic ties
4. Put tons of screws back on.
2. Peeled outside back, removed more screws
3. Replaced fuse after cutting all plastic ties
4. Put tons of screws back on.
Did you find this story helpful?
Thanks for voting and helping fellow customers!
Thermal fuse blew out
Brian - May 30, 2018
👍 3 of 3 people found this instruction helpful
Tool Type
Convection Oven
Difficulty
Medium
Time
1-2 hours
Tools Used
Screwdriver, Pliers, Electrical connector crimper and wire cutters/strippers.
Parts Used
I searched this repair online and found several very helpful Do-It-Yourself videos and articles. I got a box of snack-size, clear, Ziploc baggies, a piece of copy paper, and a pen so as to put screws/parts into separate bags and write down where they came from on a segment of the sheet of paper. I then tore off each segment and put it inside the corresponding baggie to keep track for reassembly later on. Also, the wire is 16 gauge, so allow for that when choosing butt connectors and using wire strippers. Step 1: Remove all screws from the back panel of the oven. Step 2: Remove all screws from the ends of the housing along each side of the bottom of the oven, and remove all screws from the four feet (NOTE: Two screws for the front feet are hidden under an added, black rubber insert that's held in by one screw and a small metal plate). Step 3: CAREFULLY slide the back panel downward to remove. The back foot that curls up over the side of the oven will create resistance when trying to get the back off. Also, each back foot is held on by a rivet too, so neither can actually be removed from the panel. DO NOT FORCE ANYTHING, and gently straighten any sheet metal needing it after you've gotten the back panel off. Step 4: Remove the 2 black screws holding the metal mounting bracket for the thermal fuse in place against the inner cooking-side wall, bend the two teeth holding the bracket to the fuse outward, remove the bracket from the fuse, and put the bracket and 2 screws into their own plastic baggie with a label. The new fuse comes with the bracket too, but not the screws. Step 5: Slide the white insulation sleeve back so you can see the original fuse itself. Find which end of the fuse has a black mark on it and wrap a small piece of black electrical tape around the wire connected to it before you cut the old fuse off. You'll need to install the new fuse oriented the same way. Guess there's polarity involved, eh? Trying to get inside the section of the oven where the fuse and computer circuit panel are located is too cramped. So, I simply cut the original fuse away as far outside the back of the oven as possible, leaving me some wire length with which to work. Step 6: Find the end of the replacement fuse with the black mark on it and make sure to connect it to the original wire with the small piece of black electrical tape wrapped around it. Step 7: I took into consideration that this might not be the only time I have to do this repair, so I left 6 inch's length of wire on each end of the new fuse in case I ever had to replace it again. I then stripped the ends of the new and old wires and, using tube-shaped insulated butt connectors and a crimping tool, I connected the new wires to the old ones with the end with the black mark connected to the wire with the black electrical tape on it. I then slid the white insulation sleeve back over the new fuse, carefully folded it in half again (as it originally was), and loosely coiled the wire lengths so I could put the fuse back inside the oven without the wires touching any of the metal surfaces. The uninsulated lengths of wire connected directly to the fuse (inside the white insulation sleeve) are folded over in half so the fuse will fit into the mounting bracket with the insulation sleeve in place over the fuse, the same as it's installed when you first open the back of the oven. Step 8: At this point, Breville would have you crimp the metal mounting bracket's 2 tabs around the insulation sleeve of the new, folded fuse, and then attach the bracket to the inside the oven's cooking wall again with the 2 black screws you took out before to remove the old fuse. I did not do this. It occurred to me that, since the fuse is from Breville (as opposed to a 3rd party), is already rated at 10 amps and has its set thermal limit, attaching it against the cooking wall of the oven again is going to keep on heating it until it fails just as the original fuse did. In fact, there are comments online stating that some who did this repair ended up having the new fuse blow on them again right afterward. Step 9: So, instead of attaching the new fuse to the mounting bracket and screwing it to the inner wall, I reattached the mounting bracket where it originally was using its 2 black screws so there would be no screws holes open to the section where the fuse and circuit board are located, but I did not attach the new fuse to the mounting bracket. Instead, I positioned the fuse so it's held securely between the insulated lengths of wire without touching any of the metal walls around it. It's also near the vents on the side and back of the oven. I shook the oven and turned it over a few times to make sure the fuse stayed in place, which it did. I felt it was asking for the fuse to blow again, under normal operating use, if I reattached it against the cooking wall. Step 10: Before reassembling the oven, I cleaned the inside walls as best as I could while being careful not to touch the heating elements. You can only do so much cleaning a toaster oven. Their fate is to become gunked up with use since you can't get inside them to clean thoroughly or use oven cleaner sprays without potentially damaging the heating elements. Step 11: I carefully set the oven rightside up and plugged it in to ensure it was now getting power. It sprang right back to life, confirming the repair was successful. Step 12: I then reassembled the rest of the oven the same way I took it apart, starting with replacing the back panel first (important to start with this), and then replacing the bottom screws for the side edges of the housing and the feet. I then cleaned the outside after it was fully reassembled. Apparently, the thermal fuse blowing out is a common problem with the Breville BOV450XL toaster oven (actually, with all of Breville's toaster ovens), despite using the oven within normal operating parameters. I honestly don't know the reason why the oven has a thermal fuse when the only way it could get too hot is if it exceeded its own thermostat's maximum setting, and that's governed by its computer circuit panel which, I think, would blow out before the oven overheated since the thermostat failing would mean the computer board is failing. I guess the only other consideration is if someone were to use the oven without allowing for it to ventilate properly. Yet, the comments I've read from customers online is that the fuse blows even after light use toasting bread! Mine went after only 4 months of regular use, and with open ventilation around all sides of the oven. I guess my "sin" was heating it to its maximum temperature for baking - 450 degrees F. The fuse blew after a few minutes of cooking once it had preheated. Since installing the new fuse as described here, I admit I have not tried using the oven at 450 degrees. I cook at 425 for a little longer time, instead. Why tempt fate, right? It's been a few weeks now. So far, so good.
Did you find this story helpful?
Thanks for voting and helping fellow customers!
The fuse blew out, hard to believe on a 2+ year old Breville Mini Smart Oven, My old GE still working after 30 years
Nancy - April 20, 2018
👍 3 of 3 people found this instruction helpful
Tool Type
Toaster
Difficulty
Medium
Time
1-2 hours
Tools Used
Screwdriver
Parts Used
Removed all screws, of which there are many
Had a hard time changing out fuse assembly which was difficult because we could not take off the entire back and had to work in a small space. Manufacture did not make it easy to repair.
It was worth effort as oven is now working and saving over 200$ with a 10$ part.
Had a hard time changing out fuse assembly which was difficult because we could not take off the entire back and had to work in a small space. Manufacture did not make it easy to repair.
It was worth effort as oven is now working and saving over 200$ with a 10$ part.
Did you find this story helpful?
Thanks for voting and helping fellow customers!
Just wouldn't turn on all of a sudden.
Itsuay - June 29, 2018
👍 1 of 1 people found this instruction helpful
Tool Type
Convection Oven
Difficulty
Medium
Time
More than 2 hours
Tools Used
Screwdriver, Wire cutter and stripper
Parts Used
This was to fix the Breville mini smart oven, model number BOV450XL.
It took a while just to remove the 41 screws while trying not to strip the threads. The toughest part was to slide the back panel off after all the screws were removed and not clear which part exactly to replace. I'll list the tips below.
1. Remove all screws at the back panel and the 4 feet as well as the side screws at the bottom panel. The two front feet have two hidden screws under the oblong rubber. The two back feet have a revel that cannot be removed, that is, they won't completely come off.
2. Remove the front feet and loosen the back feet. Wiggle the side panel (where all the controls are) to open enough space to slide off the back panel. I found it easier to rotate the back panel counterclockwise to get it off. I didn't warp any of the sheet metal.
3. Unscrew the 2 screws that hold the bracket that hold the fuse assembly. These are the only two screws inside the oven on the divider facing the oven. Remove the wire from the bracket and slide off the housing tube to expose the fuse , which is what needs to be replaced. ( I wasted a lot of time here thinking that I had to trace the wires and to replace them at their connection points and ended up cutting off all the ties for nothing). There maybe a way to replace the fuse at the original connection points, but I just cut out the bad fuse and connected the two ends of the new fuse to the old wire by using wire nuts. Place wire and fuse and bracket together as you found them.
4. Plug the oven in to see if it worked. If not, check all connections, if it still won't work, maybe fuse is not the problem.
5. If the oven comes back alive, you can spend the effort to put all parts back the way they were.
This fixed my oven!!!
Did you find this story helpful?
Thanks for voting and helping fellow customers!
Fuse failed (oven wouldn't turn on)
Gabrielle - January 12, 2024
Tool Type
Convection Oven
Difficulty
Hard
Time
More than 2 hours
Tools Used
Screwdriver, Pliers, wire snipper and crimper
Parts Used
I followed the instructions left by previous users, especially the ones titled "Thermal fuse blew out" and "My Breville 450 toaster oven just died mid-use (fuse blew)".
1. I removed the screws from the back, feet (including those hidden under the rubber tabs), and the two on the bottom side panels. I sketched a diagram and numbered the location of each screw. Then I numbered the cups of egg cartons and used them to keep the screws etc. in order.
2. I slid off the back panel.
3. I removed another screw on the bottom left side that is accessible through a hole in the metal edging. That allowed me to pry open the panel housing the wires and circuit board.
4. I clipped off the wire ties.
5. I left the fuse mount in place, but pried it open to remove the fuse.
6. I unplugged the fuse from the 2nd slot in the circuit board as described by another user: "On the plug you'll see how those two curled pieces of the fuse end are on the plug. Using a very small screwdriver very gently insert it into the little opening in the plug. You want to open the fuse end a tiny bit so it can be pulled off the plug."
7. I un-crimped the fuse cap that held the other end of the fuse together with the power cable following the instructions of another user: "First grab some needlenose pliers or other instrument that lets you crimp down on the cap in the opposite way it was crimped. Picture a + sign. There's top and bottom, and left and right. If it was crimped in the top/bottom way, you'll want to squeeze the left/right way."
8. I plugged one end of the new fuse into the second slot on the circuit board.
9. I twisted together the wires from the other end of the fuse with those of the power cable, inserted them back into the fuse cap, and re-crimped it closed.
10. I taped together the fuse with the other wires so that they're held in the middle of the wire compartment, not touching any of the oven walls.
11. I cleaned as much of the oven as I could.
12. I screwed back in the screw underneath the wire compartment. This helped hold the structure of the oven steadier for the next step.
13. The metal panels of the oven had come un-clipped from wires around the edges of the frame. I re-inserted them the best I could so that I could slide the back panel in again. This was difficult and took a long time, because the metal panels had become slightly warped when I opened up the oven to access the wires.
14. I reinserted all the screws and feet.
This is the first fuse I ever replaced. I have no experience with anything electrical. This was hard and took a long time, but it was do-able, and my oven works well again! I also agree with what other users said -- now that the fuse isn't touching the hot interior oven wall, I expect it to last a long time.
Did you find this story helpful?
Thanks for voting and helping fellow customers!
Start button did not turn toaster on
Jim - January 13, 2022
Tool Type
Toaster
Difficulty
Easy
Time
30-60 minutes
Tools Used
Screwdriver, Pliers
Parts Used
-Removed about 50 screws carefully separating and marking where screws fit.
-Unscrewed 2 screws on bracket holding fuse assembly replacing with new assembly.
-cut wires from crimped wire nut then stripped end of black wire. Connected black wire to white wire with wirenut.
-cut all tire wraps. Followed 2nd white wire to connector. Unplugged and plugged new wire in. Was a very tight work space.
-replaced wire ties to hold wires together.
-carefully slid back on…..put feet on then all other screws.
- recommend taking pictures as you take apart. Helps when putting back together.
Did you find this story helpful?
Thanks for voting and helping fellow customers!
My Breville 450 toaster oven just died mid-use (fuse blew)
Adam - August 5, 2020
Tool Type
Toaster
Difficulty
Medium
Time
30-60 minutes
Tools Used
Screwdriver, Pliers
Parts Used
The important thing here is to realize that this fuse assembly IS THE EXACT ONE YOUR TOASTER NEEDS! DO NOT follow other instructions out there telling you to cut the fuse. That is the wrong thing to do. It's actually more work and not good craftsmanship. Replace the fuse the right way so it's like nothing ever happened. Your toaster will run that much better in the future and you don't want to keep doing this over and over again even though it's a super cheap repair.
But hey, you're here so that's a good sign that you're looking to do this the right way.
What I used: 1 long (12-16' philips screwdriver) helpful for reach the deep in screws from step 9; 1 shorter ratcheting screwdriver (philips) to help with screwing so many screws in; 2 flat screwdrivers (one tiny, that I could squeeze into the little holes at the one of the fuse assembly, and a second wider one for helping push the fuse assembly down on to the circuit board); painters tape for keeping the door shut; needlenose pliers for crimping a wire cap
1.) first thing is take all the screws off the back and gently slide the back off. You will have to unscrew the back feet, as well as the front right foot of the machine (the one under the buttons). There are two 'layers' of screws so once you remove the ones you can see, pull the tab out of the middle and you'll see a screw or two remaining. This threw me off for a sec on the front right one.
2.) Your toaster's outer layer is metal and so while you can bend it out of place to get around it, just be a bit gentle since it may stay bent when you go to put everything back together. You'll just have to fight to push it into order again which is not much work at all. Just a heads up.
3.) Looking at the back of the toaster, with the back off, everything you need to focus on is on the left side. Pretty quickly you should find the fuse covered by a white tube.
4.) Remove the fuse from the mount. Not necessary, but you may want to remove the mount since it's on the sidewall taking all the heat from the unit. If it really is a heat sensitive issue with the fuse going, you may want to attach the mount elsewhere (or not even use it) once you have the new fuse in there. Just so it's not resting up against all that heat.
5.) When you have the fuse pulled loose from the mount, you'll see one side goes into a cap with a wire from the power cable. The other side goes down into the unit towards the front and plugs into a circuit board.
6.) Trim all the plastic ties so the wires are more easily accessible.
7.) How to replace the fuse, simply find the open end of your new fuse, the one with the exposed wire. That goes in the cap with the black power cable end. The other end simply plugs into the circuit board up front. It is the second connection from the left in the circuit board. The left most plug will say "null" above it. The one we care about is just to the right of it and it says "life".
8.) Replacing the 'cap' end. First grab some needlenose pliers or other instrument that lets you crimp down on the cap in the opposite way it was crimped. Picture a + sign. There's top and bottom, and left and right. If it was crimped in the top/bottom way, you'll want to squeeze the left/right way. This should open it up a bit to allow both the old fuse wire and the power cable wire to come out. You don't need the power cable wire to come out, but generally I like to twist the two wires together to ensure a good connection before using such a cap but it'll work if the power cable stayed in. Once the old fuse end is out, you can put the new one in. Again, if you just squeezed the left/right direction, now you want to squeeze top/bottom to close it back up. Gently tug on the cap to see if it's crimped on there well. If it is, great job. If not, squeeze harder! (or just use a fresh cap!)
9.) Now the trickiest part besides finding the patience to unscrew so many screws (all that is unscrewed must then be screwed!) is the replacement of the 'plug' end of the fuse. Note: a lot of directions talk of polarity in the fuse (one side is colored black) but that doesn't really matter here because you're replacing one type of end with the same type. So you don't need to worry about that stuff and you shouldn't take the plastic sheathing off the fuse. To pull the cord out of the 'life' plug on the circuit board, you'll want some space. With the front right foot off, you'll see there is a screw halfway up and well as up in the top corner, in the space you're trying to access. If you get those off, you can sort of pull the entire side of the toaster up and away a bit so you have more room to work with. Again, don't pull too hard because it will bend and stay that way, you want to get this back to the way it was before. With the space to move now, locate the second plug in from the left at the bottom. On the plug you'll see how those two curled pieces of the fuse end are on the plug. Using a very small screwdriver very gently insert it into the little opening in the plug. You want to open the fuse end a tiny bit so it can be pulled off the plug. Imagine a number 9 and you're putting the screwdriver in the hole to try and pry it open just the tiniest little bit. Honestly, you may feel like to didn't do anything to pry it open and that will be enough. You just want enough to be able to pull the thing off. Once you've pulled the fuse end off, simply press the new one into place. It's a tight fit so take a wider screw driver and use that to push down on the fuse end as you maneuver it evenly onto the plug. In the example of the #9, you're now pushing the screwdriver onto the circle of 9 to push it on the plug.
10.) with the new circuit board end in, and the power cable end replaced, you're done. How easy was that?
11.) Now, it's a matter of screwing all the screws back in. If you bent the metal, you'll need some help pushing on one side to align the holes so you can screw it in. There's no screw up in the front, but the top meets the front with a few lips of metal, just make sure those snap back into place before you've got too much screwed back in.
12.) Also, before you have too much done, neaten up the wires a bit. You could reattach the mount for the fuse on the outside wall if you don't mind the holes on the side.
Tip: don't screw all along one side first. Treat it like replacing a tire. Place a screw on the left, then on the right, then on top, then bottom, etc... This way the thing stays square and you're not pulling everything down one way.
Did you find this story helpful?
Thanks for voting and helping fellow customers!
Convection oven would not turn on
Michael - May 29, 2019
Tool Type
Convection Oven
Difficulty
Easy
Time
Less than 15 minutes
Tools Used
Screwdriver, Pliers
Parts Used
1. Remove back panel
2. Remove feet assembly
3. Remove old fuse
4. install new fuse
5. Replace feet assembly and back panel
2. Remove feet assembly
3. Remove old fuse
4. install new fuse
5. Replace feet assembly and back panel
Did you find this story helpful?
Thanks for voting and helping fellow customers!
Fuse blew
Ed - December 16, 2018
Tool Type
Convection Oven
Difficulty
Expert
Time
30-60 minutes
Tools Used
Screwdriver, Wire strippers
Parts Used
Remove all loose screws holding the housing on. Remove covers. Remove blown fuse by cutting wires and attach new fuse to existing wires with wire nut connectors. Reinstall or covers
Did you find this story helpful?
Thanks for voting and helping fellow customers!
OEM stands for Original Equipment Manufacturer and means the part you’re buying is sourced directly from the manufacturer who made your product. At eReplacementParts, we sell only genuine OEM parts, guaranteeing the part you’re purchasing is of better design and of higher quality than aftermarket parts.
Our product descriptions are a combination of data sourced directly from the manufacturers who made your product as well as content researched and curated by our content & customer service teams. This content is edited and reviewed internally before being made public to customers.
Our customer service team are at the ready daily to answer your part and product questions. We have a dedicated staff with decades of collective experience in helping customers just like you purchase parts to repair their products.
All our part reviews are solicited directly from other customers who have purchased this exact part. While we moderate these reviews for profanity, offensive language or personally identifiable information, these reviews are posted exactly as submitted and no alterations are made by our team.
All our customer repair instructions are solicited directly from other customers just like you who have purchased and replaced this exact part. While we moderate these reviews for profanity, offensive language or personally identifiable information, these reviews are posted exactly as submitted and no alterations are made by our team.
Based on data from past customer purchasing behaviors, these parts are most commonly purchased together along with the part you are viewing. These parts may be necessary or helpful to replace to complete your current repair.
All our installation videos are created and produced in collaboration with our in-house repair technician, Mark Sodja, who has helped millions of eReplacementParts customers over the last 13 years repair their products. Mark has years of experience in selling and repairing both commercial and residential products with a specialty in gas-powered equipment.
This data is collected from customers who submitted a repair instruction after replacing this exact part. Customers can rate how easy the repair was to complete and how long it took. We aggregate this data to provide a repair rating that allows customers to quickly determine the difficulty and time needed to perform their own repair.