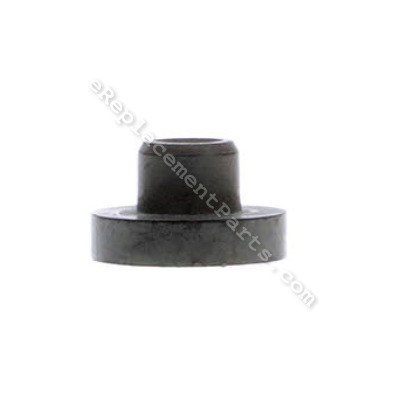
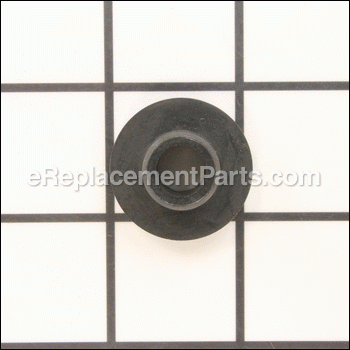
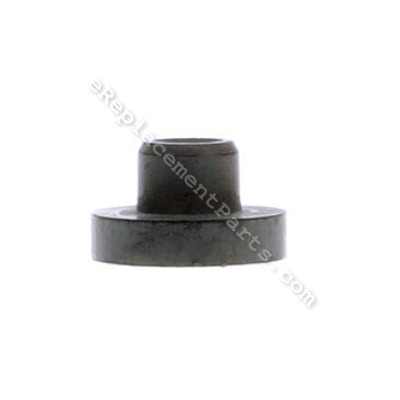
This is an authentic part which is supplied by the original manufacturer for use with Generac portable generators. It is utilized to secure and provide a tight fit for the fuel tank valve. This is a high-quality replacement for a damaged or a missing hardware that was installed on a new unit. To ensure the correct location and application of this part, refer to the appropriate diagrams of your model. It is made of durable rubber and is sold individually. You may need pliers to remove and secure the bushing.
Bushing Tank Dextor G078299
OEM part for: Generac
Part Number: G078299
Jump To:
Frequently Purchased Together ?
Compatibility
This Bushing Tank Dextor will fit the following 203 machines. Confirm this part works with your model, and view the detailed model diagrams and repair help we have to offer.
Generac
Show More Compatible ModelsThis item works with the following types of products:
- Generator Parts
This part replaces obsolete part #: 078299, 78299
Customer Part Reviews ?
- 1
Questions & Answers ?
Our customer Service team is at the ready daily to answer your part and product questions.

Ask our Team
We have a dedicated staff with decades of collective experience in helping customers just like you purchase parts to repair their products.
Does this fit my product?Questions & Answers for Bushing Tank Dextor
Customer Repair Instructions ?
All our customer repair instructions are solicited directly from other customers just like you who have purchased and replaced this exact part.
Replacing the fuel valve and tank bushing
Tool Type
Generator
Difficulty
Easy
Time
Less than 15 minutes
Tools Used
Pliers
Grommet was bad on petcock for fuel line.
Tool Type
Generator
Difficulty
Easy
Time
15-30 minutes
Tools Used
Screwdriver
Removed the fuel line from the valve
Removed the old valve and the old tank bushing
Put a little oil on the new bushing and inserted it into the tank
Put a little oil on the valve and inserted it into the bushing
Installed the fuel line on the valve
Fuel leak at the bottom of the tank
Tool Type
Generator
Difficulty
Easy
Time
30-60 minutes
Tools Used
Screwdriver, Wrench Set
Parts Used
2. Empty the fuel tank.
3. Disconnect the tank hoses and
remove tank from the holding base.
4. Unplug the bushing and insert the new part.
5. Reinstall tank.
6. Be careful to ensure you completely emptied the tank and no remaining of fuel are inside.
The diagrams available in the web page were very helpful and friendly to use. The selection of parts can be done easily . Great for us. I definitively will recommend the web page to all my friends.
Shutoff valve leaked, and gasket leaked
Tool Type
Generator
Difficulty
Easy
Time
30-60 minutes
Tools Used
Socket set
2. Remove remnants of bushing & shutoff valve
3. Push new the bushing into tank
4. Lube inside of bushing with a very small amount of oil.
5. Push shutoff valve into the bushing until it snaps into place. This is easiest to do if tank has been removed, but it is not necessary if you have small enough hands to work under the gas tank.
6. Loosen all vibration mounts.
7. Lift each corner, remove old mount, replace with new mount, go to next corner until all four are replace. I used a piece of wood to hold up the generator between the frame and generator to remove the vibration mount.
8. Retighten each corner mount, operate generator and check for vibration
the seal and gas shut off valve were old and cracked
Tool Type
Generator
Difficulty
Easy
Time
15-30 minutes
Tools Used
Screwdriver, Pliers
Fuel tank grommet was leaking due to old age
Tool Type
Generator
Difficulty
Easy
Time
30-60 minutes
Tools Used
Screwdriver, Pliers, Socket set, Wrench Set
Parts Used
Fuel was leaking from the bushing
Tool Type
Generator
Difficulty
Easy
Time
Less than 15 minutes
Tools Used
Pliers, I piece of 2x4 to push the bushing and fuel valve into the n
Parts Used
Gravity fuel valve broken.
Tool Type
Generator
Difficulty
Easy
Time
1-2 hours
Tools Used
Screwdriver, Pliers, Simple tools. Simple job.
Parts Used
On/off switch was bad , fuel shut off valve and tank grommet was leaking fuel
Tool Type
Generator
Difficulty
Medium
Time
15-30 minutes
Tools Used
Screwdriver, Pliers, Socket set, Small pry bar
Put wires on new switch in proper order and snaplocked back into place.
Tilted unit gas tank to put fuel away from the valve end , removed gas line, pulled and wiggled the gas valve out of grommet.
Pried grommet out of tank with small pry bar, pressed new grommet , pressed valve into grommet
Fuel tank bushing had began to leak from dry rot.
Tool Type
Generator
Difficulty
Medium
Time
30-60 minutes
Tools Used
Screwdriver, Pliers
Parts Used
Remove fuel line and remove tank
Replace bushing
Reverse order
Use
OEM stands for Original Equipment Manufacturer and means the part you’re buying is sourced directly from the manufacturer who made your product. At eReplacementParts, we sell only genuine OEM parts, guaranteeing the part you’re purchasing is of better design and of higher quality than aftermarket parts.
Our product descriptions are a combination of data sourced directly from the manufacturers who made your product as well as content researched and curated by our content & customer service teams. This content is edited and reviewed internally before being made public to customers.
Our customer service team are at the ready daily to answer your part and product questions. We have a dedicated staff with decades of collective experience in helping customers just like you purchase parts to repair their products.
All our part reviews are solicited directly from other customers who have purchased this exact part. While we moderate these reviews for profanity, offensive language or personally identifiable information, these reviews are posted exactly as submitted and no alterations are made by our team.
All our customer repair instructions are solicited directly from other customers just like you who have purchased and replaced this exact part. While we moderate these reviews for profanity, offensive language or personally identifiable information, these reviews are posted exactly as submitted and no alterations are made by our team.
Based on data from past customer purchasing behaviors, these parts are most commonly purchased together along with the part you are viewing. These parts may be necessary or helpful to replace to complete your current repair.
All our installation videos are created and produced in collaboration with our in-house repair technician, Mark Sodja, who has helped millions of eReplacementParts customers over the last 13 years repair their products. Mark has years of experience in selling and repairing both commercial and residential products with a specialty in gas-powered equipment.
This data is collected from customers who submitted a repair instruction after replacing this exact part. Customers can rate how easy the repair was to complete and how long it took. We aggregate this data to provide a repair rating that allows customers to quickly determine the difficulty and time needed to perform their own repair.


