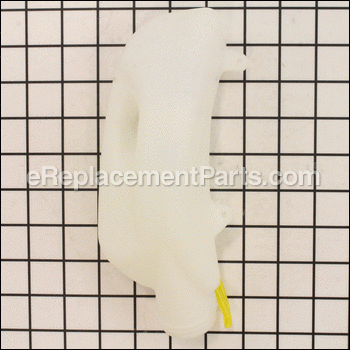

Fuel Tank Assembly W/cap 310752006
OEM part for: Homelite
Part Number: 310752006
$11.23
Usually ships in 7 - 12 business days
7 - 12 business days
Compatibility
This part will fit the following 4 machines
Homelite
UT09521 26cc Blower View Diagrams & Manuals
UT09520 26cc Blower View Diagrams & Manuals
UT09523 26cc Blower View Diagrams & Manuals
UT09525 26cc Blower View Diagrams & Manuals
This item works with the following types of products:
- Blower Parts
This part replaces obsolete part #: 310753001
Questions & Answers ?
Our customer Service team is at the ready daily to answer your part and product questions.

Ask our Team
We have a dedicated staff with decades of collective experience in helping customers just like you purchase parts to repair their products.
Does this fit my product?Questions & Answers for Fuel Tank Assembly W/cap
No questions have been asked yet
Customer Repair Instructions ?
All our customer repair instructions are solicited directly from other customers just like you who have purchased and replaced this exact part.
Fuel tank leaked
Mike - December 23, 2022
Tool Type
Blower
Difficulty
Easy
Time
Less than 15 minutes
Tools Used
Screwdriver, Pliers, util knife
Parts Used
- Empty fuel tank.
- Note fuel line placement on carburetor.
- Clean outside of carburetor near fuel lines.
- Put lateral slide in fuel line on carburetor tubes. (Makes removal of old stiff fuel lines much
easier.)
- Puil fuel lines off carburetor with plyers.
- Remove 3 tank mount screws. (T25.)
- Swap fuel tanks.
- Reinstall 3 tank mount screws.
- Put dab of oil inside both fuel lines. (Makes reinstall much easier).
- Reinstall fuel lines.
- Fuel and conferm unit runs as expected.
- Return unit to service.
- Less than 15 min. Worth $$'s and time to salvage, replacement was ~$200 unit+tax.
Did you find this story helpful?
Thanks for voting and helping fellow customers!
Leaky gas tank
Robert - April 12, 2018
Tool Type
Blower
Difficulty
Easy
Time
Less than 15 minutes
Tools Used
Screwdriver
Parts Used
Removed the three screws holding the tank in place, installed the new tank(and hoses), replaced the screws and connected the new hosing to the carb. Worked fine!
Did you find this story helpful?
Thanks for voting and helping fellow customers!
Fuel lines were cracked and fuel tank was leaking; air box was missing.
Danny - December 7, 2017
Tool Type
Blower
Difficulty
Easy
Time
Less than 15 minutes
Tools Used
Screwdriver, Torx screwdriver
1. Disconnect 2 fuel lines from carb. Note location of lines relative to position leaving top of fuel tank and how they connect to carb.
2. Remove fuel tank (3 torx screws).
3. Clean up area under the blower where tank sits.
4. Install new tank and connect fuel lines to carb.
5. Clean up around choke and air intake area; use a q-tip soaked with gasoline.
6. Install new air box gasket and snap air box cover into place.
7. Fill fuel tank with fresh gas-oil mix.
8. Prime the carb by pressing primer bulb 3-4 times, close choke, open throttle lever to RUN, and pull. When she hits, open the choke and pull again - back in business!
Did you find this story helpful?
Thanks for voting and helping fellow customers!
Leak in the fuel tank.
OLUWOLE - December 5, 2015
Tool Type
Blower
Difficulty
Easy
Time
Less than 15 minutes
Tools Used
Screwdriver, None
Parts Used
Remove the three screws holding the fuel assembly and replace with the new one. Install fuel lines in the correct position.
Did you find this story helpful?
Thanks for voting and helping fellow customers!
OEM stands for Original Equipment Manufacturer and means the part you’re buying is sourced directly from the manufacturer who made your product. At eReplacementParts, we sell only genuine OEM parts, guaranteeing the part you’re purchasing is of better design and of higher quality than aftermarket parts.
Our product descriptions are a combination of data sourced directly from the manufacturers who made your product as well as content researched and curated by our content & customer service teams. This content is edited and reviewed internally before being made public to customers.
Our customer service team are at the ready daily to answer your part and product questions. We have a dedicated staff with decades of collective experience in helping customers just like you purchase parts to repair their products.
All our part reviews are solicited directly from other customers who have purchased this exact part. While we moderate these reviews for profanity, offensive language or personally identifiable information, these reviews are posted exactly as submitted and no alterations are made by our team.
All our customer repair instructions are solicited directly from other customers just like you who have purchased and replaced this exact part. While we moderate these reviews for profanity, offensive language or personally identifiable information, these reviews are posted exactly as submitted and no alterations are made by our team.
Based on data from past customer purchasing behaviors, these parts are most commonly purchased together along with the part you are viewing. These parts may be necessary or helpful to replace to complete your current repair.
All our installation videos are created and produced in collaboration with our in-house repair technician, Mark Sodja, who has helped millions of eReplacementParts customers over the last 13 years repair their products. Mark has years of experience in selling and repairing both commercial and residential products with a specialty in gas-powered equipment.
This data is collected from customers who submitted a repair instruction after replacing this exact part. Customers can rate how easy the repair was to complete and how long it took. We aggregate this data to provide a repair rating that allows customers to quickly determine the difficulty and time needed to perform their own repair.