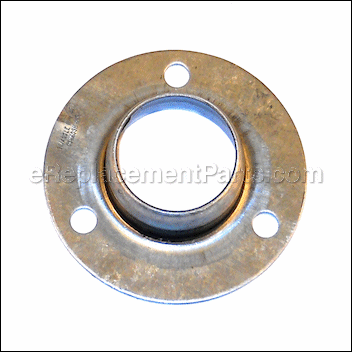
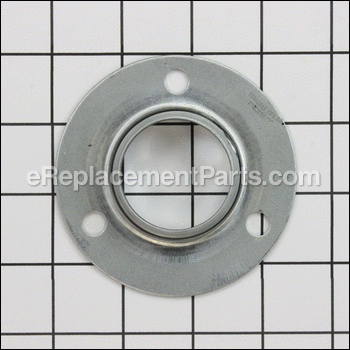
This genuine manufacturer-sourced item is specially made for use with Toro and Lawn Boy snowthrowers. It is utilized to secure the bearing. Bearings are generally utilized to reduce the friction between rotating parts. The rollers help to distribute the weight while the minimal contact area reduces friction. This is an identical replacement for a missing or a damaged component that was installed on a new unit. One durable metal flange-cup is included. Refer to the appropriate diagrams for your model to ensure the proper repair procedure. A wrench set might be needed to replace this part.
Flange-cup, Bearing 26-6110
OEM part for: Toro, Lawn Boy
Part Number: 26-6110
Jump To:
Frequently Purchased Together ?
Compatibility
This part will fit the following 421 machines
Toro
Lawn Boy
This item works with the following types of products:
- Snowblower Parts
Customer Part Reviews ?
- 1
Questions & Answers ?
Our customer Service team is at the ready daily to answer your part and product questions.

Ask our Team
We have a dedicated staff with decades of collective experience in helping customers just like you purchase parts to repair their products.
Does this fit my product?Questions & Answers for Flange-cup, Bearing
Customer Repair Instructions ?
All our customer repair instructions are solicited directly from other customers just like you who have purchased and replaced this exact part.
Main drive shaft bearing failure.
Tool Type
Snowblower
Difficulty
Medium
Time
More than 2 hours
Tools Used
Socket set, Wrench Set
Removal of the main shaft drive sheave was difficult, sheave set screws marked the drive shaft.
Original auger bearing flanges are threaded, replacement bearings were not, required to purchase a 5/16” X 18 bolt thread tap and cut threads into them, the flange holes were of the right diameter for the tap.
The auger bearing can then installed onto the auger shaft ends.
Tight clearances when installing the main drive sheave and it’s relative key requires manual manipulation of the complete auger, gearbox, main shaft assembly while inserting the woodruff key, once started tap the key into its final position, then tighten the set screws. The auger / gearbox can then be positioned and secured into place by bolting auger shaft bearings bearing to the hood side walls.
Bearing and cup was wear oit
Tool Type
Snowblower
Difficulty
Easy
Time
15-30 minutes
Tools Used
Socket set, Wrench Set
Parts Used
2. Remove 4 13in bolts from blade sides, then remove two 13in bolts from chute hold bracket remove chute and belt cover
3. Tip forward to remove bottom cover to remove bolt from blade holder suggests use jack stands to hold the blower up .
4. Pull blade out from housing, there you well see three bolts remove and to replace bearing and cup.
5. To reinstall repeat same steps from tear down.
Snowblower would not throw snow very far
Tool Type
Snowblower
Difficulty
Medium
Time
1-2 hours
Tools Used
Pliers, Socket set, Adjustable Wrench, Gear Puller
2. Remove drive belt from auger shaft.
3. Remove drive pulley assembly to access auger pulley bolt.
4. Remove auger pulley bolt & pulley.
5. Remove pulley flange with gear puller.
6. Remove bolts from auger shaft bearing & remove auger bearing, bearing cups & thrust washer.
7. Install new thrust washer, bearing & bearing cups.
8. Reinstall remaining parts in reverse order.
9. Adjust tension on auger drive cable.
bearing wore out
Tool Type
Snowblower
Difficulty
Medium
Time
30-60 minutes
Tools Used
Pliers, Socket set, Wrench Set
When running the impeller shaft was making nose and made belt slip.
Tool Type
Snowblower
Difficulty
Medium
Time
1-2 hours
Tools Used
Screwdriver, Pliers, Socket set, Wrench Set
2-Removed front part of blower.
3-Remove the auger pulley and auger.
4-Replaced auger bearing and housing.
5-Then reassembled the blower.
6-Then installed new belt.
OEM stands for Original Equipment Manufacturer and means the part you’re buying is sourced directly from the manufacturer who made your product. At eReplacementParts, we sell only genuine OEM parts, guaranteeing the part you’re purchasing is of better design and of higher quality than aftermarket parts.
Our product descriptions are a combination of data sourced directly from the manufacturers who made your product as well as content researched and curated by our content & customer service teams. This content is edited and reviewed internally before being made public to customers.
Our customer service team are at the ready daily to answer your part and product questions. We have a dedicated staff with decades of collective experience in helping customers just like you purchase parts to repair their products.
All our part reviews are solicited directly from other customers who have purchased this exact part. While we moderate these reviews for profanity, offensive language or personally identifiable information, these reviews are posted exactly as submitted and no alterations are made by our team.
All our customer repair instructions are solicited directly from other customers just like you who have purchased and replaced this exact part. While we moderate these reviews for profanity, offensive language or personally identifiable information, these reviews are posted exactly as submitted and no alterations are made by our team.
Based on data from past customer purchasing behaviors, these parts are most commonly purchased together along with the part you are viewing. These parts may be necessary or helpful to replace to complete your current repair.
All our installation videos are created and produced in collaboration with our in-house repair technician, Mark Sodja, who has helped millions of eReplacementParts customers over the last 13 years repair their products. Mark has years of experience in selling and repairing both commercial and residential products with a specialty in gas-powered equipment.
This data is collected from customers who submitted a repair instruction after replacing this exact part. Customers can rate how easy the repair was to complete and how long it took. We aggregate this data to provide a repair rating that allows customers to quickly determine the difficulty and time needed to perform their own repair.


