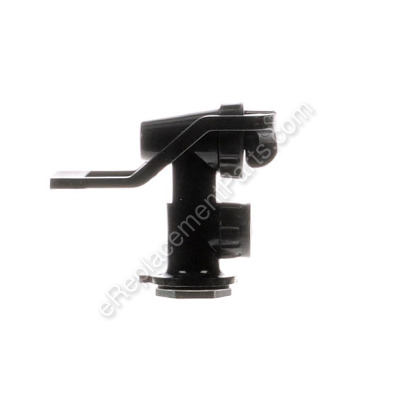


This is a Genuine Hamilton Beach Plastic (Black) Faucet/Spigot used on a Commercial Coffee Pot. This part does have a Metal Nut used to attach it to the unit. No additional pieces or tools needed to replace this part.
Faucet 990044200
OEM part for: Hamilton Beach
Part Number: 990044200
$10.02
In Stock
Jump To:
Frequently Purchased Together ?

Compatibility
This part will fit the following 2 machines
Hamilton Beach
D50065 (A-B) Commercial Coffee Pot View Diagrams & Manuals
D50065C (A-B) Commercial Coffee Pot View Diagrams & Manuals
This item works with the following types of products:
- Coffee Maker Parts
Customer Part Reviews ?
Average Rating (out of 5):
Click to filter by ratings:
5 stars
5
4 stars
0
3 stars
0
2 stars
0
1 stars
0
< PREV
- 1
So happy to receive the part in a timely manner. Thank You!
Part for coffee pot was in great condition and we're back in business. :)
Guest -
April 17, 2021
Verified Purchase
Great Value and Quality Replacement Parts
The ordering process was simple. My part was easy to find and the shipping was FAST!
Guest -
October 27, 2020
Verified Purchase
Easy repair
It came with more parts then expected.
They all fit perfectly
Guest -
October 17, 2019
Verified Purchase
Worked great!
Easily replaced part. Now the coffee pot is working again.
Guest -
July 9, 2019
Verified Purchase
It works perfect!!!
No problem with delivery. Product arrived on time. Coffe maker working like New.!!!
Israel. Virginia
Guest -
June 6, 2019
Verified Purchase
t
t
t -
t days ago
Verified Purchase
eReplacementParts Team
t
Questions & Answers ?
Our customer Service team is at the ready daily to answer your part and product questions.

Ask our Team
We have a dedicated staff with decades of collective experience in helping customers just like you purchase parts to repair their products.
Does this fit my product?Questions & Answers for Faucet
No questions have been asked yet
Customer Repair Instructions ?
All our customer repair instructions are solicited directly from other customers just like you who have purchased and replaced this exact part.
Faucet handle was broke. Replaced complete faucet
Terry - August 14, 2016
👍 8 of 8 people found this instruction helpful
Tool Type
Coffee Maker
Difficulty
Easy
Time
Less than 15 minutes
Tools Used
Socket set
Parts Used
1. Loosen and remove water gauge from pot faucet.
2. Use 15/16" socket to remove the nut (inside the pot).
3. Pull the complete faucet out, noting placement of rubber washer.
4. Install new faucet, insuring new washer is in same position as old washer.
5. Tighten nut while keeping faucet vertical.with pot.
6. Reconnect water gauge tube.
7. Fill with enough water to cover inside of faucet. Check for leaks.
Did you find this story helpful?
Thanks for voting and helping fellow customers!
The hinge tabs broke the faucet would not open
robert - December 2, 2015
👍 4 of 4 people found this instruction helpful
Tool Type
Coffee Maker
Difficulty
Easy
Time
Less than 15 minutes
Tools Used
Wrench Set, open end wrenches that fit the nuts
Parts Used
Easy repair, removed the broken faucet and replaced it with new one.
Did you find this story helpful?
Thanks for voting and helping fellow customers!
Faucet broke
Nancy - November 2, 2018
👍 1 of 1 people found this instruction helpful
Tool Type
Coffee Maker
Difficulty
Easy
Time
Less than 15 minutes
Tools Used
Parts Used
I removed old faucet and hand screwed new one on. Super easy & ready to go
Did you find this story helpful?
Thanks for voting and helping fellow customers!
Water gauge broke while cleaning.
Ron - May 16, 2018
👍 1 of 1 people found this instruction helpful
Tool Type
Coffee Maker
Difficulty
Easy
Time
15-30 minutes
Tools Used
Parts Used
1 Remove broken water gauge
2 Remove faucet
3 Clean urn
4 Replace the new faucet
5 Replace the new water gauge.
6 Completed
2 Remove faucet
3 Clean urn
4 Replace the new faucet
5 Replace the new water gauge.
6 Completed
Did you find this story helpful?
Thanks for voting and helping fellow customers!
No water level gauge
samantha - June 17, 2018
Tool Type
Coffee Maker
Difficulty
Easy
Time
Less than 15 minutes
Tools Used
Adjustable Wrench, My husband
Parts Used
Did you find this story helpful?
Thanks for voting and helping fellow customers!
Faucet and water gauge was broken
Philip - March 23, 2018
Tool Type
Coffee Maker
Difficulty
Easy
Time
Less than 15 minutes
Tools Used
Pliers
Parts Used
Took the old off and easily put the new on. Uses pliers to hold and tighten.
Did you find this story helpful?
Thanks for voting and helping fellow customers!
The handle broke off the spigot
David - March 21, 2018
Tool Type
Coffee Maker
Difficulty
Easy
Time
Less than 15 minutes
Tools Used
Wrench Set
Parts Used
The nut on the spigot inside the the coffee maker was removed and the defective spigot slid out of the mounting hole. The replacement and seals were assembled in order and the nut reapplied.
A few cups of water were placed in the pot, no leakage was detected and the water drained through the new spigot.
A few cups of water were placed in the pot, no leakage was detected and the water drained through the new spigot.
Did you find this story helpful?
Thanks for voting and helping fellow customers!
Original spout was broken by a driver, so I ordered a replacement.
Jesse - February 6, 2018
Tool Type
Coffee Maker
Difficulty
Easy
Time
Less than 15 minutes
Tools Used
Adjustable Wrench
Parts Used
1. Used an adjustable wrench to loosen the nut inside the coffee urn.
2. Removed the sight level from the spout.
3. Held onto the nut using a wrench, and rotated the spout to unscrew.
4. Threw out the broken spout.
5. Held the nut in place with a wrench, and tightened the new spout into place.
6. Reinstalled the sight level.
7. Brewed fresh coffee for the drivers.
2. Removed the sight level from the spout.
3. Held onto the nut using a wrench, and rotated the spout to unscrew.
4. Threw out the broken spout.
5. Held the nut in place with a wrench, and tightened the new spout into place.
6. Reinstalled the sight level.
7. Brewed fresh coffee for the drivers.
Did you find this story helpful?
Thanks for voting and helping fellow customers!
The coffee spout was broken
Joe - December 13, 2017
Tool Type
Coffee Maker
Difficulty
Easy
Time
Less than 15 minutes
Tools Used
Pliers
Parts Used
Simply removed old spout by loosening the nut inside the pot and unscrewing the nut.
Then replaced the spout with the new one and tightened the nut.
The replacement part was exact match to the existing one.
Then replaced the spout with the new one and tightened the nut.
The replacement part was exact match to the existing one.
Did you find this story helpful?
Thanks for voting and helping fellow customers!
The pour spout was stuck in the up position.
Greg - October 11, 2017
Tool Type
Coffee Maker
Difficulty
Easy
Time
Less than 15 minutes
Tools Used
Parts Used
1. Removed the old faucet.
2. Cleaned the area where the faucet connects.
3. Inserted the new faucet making sure rubber grommet was on the proper side.
4. Tightened the inner nut with the faucet at a 90% angle.
5. Holding the nut, turned the faucet upright making it tight and secure.
2. Cleaned the area where the faucet connects.
3. Inserted the new faucet making sure rubber grommet was on the proper side.
4. Tightened the inner nut with the faucet at a 90% angle.
5. Holding the nut, turned the faucet upright making it tight and secure.
Did you find this story helpful?
Thanks for voting and helping fellow customers!
Load More Install Stories
OEM stands for Original Equipment Manufacturer and means the part you’re buying is sourced directly from the manufacturer who made your product. At eReplacementParts, we sell only genuine OEM parts, guaranteeing the part you’re purchasing is of better design and of higher quality than aftermarket parts.
Our product descriptions are a combination of data sourced directly from the manufacturers who made your product as well as content researched and curated by our content & customer service teams. This content is edited and reviewed internally before being made public to customers.
Our customer service team are at the ready daily to answer your part and product questions. We have a dedicated staff with decades of collective experience in helping customers just like you purchase parts to repair their products.
All our part reviews are solicited directly from other customers who have purchased this exact part. While we moderate these reviews for profanity, offensive language or personally identifiable information, these reviews are posted exactly as submitted and no alterations are made by our team.
All our customer repair instructions are solicited directly from other customers just like you who have purchased and replaced this exact part. While we moderate these reviews for profanity, offensive language or personally identifiable information, these reviews are posted exactly as submitted and no alterations are made by our team.
Based on data from past customer purchasing behaviors, these parts are most commonly purchased together along with the part you are viewing. These parts may be necessary or helpful to replace to complete your current repair.
All our installation videos are created and produced in collaboration with our in-house repair technician, Mark Sodja, who has helped millions of eReplacementParts customers over the last 13 years repair their products. Mark has years of experience in selling and repairing both commercial and residential products with a specialty in gas-powered equipment.
This data is collected from customers who submitted a repair instruction after replacing this exact part. Customers can rate how easy the repair was to complete and how long it took. We aggregate this data to provide a repair rating that allows customers to quickly determine the difficulty and time needed to perform their own repair.