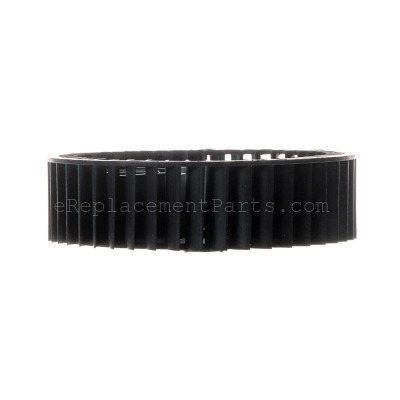


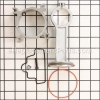
This is a genuine OEM sourced replacement part designed for use with Black and Decker blowers. This is the main fan which connects to the motor and it is what moves the air. Please note plastic nut used to attach this fan is sold separately. This blower fan is made out of plastic and it is sold individually. To complete this repair you will need a screwdriver and a wrench.
Fan, Plastic 027-0033
OEM part for: Powermate
Part Number: 027-0033
$25.28
In Stock
Jump To:
Frequently Purchased Together ?
Compatibility
This part will fit the following 25 machines
Powermate
HC125A Oilless Single Stage Direct Drive Electric Air Compressor View Diagrams & Manuals
T5090412 Oilless Single Stage Direct Drive Gas Air Compressor View Diagrams & Manuals
L060331201 Air Compressor View Diagrams & Manuals
LC631112 Oilless Single Stage Direct Drive Electric Air Compressor View Diagrams & Manuals
L0501512 Oilless Single Stage Direct Drive Electric Air Compressor View Diagrams & Manuals
L0602012 Oilless Single Stage Direct Drive Electric Air Compressor View Diagrams & Manuals
L0602112 Oilless Single Stage Direct Drive Electric Air Compressor View Diagrams & Manuals
L0602712 Oilless Single Stage Direct Drive Electric Air Compressor View Diagrams & Manuals
LAC631112 Oilless Single Stage Direct Drive Electric Air Compressor View Diagrams & Manuals
LA0501512 Oilless Single Stage Direct Drive Electric Air Compressor View Diagrams & Manuals
LA0602112 Oilless Single Stage Direct Drive Electric Air Compressor View Diagrams & Manuals
LA0602712 Oilless Single Stage Direct Drive Electric Air Compressor View Diagrams & Manuals
LA0603012 Oilless Single Stage Direct Drive Electric Air Compressor View Diagrams & Manuals
LA1982012 Oilless Single Stage Direct Drive Electric Air Compressor View Diagrams & Manuals
P0200312 Oilless Single Stage Direct Drive Electric Air Compressor View Diagrams & Manuals
P0501512 Oilless Single Stage Direct Drive Electric Air Compressor View Diagrams & Manuals
P0602012 Oilless Single Stage Direct Drive Electric Air Compressor View Diagrams & Manuals
PA0601512 Oilless Single Stage Direct Drive Electric Air Compressor View Diagrams & Manuals
PA1982012 Oilless Single Stage Direct Drive Electric Air Compressor View Diagrams & Manuals
S0200412 Oilless Single Stage Direct Drive Electric Air Compressor View Diagrams & Manuals
TA5090412 Oilless Single Stage Direct Drive Gas Driven Air Compressor View Diagrams & Manuals
CTA5090412 4 Gallon Air Compressor View Diagrams & Manuals
CLA0602712 27 Gallon Oilless Single Stage Direct Drive Electric Air Compressor View Diagrams & Manuals
LA1983012 Oilless Single Stage Direct Drive Electric Air Compressor View Diagrams & Manuals
SPA0601512 Portable Oil-Free Air Compressor View Diagrams & Manuals
Show More Compatible Models
This item works with the following types of products:
- Compressor Parts
Customer Part Reviews ?
Questions & Answers ?
Our customer Service team is at the ready daily to answer your part and product questions.

Ask our Team
We have a dedicated staff with decades of collective experience in helping customers just like you purchase parts to repair their products.
Does this fit my product?Questions & Answers for Fan, Plastic
No questions have been asked yet
Customer Repair Instructions ?
All our customer repair instructions are solicited directly from other customers just like you who have purchased and replaced this exact part.
Cooling Fan Fins Broke
Bob - November 16, 2017
Tool Type
Compressor
Difficulty
Easy
Time
Less than 15 minutes
Tools Used
Screwdriver, Nutdriver
Parts Used
1. Remove shroud protecting the cooling fan (Unplug the air compressor prior to any work)
2. Removed the one phillips screw holding the cooling fan to the shaft
3. Removed old/broken fan, also cleaned the two key ways to ensure they were clear of debris
4. Oriented the new fan so the correct key was facing up (there are two key ways on the shaft each is a different size)
5. Applied light force to install the fan on the shaft
6. Hand threaded the bolt on the shaft and used the bolt and washer to secure the new fan to the shaft.
7. Hand spun the new fan to ensure the new fan was square and sat correctly on the shaft
8. Replaced the protective shroud
9. Hand spun the new fan again to ensure no contact between the shroud and the new fan.
10. Plugged the air compressor in the nearest outlet and tested the system.
Did you find this story helpful?
Thanks for voting and helping fellow customers!
Cooling fan broke.
Bernd - November 9, 2017
Tool Type
Compressor
Difficulty
Easy
Time
15-30 minutes
Tools Used
Screwdriver, Socket set
Parts Used
1. Removed the shroud.
2. Removed the screw and the old fan.
3. Installed the new fan, the screw, and the shroud.
2. Removed the screw and the old fan.
3. Installed the new fan, the screw, and the shroud.
Did you find this story helpful?
Thanks for voting and helping fellow customers!
Cooling fan deteriorated and desentegrated
Todd - August 9, 2017
Tool Type
Compressor
Difficulty
Easy
Time
Less than 15 minutes
Tools Used
Socket set, Allen wrench
Parts Used
1. Remove plastic housing cover halves, (Since I had replaced the high pressure air line previously with a steel one that has a different form /shape I did not have to remove that line to remove any components.)
2. Remove inner plastic air diverter housing (directs air to cool the head/high pressure line)
2. Remove shaft bolt and washer.
3. Remove old fan fragments and dig old plastic out of motor shaft key-way.
4. Tap new fan onto motor shaft and then draw down into final set position with shaft bolt.
5..Verify minimal run-out on fan rotation.
6. Reinstall lower diverter housing
7. Reinstall cover halves.
Did you find this story helpful?
Thanks for voting and helping fellow customers!
OEM stands for Original Equipment Manufacturer and means the part you’re buying is sourced directly from the manufacturer who made your product. At eReplacementParts, we sell only genuine OEM parts, guaranteeing the part you’re purchasing is of better design and of higher quality than aftermarket parts.
Our product descriptions are a combination of data sourced directly from the manufacturers who made your product as well as content researched and curated by our content & customer service teams. This content is edited and reviewed internally before being made public to customers.
Our customer service team are at the ready daily to answer your part and product questions. We have a dedicated staff with decades of collective experience in helping customers just like you purchase parts to repair their products.
All our part reviews are solicited directly from other customers who have purchased this exact part. While we moderate these reviews for profanity, offensive language or personally identifiable information, these reviews are posted exactly as submitted and no alterations are made by our team.
All our customer repair instructions are solicited directly from other customers just like you who have purchased and replaced this exact part. While we moderate these reviews for profanity, offensive language or personally identifiable information, these reviews are posted exactly as submitted and no alterations are made by our team.
Based on data from past customer purchasing behaviors, these parts are most commonly purchased together along with the part you are viewing. These parts may be necessary or helpful to replace to complete your current repair.
All our installation videos are created and produced in collaboration with our in-house repair technician, Mark Sodja, who has helped millions of eReplacementParts customers over the last 13 years repair their products. Mark has years of experience in selling and repairing both commercial and residential products with a specialty in gas-powered equipment.
This data is collected from customers who submitted a repair instruction after replacing this exact part. Customers can rate how easy the repair was to complete and how long it took. We aggregate this data to provide a repair rating that allows customers to quickly determine the difficulty and time needed to perform their own repair.