
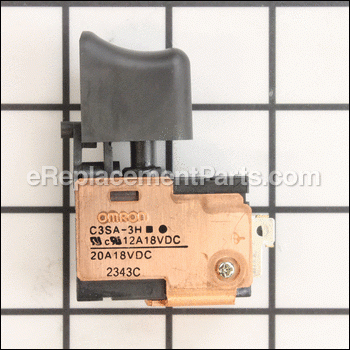
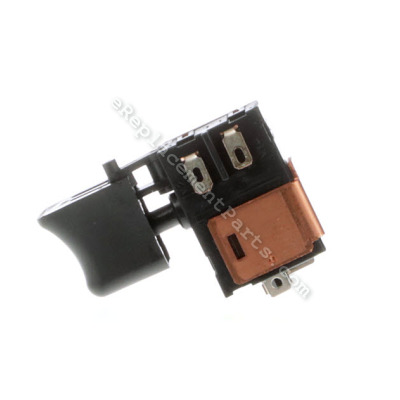


This speed control switch is an authentic Hitachi replacement part, it is not an aftermarket imitation. It is a high quality item designed for use with cordless hammer drills. This is the main switch that allows user to turn the tool on and off and control its speed as well. Please note, this plastic switch is sold individually. You will need a screwdriver to replace this item.
Dc-speed Control Switch 333640
OEM part for: Metabo HPT (Hitachi)
Part Number: 333640
$53.69
Usually ships in 7 - 12 business days
7 - 12 business days
Compatibility
This part will fit the following 11 machines
Metabo HPT (Hitachi)
DS18DL 18V 3.0Ah Lithium Ion Driver Drill View Diagrams & Manuals
DS18DMR(PS) 18V 2.0Ah Cordless 1/2" Driver Drill View Diagrams & Manuals
DS14DL 14.4 Volt Lithium Ion Cordless Driver Drill View Diagrams & Manuals
DV18DL 18V 3.0Ah Lithium Ion Cordless Hammer Drill View Diagrams & Manuals
DV14DL 14.4-Volt Lithium Ion Cordless Hammer Drill View Diagrams & Manuals
DV18DMR 18-Volt 1/2" Cordless Hammer Drill View Diagrams & Manuals
DV14DMR 14-Volt 1/2" Cordless Hammer Drill View Diagrams & Manuals
DS14DMR 14.4V Cordless 1/2" Driver Drill View Diagrams & Manuals
DS18DMR 18V 3.0Ah Cordless 1/2" Driver Drill View Diagrams & Manuals
DS18DSDL Cordless Driver Drill View Diagrams & Manuals
DV18DSDL Cordless Impact Driver Drill View Diagrams & Manuals
Show More Compatible Models
This item works with the following types of products:
- Drill Parts
- Cordless Drill Parts
- Hammer Drill Parts
- Impact Driver Parts
This part replaces obsolete part #: 322-994
Questions & Answers ?
Our customer Service team is at the ready daily to answer your part and product questions.

Ask our Team
We have a dedicated staff with decades of collective experience in helping customers just like you purchase parts to repair their products.
Does this fit my product?Questions & Answers for Dc-speed Control Switch
No questions have been asked yet
Customer Repair Instructions ?
All our customer repair instructions are solicited directly from other customers just like you who have purchased and replaced this exact part.
Shattered handle and power,switch
C - February 14, 2016
👍 7 of 7 people found this instruction helpful
Tool Type
Cordless Drill
Difficulty
Medium
Time
1-2 hours
Tools Used
Screwdriver, Power Drill, Soldering iron
Remove all screws to open up drill - about eight
I recommend taking several detailed pictures with your smart phone paying special attention to which wires attach to which terminals of the switch
Very carefully remove the internal parts keeping them together as one unit and make note that the motor has a keyed slot that will need to be aligned into the new handle
Melt the solder off of the old broken switch 4 wires total
Solder wires onto the new switch in the same way they were removed - if you get this wrong the drill may operate backwards
Clean up the parts and pieces removing any old build up and check the brushes - they may need to be replaced - grease rotating elements - I used white lithium grease
I recommend leaving the brushes out until reassembly is almost done
Install the parts in to the new handle - pay attention to the keyed slot in the motor and align it to the handle first
Snap in the remaking parts
Screw the two halves of the handles back together paying attention that all of the wires are in the internal grooves of the handles and don't let them get pinched as you screw the halves together
Insert the brushes
Did you find this story helpful?
Thanks for voting and helping fellow customers!
Speed control switch
Steven - September 27, 2019
👍 1 of 1 people found this instruction helpful
Tool Type
Cordless Drill
Difficulty
Medium
Time
1-2 hours
Tools Used
Screwdriver, Solder iron
Parts Used
I had to heat and remove 4 soldered wires from the old controller and re-solder the wires onto the new controller. Closing up the gun with all of its parts aligned was a bit challenging.
Did you find this story helpful?
Thanks for voting and helping fellow customers!
Power switch
Franco - November 24, 2017
Tool Type
Hammer Drill
Difficulty
Medium
Time
30-60 minutes
Tools Used
Screwdriver, Pliers, Power Drill, Solder
Parts Used
I solder both side of the cables for the power switch And replaced the whole handle.
Did you find this story helpful?
Thanks for voting and helping fellow customers!
OEM stands for Original Equipment Manufacturer and means the part you’re buying is sourced directly from the manufacturer who made your product. At eReplacementParts, we sell only genuine OEM parts, guaranteeing the part you’re purchasing is of better design and of higher quality than aftermarket parts.
Our product descriptions are a combination of data sourced directly from the manufacturers who made your product as well as content researched and curated by our content & customer service teams. This content is edited and reviewed internally before being made public to customers.
Our customer service team are at the ready daily to answer your part and product questions. We have a dedicated staff with decades of collective experience in helping customers just like you purchase parts to repair their products.
All our part reviews are solicited directly from other customers who have purchased this exact part. While we moderate these reviews for profanity, offensive language or personally identifiable information, these reviews are posted exactly as submitted and no alterations are made by our team.
All our customer repair instructions are solicited directly from other customers just like you who have purchased and replaced this exact part. While we moderate these reviews for profanity, offensive language or personally identifiable information, these reviews are posted exactly as submitted and no alterations are made by our team.
Based on data from past customer purchasing behaviors, these parts are most commonly purchased together along with the part you are viewing. These parts may be necessary or helpful to replace to complete your current repair.
All our installation videos are created and produced in collaboration with our in-house repair technician, Mark Sodja, who has helped millions of eReplacementParts customers over the last 13 years repair their products. Mark has years of experience in selling and repairing both commercial and residential products with a specialty in gas-powered equipment.
This data is collected from customers who submitted a repair instruction after replacing this exact part. Customers can rate how easy the repair was to complete and how long it took. We aggregate this data to provide a repair rating that allows customers to quickly determine the difficulty and time needed to perform their own repair.