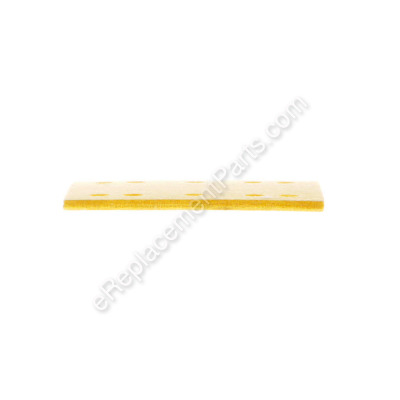


The cushion connects to the platen with metal Phillip-head screws and is sold as an individual replacement part. The screws are sold separately. The cushion will become damaged in time after normal use and will need to be replaced. This is a Ryobi replacement part directly sourced from the manufacturer to be used in sanders. A screwdriver may be needed to replace this item.
Cushion-sndr 10 Hole 662317003
OEM part for: Ryobi, Craftsman
Part Number: 662317003
$3.99
Usually ships in 7 - 12 business days
7 - 12 business days
Compatibility
This part will fit the following 5 machines
Ryobi
S605D8 1/4 Sheet Sander W/Dust Collector View Diagrams & Manuals
S605D 1/4 Sheet Finish Sander View Diagrams & Manuals
Craftsman
315277012 Sander View Diagrams & Manuals
315277011 1/4 Sheet Professional Sander View Diagrams & Manuals
315277010 Sander View Diagrams & Manuals
This item works with the following types of products:
- Sander Parts
This part replaces obsolete part #: 662317-001
Customer Part Reviews ?
Average Rating (out of 5):
Click to filter by ratings:
5 stars
2
4 stars
0
3 stars
0
2 stars
0
1 stars
0
< PREV
- 1
Easy repair
Was the exact fit part. No problem removing old on and putting new one on.
Guest -
November 26, 2019
Verified Purchase
Like New Sander
It is an exact replacement for my very old craftsman sander and now it is like new. Ereplacementparts is a top notch outlet.
Joseph -
October 5, 2019
Verified Purchase
t
t
t -
t days ago
Verified Purchase
eReplacementParts Team
t
Questions & Answers ?
Our customer Service team is at the ready daily to answer your part and product questions.

Ask our Team
We have a dedicated staff with decades of collective experience in helping customers just like you purchase parts to repair their products.
Does this fit my product?Questions & Answers for Cushion-sndr 10 Hole
No questions have been asked yet
Customer Repair Instructions ?
All our customer repair instructions are solicited directly from other customers just like you who have purchased and replaced this exact part.
The cushion was no longer usuable due to damage from normal use.
Terrence - March 17, 2016
👍 3 of 3 people found this instruction helpful
Tool Type
Sander
Difficulty
Easy
Time
Less than 15 minutes
Tools Used
Screwdriver
Parts Used
Repair consisted of using a phillips screwdriver to remove the screws of the old plate and then installing the new plate using the same screws from the original plate.
I ordered the wrong part first and I tried to use that one but it didn't work very good. I looked at the sander, got the model number, reordered the correct plate and the part fit and repair was simple to accomplish. Moral of the story is, get the right model number and part number before you start.
I ordered the wrong part first and I tried to use that one but it didn't work very good. I looked at the sander, got the model number, reordered the correct plate and the part fit and repair was simple to accomplish. Moral of the story is, get the right model number and part number before you start.
Did you find this story helpful?
Thanks for voting and helping fellow customers!
Sander cushion was overloaded with old adhesive.
Rory - October 10, 2016
👍 1 of 1 people found this instruction helpful
Tool Type
Sander
Difficulty
Easy
Time
15-30 minutes
Tools Used
Screwdriver, Shallow pan
Parts Used
1. Used screwdriver to remove cushion assembly
2. Placed assembly cushion side down in shallow pan of acetone; just enough acetone to soak the cushion
3. After five or so minutes the cushion should come off easily
4. Using a clean cloth dipped in acetone clean off any remaining adhesive
5. Allow the assembly to dry thoroughly
6. Peel backing from new cushion and stick onto assembly lining up the dust control holes
7. Press firmly into place
8. Using screwdriver, re-attach assembly to sander
Did you find this story helpful?
Thanks for voting and helping fellow customers!
Sander pad worn
Joseph - September 10, 2016
👍 1 of 1 people found this instruction helpful
Tool Type
Sander
Difficulty
Easy
Time
Less than 15 minutes
Tools Used
, none
Parts Used
Pealed off the old & replaced with the new
Did you find this story helpful?
Thanks for voting and helping fellow customers!
Old pad was worn out
Michael - April 18, 2019
Tool Type
Sander
Difficulty
Easy
Time
Less than 15 minutes
Tools Used
, Scraper and mallet
Parts Used
Scraped off old and stuck on new pad
Did you find this story helpful?
Thanks for voting and helping fellow customers!
Sandpaper pad worn out
Gary - May 20, 2018
Tool Type
Sander
Difficulty
Medium
Time
15-30 minutes
Tools Used
Screwdriver
Parts Used
Removed 4 screws and the old pad and installed the new pad with the screws.
Did you find this story helpful?
Thanks for voting and helping fellow customers!
Cushion worn out. Screw heads showing and marking.
Gene& - January 13, 2018
Tool Type
Sander
Difficulty
Easy
Time
15-30 minutes
Tools Used
Screwdriver, Paint scraper
Parts Used
Unable to tear off old cushion, removed the screws with the screw driver, used paint scraper to pry off the old worn our cushion, a little alcohol to remove old adhesive, and when dry. Lined up holes, made two setting screws for the front end and back end of the new adhesive cushion. Inserted the two screws, and aligned the cushion, touch down!, and tightened screws. Applied quarter sheet of sandpaper and began working.
Did you find this story helpful?
Thanks for voting and helping fellow customers!
Sander pad was warped due to work on round bamboo. I replace pad periodically
Leo - December 22, 2017
Tool Type
Sander
Difficulty
Easy
Time
Less than 15 minutes
Tools Used
Screwdriver
Parts Used
Remove sand paper
Unscrew old pad and remove
Remove back paper for new pad
Stick new pad on bottom plate of sander
Attach sand paper and yer ready to go.
Unscrew old pad and remove
Remove back paper for new pad
Stick new pad on bottom plate of sander
Attach sand paper and yer ready to go.
Did you find this story helpful?
Thanks for voting and helping fellow customers!
Pad worn on corners, spring clip broke
DAVID - November 20, 2017
Tool Type
Sander
Difficulty
Easy
Time
Less than 15 minutes
Tools Used
Screwdriver
Removed old pad and replaced clips
Did you find this story helpful?
Thanks for voting and helping fellow customers!
OEM stands for Original Equipment Manufacturer and means the part you’re buying is sourced directly from the manufacturer who made your product. At eReplacementParts, we sell only genuine OEM parts, guaranteeing the part you’re purchasing is of better design and of higher quality than aftermarket parts.
Our product descriptions are a combination of data sourced directly from the manufacturers who made your product as well as content researched and curated by our content & customer service teams. This content is edited and reviewed internally before being made public to customers.
Our customer service team are at the ready daily to answer your part and product questions. We have a dedicated staff with decades of collective experience in helping customers just like you purchase parts to repair their products.
All our part reviews are solicited directly from other customers who have purchased this exact part. While we moderate these reviews for profanity, offensive language or personally identifiable information, these reviews are posted exactly as submitted and no alterations are made by our team.
All our customer repair instructions are solicited directly from other customers just like you who have purchased and replaced this exact part. While we moderate these reviews for profanity, offensive language or personally identifiable information, these reviews are posted exactly as submitted and no alterations are made by our team.
Based on data from past customer purchasing behaviors, these parts are most commonly purchased together along with the part you are viewing. These parts may be necessary or helpful to replace to complete your current repair.
All our installation videos are created and produced in collaboration with our in-house repair technician, Mark Sodja, who has helped millions of eReplacementParts customers over the last 13 years repair their products. Mark has years of experience in selling and repairing both commercial and residential products with a specialty in gas-powered equipment.
This data is collected from customers who submitted a repair instruction after replacing this exact part. Customers can rate how easy the repair was to complete and how long it took. We aggregate this data to provide a repair rating that allows customers to quickly determine the difficulty and time needed to perform their own repair.