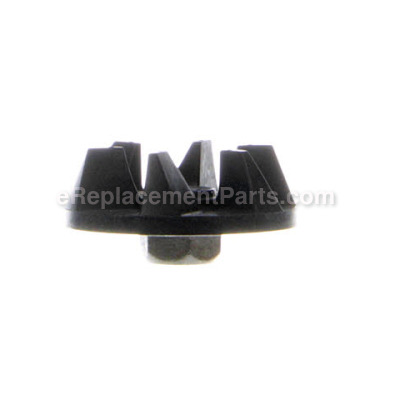
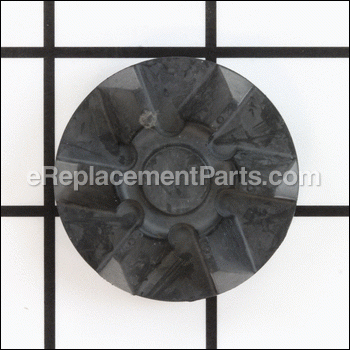
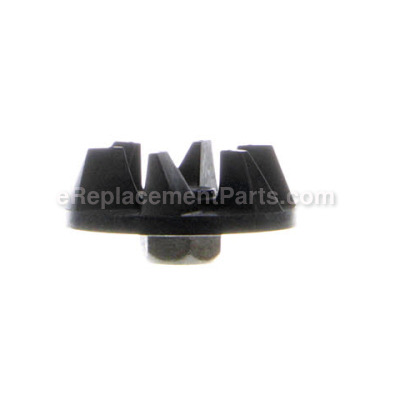
This part comes directly for Waring Pro. This Coupling is used on many models of Waring Pro blenders. The Coupling is used to drive the Blades in the Jar. This part is made from metal and a hard rubber. This part should be replaced if the teeth on the coupling have stripped off or if it has stripped on the shaft of the motor. To replace this part the armature will need to remain still.
Tools used:
• Flat Head Screwdriver
• Philips Head Screwdriver
Coupling 032453
OEM part for: Waring
Part Number: 032453
Jump To:
Product Description ?
- Classification: Part
- Weight: 0.01 lbs.
- Shipping: Ships Worldwide
Frequently Purchased Together ?
Compatibility
This part will fit the following 26 machines
Waring
This item works with the following types of products:
- Blender Parts
Customer Part Reviews ?
- 1
Questions & Answers ?
Our customer Service team is at the ready daily to answer your part and product questions.

Ask our Team
We have a dedicated staff with decades of collective experience in helping customers just like you purchase parts to repair their products.
Does this fit my product?Questions & Answers for Coupling
Customer Repair Instructions ?
All our customer repair instructions are solicited directly from other customers just like you who have purchased and replaced this exact part.
Coupling teeth broken and Blending Assembly not turning properly
Tool Type
Blender
Difficulty
Easy
Time
15-30 minutes
Tools Used
Screwdriver, Wrench Set, Small Vise Grip Pliers and Super Lube
Replacement parts needed: V-Seal, two couplings, and optionally a new fiber washer (depending on condition of the old one), and optionally replace the jar seal if the old one is worn, deteriorated or deformed.
Fix the Blending Assembly:
Disassemble the Blending Assembly using a 3/8" combination wrench on the nut at the top and turn the coupling either by hand or use a screwdriver between the teeth of the coupling for leverage. Note the coupling has a left-handed thread, meaning you must turn it clockwise to loosen it!
Once you remove the coupling, slide the blade and shaft assembly out of the top and thoroughly clean the shaft with a fine emery cloth or a scotchbright pad or similar, and clean out any muck on the inside of the bearing, being careful not to scratch up the bearing or shaft. The bearing itself is only a brass sleeve. Replace the V-Seal at the top of the shaft underneath the blades with a new seal, placing the smaller flared end facing downward toward the bearing holder.
Cover the shaft with Super Lube (or equivalent), either the oil or grease (the grease will last longer). Super Lube, according to its label, is food safe and should be safe to use. Slide the blade and shaft assembly back inside the bearing and put the washer back in place on the bottom (if necessary, replace the washer with a new one).
Optionally, place a little antiseize compound or graphite on the threads of the shaft before replacing the coupling to make it easier to remove in the future. Place a new coupling on the end of the shaft -- remember to tighten it by turning counter-clockwise. There's no need to make it too tight as it will naturally tighten itself when it's being used on the blender.
Replace Coupling on the Motor:
Remove the 4 suction cup feet from the holes on the bottom of plate of the blender. They are mildly glued in place but will pull out easily enough without much effort and generally hold themselves in place when replaced without needing to be re-glued.
Remove the four retaining screws out of the holes where the suction cups were located, using a philips-head screwdriver, and remove the bottom plate from the blender. There's no need to disconnect the wiring going through the bottom plate, as there's plenty of room to access the motor with it still connected.
Use either a flat-blade screwdriver or a pair of small vise grips on the bottom screw of the motor rotor to hold it firmly in place. In my case, the screwdriver didn't provide enough torque to hold it without slipping and I had to use small vise grips to hold it. Remove the old coupling from the top either by hand or using a screwdriver in the teeth of the old coupling for leverage. Remember to turn the coupling clockwise to loosen, since they are left-handed threads.
After removing the old coupling, optionally place a little antiseize compound or graphite on the threads to make it easier to disassemble in the future and replace the coupling with a new one, turning counter-clockwise to tighten. Make it good and snug, but there is no need to over-tighten it, as it will tighten on its on when in use on the blender.
Reinstall the bottom plate of the blender and the four retaining screws and four suction cups. The suction cups will generally stay in place on their own, but if needed, you can use a little rubber cement or similar to help them stay in place. Test the blender and make sure everything is functioning correctly, and optionally replace the jar seal if the old one is worn out, and you are done.
The part is smaller the i need need is coupling 027097 will call on thursday for return slip.
Tool Type
Blender
Difficulty
Medium
Time
15-30 minutes
Tools Used
, visual comparison
Parts Used
OEM stands for Original Equipment Manufacturer and means the part you’re buying is sourced directly from the manufacturer who made your product. At eReplacementParts, we sell only genuine OEM parts, guaranteeing the part you’re purchasing is of better design and of higher quality than aftermarket parts.
Our product descriptions are a combination of data sourced directly from the manufacturers who made your product as well as content researched and curated by our content & customer service teams. This content is edited and reviewed internally before being made public to customers.
Our customer service team are at the ready daily to answer your part and product questions. We have a dedicated staff with decades of collective experience in helping customers just like you purchase parts to repair their products.
All our part reviews are solicited directly from other customers who have purchased this exact part. While we moderate these reviews for profanity, offensive language or personally identifiable information, these reviews are posted exactly as submitted and no alterations are made by our team.
All our customer repair instructions are solicited directly from other customers just like you who have purchased and replaced this exact part. While we moderate these reviews for profanity, offensive language or personally identifiable information, these reviews are posted exactly as submitted and no alterations are made by our team.
Based on data from past customer purchasing behaviors, these parts are most commonly purchased together along with the part you are viewing. These parts may be necessary or helpful to replace to complete your current repair.
All our installation videos are created and produced in collaboration with our in-house repair technician, Mark Sodja, who has helped millions of eReplacementParts customers over the last 13 years repair their products. Mark has years of experience in selling and repairing both commercial and residential products with a specialty in gas-powered equipment.
This data is collected from customers who submitted a repair instruction after replacing this exact part. Customers can rate how easy the repair was to complete and how long it took. We aggregate this data to provide a repair rating that allows customers to quickly determine the difficulty and time needed to perform their own repair.


