
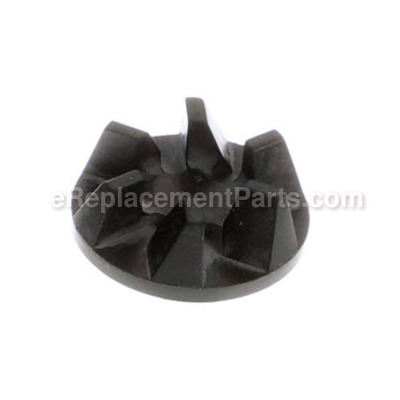


This is a genuine manufacturer sourced replacement part used on Waring blenders. The coupling is the part of a blender that transfers power from the blender's motor to the blade assembly. Over time, the teeth on blender coupling wear down until they no longer engage properly on the blade assembly. This coupling is made out of plastic and it is sold individually.
Coupling 018999
OEM part for: Waring
Part Number: 018999
$17.56
In Stock
Compatibility
This Coupling will fit the following 71 machines. Confirm this part works with your model, and view the detailed model diagrams and repair help we have to offer.
Waring
Show More Compatible ModelsThis item works with the following types of products:
- Blender Parts
Customer Part Reviews ?
Average Rating (out of 5):
Click to filter by ratings:
5 stars
1
4 stars
0
3 stars
0
2 stars
0
1 stars
0
< PREV
- 1
Perfect fit
The part rescued my old but great blender. The part fit perfectly and was simple to replace the old part. It saved the blender from the junk pile.
Guest -
April 20, 2021
Verified Purchase
Questions & Answers ?
Our customer Service team is at the ready daily to answer your part and product questions.

Ask our Team
We have a dedicated staff with decades of collective experience in helping customers just like you purchase parts to repair their products.
Does this fit my product?Questions & Answers for Coupling
No questions have been asked yet
Customer Repair Instructions ?
All our customer repair instructions are solicited directly from other customers just like you who have purchased and replaced this exact part.
Blender did not blend properly
Edmond - May 4, 2016
👍 1 of 1 people found this instruction helpful
Tool Type
Blender
Difficulty
Easy
Time
Less than 15 minutes
Tools Used
, None
Parts Used
Inside coupling thread was damaged and needed to be replaced. The coupling took a few seconds to screw on and reuse the blender
Did you find this story helpful?
Thanks for voting and helping fellow customers!
Leaking from use over time
Dan - May 8, 2020
Tool Type
Blender
Difficulty
Medium
Time
1-2 hours
Tools Used
Adjustable Wrench
Remove coupling
Big crescent wrench to hold nut securing blade assbly, smaller crescent to loosen clockwise on bottom of blend. Remove blade assbly, replace 1 rubber gasket, 2 plastic gaskets, 2 stain. Steel washers and small washer under coupling. Use parts diagram to see order of installation, part numbers and quantity needed. Reassemble, test for leaks. Voila, remember to tighten/ install button nut counterclockwise.
Big crescent wrench to hold nut securing blade assbly, smaller crescent to loosen clockwise on bottom of blend. Remove blade assbly, replace 1 rubber gasket, 2 plastic gaskets, 2 stain. Steel washers and small washer under coupling. Use parts diagram to see order of installation, part numbers and quantity needed. Reassemble, test for leaks. Voila, remember to tighten/ install button nut counterclockwise.
Did you find this story helpful?
Thanks for voting and helping fellow customers!
Coupling install
Ken - April 23, 2020
Tool Type
Blender
Difficulty
Easy
Time
Less than 15 minutes
Tools Used
Screwdriver, Pliers
Parts Used
In observation, the coupling appears to be designed to take hard impact of the blade cutting / blending hard items (ice, frozen fruit, etc) . The couplings internal threads are of a softer material that wear or give over time... a great design the lengthens the life of the motor and everything below the coupling. The coupling screws right back onto the threaded shaft but do note the coupling shaft exits at the opposite end / bottom of the blender. There is a flat blade screwdriver slot in the shaft to hold it in place while reattaching the coupling... this guarantees a very snug coupling fit. A very easy install and worth the effort.
Did you find this story helpful?
Thanks for voting and helping fellow customers!
The threads on the Original Coupler Stripped from use...
Ray - June 11, 2018
Pulled old coupler off motor as no threads
Screwed new coupler onto motor threads in a counter clockwise direction finger tight...
Took about a minute!
Screwed new coupler onto motor threads in a counter clockwise direction finger tight...
Took about a minute!
Did you find this story helpful?
Thanks for voting and helping fellow customers!
Threads on coupling stripped
vincent - February 10, 2016
👍 0 of 1 people found this instruction helpful
Tool Type
Blender
Difficulty
Easy
Time
Less than 15 minutes
Tools Used
, hands only
Parts Used
Hand screw on new coupling, press fit the feet and install lid.
Did you find this story helpful?
Thanks for voting and helping fellow customers!
OEM stands for Original Equipment Manufacturer and means the part you’re buying is sourced directly from the manufacturer who made your product. At eReplacementParts, we sell only genuine OEM parts, guaranteeing the part you’re purchasing is of better design and of higher quality than aftermarket parts.
Our product descriptions are a combination of data sourced directly from the manufacturers who made your product as well as content researched and curated by our content & customer service teams. This content is edited and reviewed internally before being made public to customers.
Our customer service team are at the ready daily to answer your part and product questions. We have a dedicated staff with decades of collective experience in helping customers just like you purchase parts to repair their products.
All our part reviews are solicited directly from other customers who have purchased this exact part. While we moderate these reviews for profanity, offensive language or personally identifiable information, these reviews are posted exactly as submitted and no alterations are made by our team.
All our customer repair instructions are solicited directly from other customers just like you who have purchased and replaced this exact part. While we moderate these reviews for profanity, offensive language or personally identifiable information, these reviews are posted exactly as submitted and no alterations are made by our team.
Based on data from past customer purchasing behaviors, these parts are most commonly purchased together along with the part you are viewing. These parts may be necessary or helpful to replace to complete your current repair.
All our installation videos are created and produced in collaboration with our in-house repair technician, Mark Sodja, who has helped millions of eReplacementParts customers over the last 13 years repair their products. Mark has years of experience in selling and repairing both commercial and residential products with a specialty in gas-powered equipment.
This data is collected from customers who submitted a repair instruction after replacing this exact part. Customers can rate how easy the repair was to complete and how long it took. We aggregate this data to provide a repair rating that allows customers to quickly determine the difficulty and time needed to perform their own repair.