Cordset 10ft 18-2 Sj 120v 22-64-6510 - OEM Milwaukee - eReplacementParts.com
eReplacementParts.com
877-346-4814
Milwaukee Parts
Repair Parts Home
  
Power Tool Parts
  
Milwaukee Parts
  22-64-6510 Cordset 10ft 18-2 Sj 120v

Cordset 10ft 18-2 Sj 120v 22-64-6510

OEM part for: Milwaukee

Part Number: 22-64-6510


Install
Videos!
Cordset 10ft 18-2 Sj 120v - 22-64-6510:Milwaukee 360 View
Cordset 10ft 18-2 Sj 120v - 22-64-6510:MilwaukeeCordset 10ft 18-2 Sj 120v - 22-64-6510:MilwaukeeCordset 10ft 18-2 Sj 120v - 22-64-6510:Milwaukee 360 View
$17.52
In Stock
Ships within 1 business day
Easy 15-30 minutes (2 rated repairs)?
OEM: Original Equipment Manufacturer ?
Milwaukee
Does this d-block d-md-none fit my product?

Product Description ?

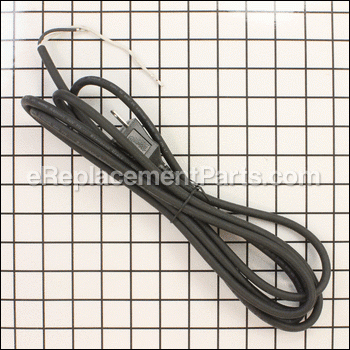
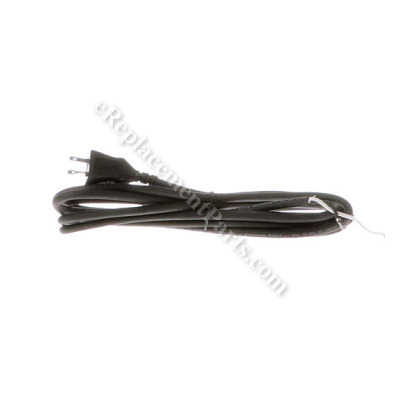
This is a genuine manufacturer sourced replacement part is designed for use with Milwaukee power tools. The purpose of this cord is to supply electricity to power the tool, if the cord is damaged it is important to replace it before continuing to use the tool. This durable rubber insulated cord is sold individually, please note cord protector is sold separately.

  • Length: 10'
  • Gauge: 18
  • Wires: 2
  • Type: Eyelets
  • Classification: Part
  • Weight: 0.55 lbs.
  • Shipping: Ships Worldwide

Compatibility

This part will fit the following 12 machines

Milwaukee

0201-20 (SER 067A) Electric Drill / Driver View Diagrams & Manuals
6740-20 (SER 143A) Decking, Drywall and Framing Screwdriver, 0-2500 RPM View Diagrams & Manuals
6742-20 (SER 146A) Drywall Screwdriver, 0-4000 RPM View Diagrams & Manuals
6742-20 (SER 146B) Drywall Screwdriver, 0-4000 RPM View Diagrams & Manuals
6742-20 (SER 146C) Drywall Screwdriver, 0-4000 RPM View Diagrams & Manuals
6780-20 (SER A54A) Metal Fastening Adjustable Clutch Screwdriver, 0-2500 RPM View Diagrams & Manuals
6790-20 (SER 179A) Self Drill Fastener Screwdriver, 0-2500 RPM View Diagrams & Manuals
6792-20 (SER 181A) Self Drill Fastener Screwdriver, 0-2500 RPM View Diagrams & Manuals
6852-20 (SER A80A) 18 Gauge Shear View Diagrams & Manuals
6852-20 (SER A80B) 18 Gauge Shear View Diagrams & Manuals
6791-20 Screwdriver View Diagrams & Manuals
6791-21 Drywall Screwdriver View Diagrams & Manuals
Show More Compatible Models
Don't see yours? Try searching our site for :

This item works with the following types of products:

  • Drill Parts
  • Electric Drill Parts
  • Screwdriver Parts
  • Shear Parts

Repair Videos ?

Watch the Repair Video for Cordset 10ft 18-2 Sj 120v

Questions & Answers ?

Our customer Service team is at the ready daily to answer your part and product questions.

photo of team member
Ask our Team

We have a dedicated staff with decades of collective experience in helping customers just like you purchase parts to repair their products.

Does this fit my product?

Questions & Answers for Cordset 10ft 18-2 Sj 120v


No questions have been asked yet

Customer Repair Instructions ?

All our customer repair instructions are solicited directly from other customers just like you who have purchased and replaced this exact part.

Easy 15-30 minutes (2 rated repairs)?

Power cord was cut in two parts by a falling metal duct.

Marvin - October 9, 2018
Tool Type

Nibbler

Difficulty

Easy

Time

15-30 minutes

Tools Used

Screwdriver, Torx and phillips head

1. Removed the red plastic housing's three phillips head screws
2. Removed and kept the black cord protector that "locks" the cord into the red housing
3. Loosened the torx t-0 screw that clamped down the black wire of the cord into the nibbler trigger mechanism
4. Removed the black wire
5. Loosened the phillips head screw that secured the white wire
6. Removed the white wire
7. Installed the new cord.

The new cord was a perfect match
Did you find this story helpful?
Thanks for voting and helping fellow customers!

Dogs chewed up the drill cord. Lucky for them that it wasn't plugged in.

Charlotte - July 28, 2017
Tool Type

Electric Drill

Difficulty

Easy

Time

15-30 minutes

Tools Used

Screwdriver, Torx head screw driver

Removed three torx head screws from rear motor housing/ drill handle housing to access wire connections
Unplugged the old white wire
Loosened phillips head set screw to release the old black wire
Pulled the old cord through the rubber retainer, reserving the retainer for reuse
Pulled the new cord through the rubber retainer
Plugged the new white wire in, after feeding it through retainer channel in the drill body
Plugged in the new black wire then secured it by tightening set screw
Inserted rubber cord retainer into opening in base of handle housing
Screwed the housing back onto the drill body
Done
Did you find this story helpful?
Thanks for voting and helping fellow customers!

OEM stands for Original Equipment Manufacturer and means the part you’re buying is sourced directly from the manufacturer who made your product. At eReplacementParts, we sell only genuine OEM parts, guaranteeing the part you’re purchasing is of better design and of higher quality than aftermarket parts.

Our product descriptions are a combination of data sourced directly from the manufacturers who made your product as well as content researched and curated by our content & customer service teams. This content is edited and reviewed internally before being made public to customers.

Our customer service team are at the ready daily to answer your part and product questions. We have a dedicated staff with decades of collective experience in helping customers just like you purchase parts to repair their products.

All our part reviews are solicited directly from other customers who have purchased this exact part. While we moderate these reviews for profanity, offensive language or personally identifiable information, these reviews are posted exactly as submitted and no alterations are made by our team.

All our customer repair instructions are solicited directly from other customers just like you who have purchased and replaced this exact part. While we moderate these reviews for profanity, offensive language or personally identifiable information, these reviews are posted exactly as submitted and no alterations are made by our team.

Based on data from past customer purchasing behaviors, these parts are most commonly purchased together along with the part you are viewing. These parts may be necessary or helpful to replace to complete your current repair.

All our installation videos are created and produced in collaboration with our in-house repair technician, Mark Sodja, who has helped millions of eReplacementParts customers over the last 13 years repair their products. Mark has years of experience in selling and repairing both commercial and residential products with a specialty in gas-powered equipment.

This data is collected from customers who submitted a repair instruction after replacing this exact part. Customers can rate how easy the repair was to complete and how long it took. We aggregate this data to provide a repair rating that allows customers to quickly determine the difficulty and time needed to perform their own repair.

eReplacementParts.com
7174 South 400 West
Suite 5
Midvale, UT 84047
visa mastercard discover american express PayPal