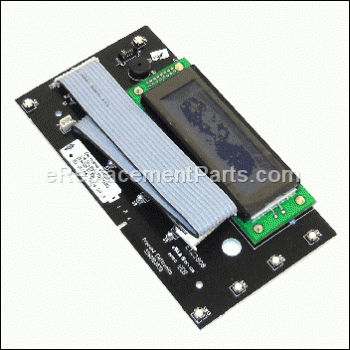
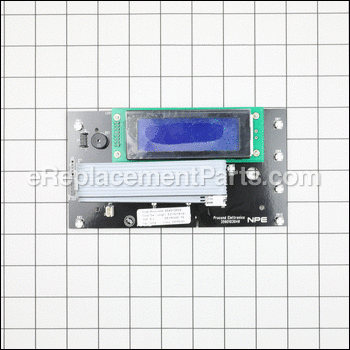
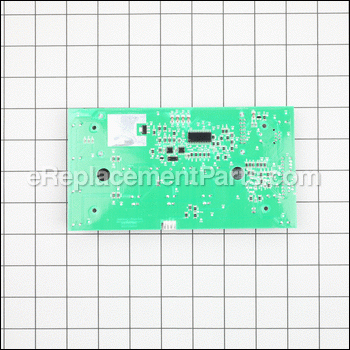
This is an authentic replacement part manufactured for use with DeLonghi coffee makers. The control board is the complete electronic control including the wire ribbon and the LCD display. This control board fits behind the keyboard and is used to relay inputs from the keys. The control board is sold as an individual replacement part, please see model diagram for associative parts.
Control Pc Board 5213216191
OEM part for: DeLonghi
Part Number: 5213216191
7 - 12 business days
Compatibility
This part will fit the following 2 machines
DeLonghi
This item works with the following types of products:
- Coffee Maker Parts
This part replaces obsolete part #: 5213214851, 5232113400
Customer Part Reviews ?
- 1
Questions & Answers ?
Our customer Service team is at the ready daily to answer your part and product questions.

Ask our Team
We have a dedicated staff with decades of collective experience in helping customers just like you purchase parts to repair their products.
Does this fit my product?Questions & Answers for Control Pc Board
Customer Repair Instructions ?
All our customer repair instructions are solicited directly from other customers just like you who have purchased and replaced this exact part.
The LED Screen was becoming too dim to read.
Tool Type
Coffee Maker
Difficulty
Easy
Time
15-30 minutes
Tools Used
Screwdriver
Parts Used
2. Removed the shell.
3. Unscrewed the control panel.
4. Unplugged the control panel and removed.
5. Installed the new control panel.
6. Plugged the panel in.
7. Tried the unit out before putting it back together.
8. Turned off the unit and reinstalled the shell.
Display board not working.
Tool Type
Coffee Maker
Difficulty
Easy
Time
15-30 minutes
Tools Used
Screwdriver, none
Parts Used
LCD screen got darker and finally it could not be read. Now it’s bright enough to light up the room!
Tool Type
Coffee Maker
Difficulty
Easy
Time
15-30 minutes
Tools Used
Screwdriver
Parts Used
Remove two screws from the top and bottom of both side panels in the rear, 4 total
Slide side panels 1/2” to the rear, tip outward and remove
Remove 4 screws, 2 each side, holding the front control panel in place, be careful as the plastic brackets are easy to break.
Remove ribbon cable from control board, be sure you have already unplugged the machine, use a small flathead screwdriver to release the clip
Remove 4 screws from backside of control panel revealing the LCD board
Replace and reverse. Be careful putting the brackets back to ensure they line up properly.
OEM stands for Original Equipment Manufacturer and means the part you’re buying is sourced directly from the manufacturer who made your product. At eReplacementParts, we sell only genuine OEM parts, guaranteeing the part you’re purchasing is of better design and of higher quality than aftermarket parts.
Our product descriptions are a combination of data sourced directly from the manufacturers who made your product as well as content researched and curated by our content & customer service teams. This content is edited and reviewed internally before being made public to customers.
Our customer service team are at the ready daily to answer your part and product questions. We have a dedicated staff with decades of collective experience in helping customers just like you purchase parts to repair their products.
All our part reviews are solicited directly from other customers who have purchased this exact part. While we moderate these reviews for profanity, offensive language or personally identifiable information, these reviews are posted exactly as submitted and no alterations are made by our team.
All our customer repair instructions are solicited directly from other customers just like you who have purchased and replaced this exact part. While we moderate these reviews for profanity, offensive language or personally identifiable information, these reviews are posted exactly as submitted and no alterations are made by our team.
Based on data from past customer purchasing behaviors, these parts are most commonly purchased together along with the part you are viewing. These parts may be necessary or helpful to replace to complete your current repair.
All our installation videos are created and produced in collaboration with our in-house repair technician, Mark Sodja, who has helped millions of eReplacementParts customers over the last 13 years repair their products. Mark has years of experience in selling and repairing both commercial and residential products with a specialty in gas-powered equipment.
This data is collected from customers who submitted a repair instruction after replacing this exact part. Customers can rate how easy the repair was to complete and how long it took. We aggregate this data to provide a repair rating that allows customers to quickly determine the difficulty and time needed to perform their own repair.


