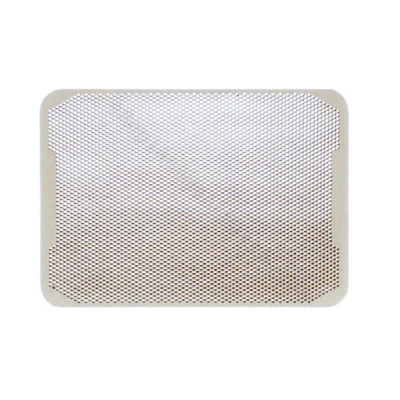


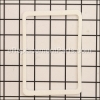
This is a high-quality manufacturer-sourced part which is made for use with Mr. Heater equipment. It helps stabilize the flame and assist in the radiation of heat. Over time it may wear out or get damaged eventually requiring a replacement. For the proper application, please refer to the appropriate diagrams of your model. This high-quality part is made of durable ceramic material and is sold as an individual component. You will need a screwdriver to remove the old burner tile and attach the new one. Note, the #73433 Tile, Gasket is sold separately.
Ceramic Burner Tile (2011 & Un 73439
OEM part for: Mr. Heater
Part Number: 73439
$15.40
In Stock
Jump To:
Frequently Purchased Together ?
Compatibility
This part will fit the following 4 machines
Mr. Heater
MH9B Heater View Diagrams & Manuals
MH18B Portable Propane Heater View Diagrams & Manuals
TSIR30LPT Unvented Lp-Gas Fired Room Heater View Diagrams & Manuals
TSIR20LPT Unvented Lp-Gas Fired Room Heater View Diagrams & Manuals
This item works with the following types of products:
- Heater Parts
Customer Part Reviews ?
Average Rating (out of 5):
Click to filter by ratings:
5 stars
3
4 stars
0
3 stars
0
2 stars
0
1 stars
0
< PREV
- 1
Some Day They Will Be Gone
This replacement tile is the most vulnerable part for breakage on my older Mr. Heater little buddy. I figured they won't be available forever so might as well get it now. The price was good, and fitment was GREAT. Thanks.
Guest -
November 6, 2023
Verified Purchase
RIGHT PARTS
WORKED WELL FIT WELL
Guest -
December 29, 2021
Verified Purchase
Me heater part
Arrived sooner than expected and put in and worked great. Also great customer service
Guest -
November 20, 2019
Verified Purchase
t
t
t -
t days ago
Verified Purchase
eReplacementParts Team
t
Questions & Answers ?
Our customer Service team is at the ready daily to answer your part and product questions.

Ask our Team
We have a dedicated staff with decades of collective experience in helping customers just like you purchase parts to repair their products.
Does this fit my product?Questions & Answers for Ceramic Burner Tile (2011 & Un
Hello, i need ceramic burner tile kit for mh18b. 6.5 inch x. 3.75 inch. Can you tell part number for order?
Eugenius
for model number Mh18b
asked on 2024-01-09
Hello Eugenius, Thank you for writing. The Ceramic Burner Tile for this model is listed as Part Number: 73439. We hope this helps!
eReplacementParts Team January 09, 2024
My Heater Burner tiles measure 3 1/2" x 5 1/2" not sure if it's older or newer 2011. TY
Dan
for model number Mh18b
asked on 2023-02-17
Hello Dan, Thank you for contacting us. We have researched the model you have provided and have found the part you are looking for is Part Number: 73439. We hope this information helps!
eReplacementParts Team February 17, 2023
I just want to know what side of the tile goes up? I got mine with the tile missing already so I don't know what side was up the rough side or the smooth side?
Cameron
asked on 2022-12-30
Hello Cameron, Thank you for the question. You would need to install the Tile with the Rough Side Up. We hope this helps!
eReplacementParts Team December 30, 2022
Will this fit my mh9bx
Kevin
for model number Mh9bx
asked on 2022-12-09
Hello Kevin, Thank you for contacting us. We have researched the model you have provided and have found the part you are looking for is Part Number:73439. Thank you for your inquiry, good luck with this repair!
eReplacementParts Team December 09, 2022
My tile is 3.75 by 6.25, will this work for my Mr. big buddy heater
Dustin
for model number MH18B
asked on 2022-02-15
Hello Dustin, Thank you for contacting us. We have researched the model you have provided and have found the part you are looking for is Part Number:73439. If you need help placing an order, customer service is open 7 days a week. Please feel free to give us a call. We look forward to hearing from you!
eReplacementParts Team February 15, 2022
Customer Repair Instructions ?
All our customer repair instructions are solicited directly from other customers just like you who have purchased and replaced this exact part.
Ceramic burner tile broke.
troy - November 6, 2017
👍 15 of 22 people found this instruction helpful
Tool Type
Heater
Difficulty
Easy
Time
Less than 15 minutes
Tools Used
Screwdriver
Took the cover off with a screwdriver. Replaced the burner and the gasket. Put the cover back on, then tested and it worked. Very simple.
Did you find this story helpful?
Thanks for voting and helping fellow customers!
Ceramic burner tile was no longer burning evenly across tile grid.
John - April 3, 2017
👍 11 of 17 people found this instruction helpful
Tool Type
Heater
Difficulty
Easy
Time
Less than 15 minutes
Tools Used
Screwdriver
Easy to replace the ceramic burner tile on my 15 year old MH9B Mr. Buddy Heater. It is important to also important to replace the ceramic burner tile gasket while doing this repair. Heater now works like it should.
Did you find this story helpful?
Thanks for voting and helping fellow customers!
Gasket was leaking and I cracked the burner getting the clips out.
Joey - February 15, 2022
Tool Type
Heater
Difficulty
Easy
Time
Less than 15 minutes
Tools Used
Screwdriver
1 Unscrew burner ass from heater
2 remove clips from ceramic burner
3 replace gasket and burner
4 replace clips
2 remove clips from ceramic burner
3 replace gasket and burner
4 replace clips
Did you find this story helpful?
Thanks for voting and helping fellow customers!
Ceramic burner came loose in transport.
Joseph - May 15, 2021
Tool Type
Heater
Difficulty
Easy
Time
Less than 15 minutes
Tools Used
Screwdriver
Replaced gasket that had torn. Used new ceramic burner and replaced both clips, one was lost when unpacking camper, the heater was stored on its front, parts wiggled loose in transport. Old burner has a few small chips on side, usable and still in good condition. Small screw driver was used in placement of clips .
Did you find this story helpful?
Thanks for voting and helping fellow customers!
Original tiles started to breakdown and cracking over time
William - January 12, 2021
Tool Type
Heater
Difficulty
Easy
Time
15-30 minutes
Tools Used
Screwdriver, Vacuum cleaner, Rag
Parts Used
1-Remove grill (4 screws)
2-Remove heat shield from around tile frame
3-Remove retaining frame from around tiles
4-Lift out old tiles, gasket and clean out the pocket of all dirt
5-Being very careful place new gasket and tiles in the holder
6-Reassemble in reverse order
Caution: A-clean out all dirt
B-Do not overtighten the tile Frame
C-When instaling gasket be careful not to damage it
D-Do not force anything
Did you find this story helpful?
Thanks for voting and helping fellow customers!
Ripped gasket
Anthony - February 24, 2020
Tool Type
Heater
Difficulty
Easy
Time
Less than 15 minutes
Tools Used
, None
Removed old parts and inserted new ones.
Did you find this story helpful?
Thanks for voting and helping fellow customers!
OEM stands for Original Equipment Manufacturer and means the part you’re buying is sourced directly from the manufacturer who made your product. At eReplacementParts, we sell only genuine OEM parts, guaranteeing the part you’re purchasing is of better design and of higher quality than aftermarket parts.
Our product descriptions are a combination of data sourced directly from the manufacturers who made your product as well as content researched and curated by our content & customer service teams. This content is edited and reviewed internally before being made public to customers.
Our customer service team are at the ready daily to answer your part and product questions. We have a dedicated staff with decades of collective experience in helping customers just like you purchase parts to repair their products.
All our part reviews are solicited directly from other customers who have purchased this exact part. While we moderate these reviews for profanity, offensive language or personally identifiable information, these reviews are posted exactly as submitted and no alterations are made by our team.
All our customer repair instructions are solicited directly from other customers just like you who have purchased and replaced this exact part. While we moderate these reviews for profanity, offensive language or personally identifiable information, these reviews are posted exactly as submitted and no alterations are made by our team.
Based on data from past customer purchasing behaviors, these parts are most commonly purchased together along with the part you are viewing. These parts may be necessary or helpful to replace to complete your current repair.
All our installation videos are created and produced in collaboration with our in-house repair technician, Mark Sodja, who has helped millions of eReplacementParts customers over the last 13 years repair their products. Mark has years of experience in selling and repairing both commercial and residential products with a specialty in gas-powered equipment.
This data is collected from customers who submitted a repair instruction after replacing this exact part. Customers can rate how easy the repair was to complete and how long it took. We aggregate this data to provide a repair rating that allows customers to quickly determine the difficulty and time needed to perform their own repair.