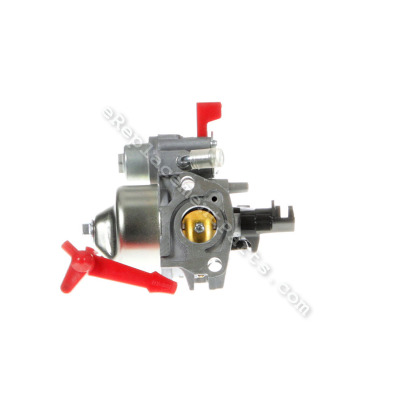


This replacement carburetor assembly is a high quality item that is designed for use with Homelite pressure washers. The purpose of this part is to mix gas and air before the fuel mix goes into the engine. You can tell that something is up with the carburetor if the engine runs poorly, surges, or flat-out won't run at all. Please note one durable metal body carburetor with a rubber primer bulb is included per order.
Carburetor Assembly 099980551032
OEM part for: Homelite
Part Number: 099980551032
$43.51
In Stock
Jump To:
Frequently Purchased Together ?

Compatibility
This part will fit the following 4 machines
Homelite
PS80522 Pressure Washer View Diagrams & Manuals
UT80522D Pressure Washer View Diagrams & Manuals
UT80522F Pressure Washer View Diagrams & Manuals
UT80522E Pressure Washer View Diagrams & Manuals
This item works with the following types of products:
- Pressure Washer Parts
This part replaces obsolete part #: DJ165F-14100-BE
Customer Part Reviews ?
Average Rating (out of 5):
Click to filter by ratings:
5 stars
3
4 stars
0
3 stars
0
2 stars
0
1 stars
0
< PREV
- 1
Precisely the part I wantedI
Sometimes a carb rebuild kit is appropriate, but sometimes a replacement carb is required. That was my situation & I found the item here, at a fair price, with a not-difficult-to-navigate online ordering process, timely shipping, great customer service, Well done!
Guest -
March 18, 2022
Verified Purchase
Easy Repair
Exactly the right part, works good
Guest -
November 5, 2019
Verified Purchase
My Go-To company for parts.
As usual the people are great and the parts are right.
Guest -
April 30, 2019
Verified Purchase
t
t
t -
t days ago
Verified Purchase
eReplacementParts Team
t
Questions & Answers ?
Our customer Service team is at the ready daily to answer your part and product questions.

Ask our Team
We have a dedicated staff with decades of collective experience in helping customers just like you purchase parts to repair their products.
Does this fit my product?Questions & Answers for Carburetor Assembly
No questions have been asked yet
Customer Repair Instructions ?
All our customer repair instructions are solicited directly from other customers just like you who have purchased and replaced this exact part.
After sitting unused for a year, engine would not start
Gary - October 18, 2017
👍 3 of 3 people found this instruction helpful
Tool Type
Pressure Washer
Difficulty
Easy
Time
15-30 minutes
Tools Used
Screwdriver, Pliers, Socket set
Parts Used
1. Drain gas tank.
2. Remove float bowl at bottom of carburetor with 10mm wrench.
3. Remove brass fuel jet from inside carburetor with flat bladed screwdriver.
4. Clear clogged jet orifices with fishing line as not to damage them
Reassemble.
Fixed! (I didn't need to replace the carburetor, I'll keep it for another repair.)
Did you find this story helpful?
Thanks for voting and helping fellow customers!
Carburator was broken
Luis - August 6, 2020
Tool Type
Pressure Washer
Difficulty
Easy
Time
30-60 minutes
Tools Used
Screwdriver, Wrench Set
Parts Used
Replace part
Did you find this story helpful?
Thanks for voting and helping fellow customers!
Fuel leak in the carburator assembly.
Joseph - September 18, 2018
Tool Type
Pressure Washer
Difficulty
Medium
Time
More than 2 hours
Tools Used
Screwdriver, Pliers, Socket set, Wrench Set, Nutdriver, Adjustable Wrench
Parts Used
1. Empty the fuel tank of all fuel.
2. Removed fuel tank from the pressure washer motor and disconnect the fuel line.
3. Disassembled the pressure washer from the base and frame to allow access to the carburetor.
4. Removed air cleaner and base.
5. Disconnect linkage and spring from carburetor assembly.
6. Unbolted the carburetor assembly and removed the seal plate.
7. Removed the old carburetor.
8. Attached new carburetor with fuel line attached..
9. Re-attached linkage and spring to carburetor
10. Reattached fuel line to fuel tank, making sure it was clear of the linkage and spring.
11. Reattached the fuel tank.
12. Remounted the pressure washer and motor on frame.
13. Refilled the fuel tank and looked for any leaks as I opened the fuel line valve.
14. Started the unit using the standard start-up procedure recommended by owner's manual.
COMMENT: On this unit it would be VERY simple to change the carburetor, if it wasn't for the frame and it is best to order several fuel lines, since they seem to deteriorate quickly with ethanol based fuel. I have switched to 100% gasoline. It is more expensive, but the engine seems to do better for longer.
Did you find this story helpful?
Thanks for voting and helping fellow customers!
Oil and gas in fuel tank and carburetor
robert - December 1, 2016
Tool Type
Pressure Washer
Difficulty
Medium
Time
30-60 minutes
Tools Used
Screwdriver, Pliers, Socket set, Wrench Set
Parts Used
Remove gas tank and flush out oil remove engine from frame. Disconnect choke and spring. Remove and replace carburetor. Reassemble. Tha replacement carburetor was a perfect match.
Did you find this story helpful?
Thanks for voting and helping fellow customers!
OEM stands for Original Equipment Manufacturer and means the part you’re buying is sourced directly from the manufacturer who made your product. At eReplacementParts, we sell only genuine OEM parts, guaranteeing the part you’re purchasing is of better design and of higher quality than aftermarket parts.
Our product descriptions are a combination of data sourced directly from the manufacturers who made your product as well as content researched and curated by our content & customer service teams. This content is edited and reviewed internally before being made public to customers.
Our customer service team are at the ready daily to answer your part and product questions. We have a dedicated staff with decades of collective experience in helping customers just like you purchase parts to repair their products.
All our part reviews are solicited directly from other customers who have purchased this exact part. While we moderate these reviews for profanity, offensive language or personally identifiable information, these reviews are posted exactly as submitted and no alterations are made by our team.
All our customer repair instructions are solicited directly from other customers just like you who have purchased and replaced this exact part. While we moderate these reviews for profanity, offensive language or personally identifiable information, these reviews are posted exactly as submitted and no alterations are made by our team.
Based on data from past customer purchasing behaviors, these parts are most commonly purchased together along with the part you are viewing. These parts may be necessary or helpful to replace to complete your current repair.
All our installation videos are created and produced in collaboration with our in-house repair technician, Mark Sodja, who has helped millions of eReplacementParts customers over the last 13 years repair their products. Mark has years of experience in selling and repairing both commercial and residential products with a specialty in gas-powered equipment.
This data is collected from customers who submitted a repair instruction after replacing this exact part. Customers can rate how easy the repair was to complete and how long it took. We aggregate this data to provide a repair rating that allows customers to quickly determine the difficulty and time needed to perform their own repair.