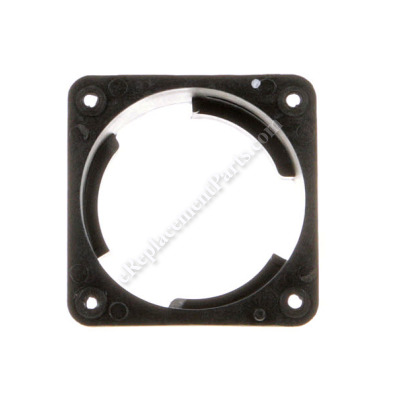
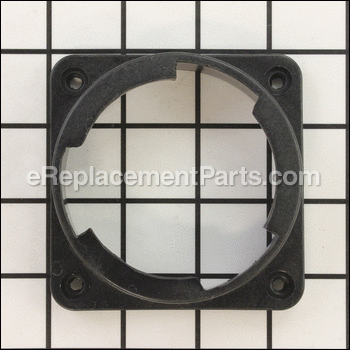
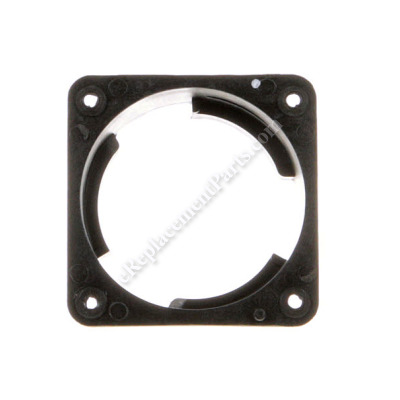
This carafe fixing seat in your espresso machine secures and stabilizes the coffee carafe or container used to collect brewed coffee or espresso, preventing messy spills. Constructed from black plastic, it is attached to the housing and has a 3-inch diameter. If you observe any wobbling or insecure holding of the carafe during brewing, or if you spot visible damage or wear on the fixing seat, it may be time to consider replacing it. To replace the fixing seat, start by disconnecting the machine from its power source and allowing it to cool down. Remove the bottom water grill and overflow level indicator bar, then empty the water reservoir. While holding the water reservoir compartment door shut, flip the espresso machine upside down. Carefully take out the screws holding the bottom cover, being cautious of sharp edges. Gently pry out the bottom water-catching plastic pan and remove the four screws securing the carafe fixing seat. Remove the center screw holding the water infuser on the steam ring and use a flathead screwdriver to pry the ring out. Attach the water infuser to the new steam ring, replace the carafe fixing seat, and reassemble your machine. Remember that certain parts may require cleaning to remove rust or calcium deposits. This replacement part is directly sourced from the original equipment manufacturer.
Carafe Fixing Seat SP0014935
OEM part for: Breville
Part Number: SP0014935
Jump To:
Product Description ?
- Diameter: 3\\\\\\\"
- Classification: Part
- Weight: 0.07 lbs.
- Shipping: Ships Worldwide
Frequently Purchased Together ?
Compatibility
This part will fit the following 2 machines
Breville
This item works with the following types of products:
- Espresso Parts
This part replaces obsolete part #: ESP8XL/137, ESP6SXL/137
Questions & Answers ?
Our customer Service team is at the ready daily to answer your part and product questions.

Ask our Team
We have a dedicated staff with decades of collective experience in helping customers just like you purchase parts to repair their products.
Does this fit my product?Questions & Answers for Carafe Fixing Seat
Customer Repair Instructions ?
All our customer repair instructions are solicited directly from other customers just like you who have purchased and replaced this exact part.
Pressure leak
Tool Type
Espresso
Difficulty
Easy
Time
Less than 15 minutes
Tools Used
Screwdriver, none
Parts Used
Carafe fixing seat cracked, causing the part to leak pressurized water while brewing.
Tool Type
Espresso
Difficulty
Medium
Time
15-30 minutes
Tools Used
Screwdriver
2) Remove bottom water grill and overflow level indicator bar
3) Empty water reservoir
4) Put espresso machine upside down (hold water reservoir compartment door shut)
5) Remove screws that hold the bottom cover (be careful handling everything and watch out for sharp metal edges of the machine's body!)
6) Gently pry out the bottom water-catching plastic pan
7) Remove the 4 screws holding the carafe fixing seat
8) Remove the center screw holding the water infuser on the steam ring
9) Remove and replace the steam ring (a flat butter knife might help prying it off)
10) Mount the water infuser back on the new steam ring
11) Replace the new carafe fixing seat and mount everything back (bottom water-catching pan, bottom cover etc.
Note: some parts might need some cleaning as rust and calcium deposits might need to be removed. Use this disassembling as an occasion to do so.
Part broken
Tool Type
Espresso
Difficulty
Easy
Time
15-30 minutes
Tools Used
Screwdriver
Carafe fixing seat developed a thin (almost invisible) crack and would leak under pressure.
Tool Type
Espresso
Difficulty
Easy
Time
Less than 15 minutes
Tools Used
Screwdriver
2. Replaced the steam ring with a new one (not absolutely required, but for good measure).
3. Screwed in the new carafe fixing seat.
Time less than 5 minutes. Replaced parts solved the problem.
Esp8xl Breville Roma espresso machine spewing water due to cracked carafe fixing seat
Tool Type
Espresso
Difficulty
Easy
Time
Less than 15 minutes
Tools Used
Screwdriver
Parts Used
Need short-handled Phillips screwdriver
Leaking under pressure
Tool Type
Espresso
Difficulty
Medium
Time
15-30 minutes
Tools Used
Screwdriver
Portafilter Mounting Piece Replacement
Tool Type
Espresso
Difficulty
Easy
Time
Less than 15 minutes
Tools Used
Screwdriver
OEM stands for Original Equipment Manufacturer and means the part you’re buying is sourced directly from the manufacturer who made your product. At eReplacementParts, we sell only genuine OEM parts, guaranteeing the part you’re purchasing is of better design and of higher quality than aftermarket parts.
Our product descriptions are a combination of data sourced directly from the manufacturers who made your product as well as content researched and curated by our content & customer service teams. This content is edited and reviewed internally before being made public to customers.
Our customer service team are at the ready daily to answer your part and product questions. We have a dedicated staff with decades of collective experience in helping customers just like you purchase parts to repair their products.
All our part reviews are solicited directly from other customers who have purchased this exact part. While we moderate these reviews for profanity, offensive language or personally identifiable information, these reviews are posted exactly as submitted and no alterations are made by our team.
All our customer repair instructions are solicited directly from other customers just like you who have purchased and replaced this exact part. While we moderate these reviews for profanity, offensive language or personally identifiable information, these reviews are posted exactly as submitted and no alterations are made by our team.
Based on data from past customer purchasing behaviors, these parts are most commonly purchased together along with the part you are viewing. These parts may be necessary or helpful to replace to complete your current repair.
All our installation videos are created and produced in collaboration with our in-house repair technician, Mark Sodja, who has helped millions of eReplacementParts customers over the last 13 years repair their products. Mark has years of experience in selling and repairing both commercial and residential products with a specialty in gas-powered equipment.
This data is collected from customers who submitted a repair instruction after replacing this exact part. Customers can rate how easy the repair was to complete and how long it took. We aggregate this data to provide a repair rating that allows customers to quickly determine the difficulty and time needed to perform their own repair.


