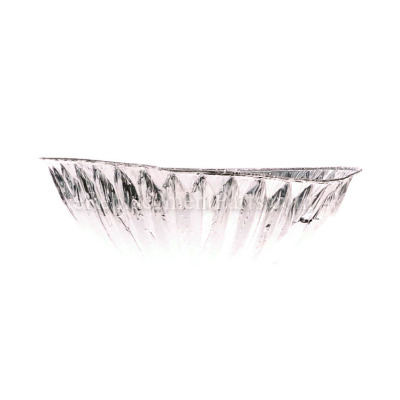


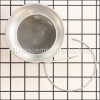
This replacement item is a high quality item that is sourced directly from original equipment manufacturer for use with Char-Broil grills. This bottom insulation bowl lines the inside of the grill and prevents heat from getting to the outer body. Please note this durable metal item is sold individually and the top insulation bowl is sold separately.
Bottom Insulation Bowl 29101086
OEM part for: Char-Broil
Part Number: 29101086
$28.63
Usually ships in 7 - 12 business days
7 - 12 business days
Jump To:
Frequently Purchased Together ?

Compatibility
This part will fit the following 3 machines
Char-Broil
4654870 (2002-2003) Grill View Diagrams & Manuals
465487004 Electric Patio Caddie View Diagrams & Manuals
4654872 Patio Caddie Grill View Diagrams & Manuals
This item works with the following types of products:
This part replaces obsolete part #: 4152827
Repair Videos ?

Articles:
|
Having trouble getting your grill to light up? A common cause of this issue is a defective ignition switch. We'll sho...
November 08, 2012
|

Customer Part Reviews ?
Average Rating (out of 5):
Click to filter by ratings:
5 stars
4
4 stars
0
3 stars
0
2 stars
0
1 stars
0
< PREV
- 1
barbque part
came in perfect condition it was a long wait but you kept me informed So thanks
Guest -
November 1, 2020
Verified Purchase
BBQ Insulation Bowl
my experience with my order was fast and easy . Would use this Company again for sure, Just wish the parts were cheaper LOL Thank you
Guest -
June 4, 2020
Verified Purchase
Easy repair
Arrived as promised.grill working perfectly.
Guest -
May 27, 2019
Verified Purchase
Right part
It was the part we were just looking for
Guest -
May 23, 2019
Verified Purchase
t
t
t -
t days ago
Verified Purchase
eReplacementParts Team
t
Questions & Answers ?
Our customer Service team is at the ready daily to answer your part and product questions.

Ask our Team
We have a dedicated staff with decades of collective experience in helping customers just like you purchase parts to repair their products.
Does this fit my product?Questions & Answers for Bottom Insulation Bowl
No questions have been asked yet
Customer Repair Instructions ?
All our customer repair instructions are solicited directly from other customers just like you who have purchased and replaced this exact part.
Bottom of grill pan old and burnt, grill is 19 years old
Daniel - October 9, 2016
👍 2 of 2 people found this instruction helpful
Tool Type
Outdoor Grill
Difficulty
Easy
Time
Less than 15 minutes
Tools Used
Screwdriver
Parts Used
Remove the heating element, then remove the old bowl and replace it with the new one. Then install the heating element.
Did you find this story helpful?
Thanks for voting and helping fellow customers!
Bottom bowl uncleanable
kelly - January 2, 2017
👍 2 of 3 people found this instruction helpful
Tool Type
Outdoor Grill
Difficulty
Easy
Time
15-30 minutes
Tools Used
Screwdriver, Soap & water
Parts Used
1. Remove heating element
2. Clean grill thoroughly
3. Replace bowl
2. Clean grill thoroughly
3. Replace bowl
Did you find this story helpful?
Thanks for voting and helping fellow customers!
The insulation bowl was covered with grease from use. I wanted to replace it with a clean one.
Michael - September 24, 2016
👍 1 of 1 people found this instruction helpful
Tool Type
Outdoor Grill
Difficulty
Easy
Time
15-30 minutes
Tools Used
Screwdriver, Adjustable Wrench, No other.
Parts Used
1. Removed the receptacle for the temperature controller;
2. Removed the electric heating element;
3. Removed the insulation bowl;
4. Inserted the new insulation bowl;
5. Reversed the disassembly procedure.
Mike N
2. Removed the electric heating element;
3. Removed the insulation bowl;
4. Inserted the new insulation bowl;
5. Reversed the disassembly procedure.
Mike N
Did you find this story helpful?
Thanks for voting and helping fellow customers!
Nothing
Ronald - September 10, 2023
Tool Type
Outdoor Grill
Difficulty
Easy
Time
Less than 15 minutes
Tools Used
Screwdriver
Parts Used
Removed old pan. Took off burner. Replaced pan. Reinstalled burner.
Did you find this story helpful?
Thanks for voting and helping fellow customers!
Needed an heating element/thermostat control assembly and top and bottom insulation for a CharBroil patio caddie electric grill
Lisa - January 4, 2022
Tool Type
Outdoor Grill
Difficulty
Easy
Time
Less than 15 minutes
Tools Used
, Came with an Allen wrench. Super easy assembling.
I had our farm hand change out the parts. It only took 15 minutes. We ordered the parts in October and received them in December. They came from the manufacture. Please be patient, it is worth the wait for the parts!!!! Great communication with this company! Will use them for future needs!!! Thank you!!! Lisa from the Lone Star State ⭐️
Did you find this story helpful?
Thanks for voting and helping fellow customers!
The bottom insulation bowl needed to be replaced because it was full of food grease.
Stacie - February 3, 2021
Tool Type
Outdoor Grill
Difficulty
Medium
Time
15-30 minutes
Tools Used
Screwdriver, Pliers
Parts Used
1. Unplugged Electric BBQ
2. Unplugged the Heat Controller.
3. Unscrewed Heat Element
4. Pulled out old insulation bowl.
5. Wiped out grease in bbq.
6. Put new insulation bowl in making sure the precut whole was lined up with the heat element plug in area.
7. Screwed Heat Element back into place.
8. Plugged in the Heat Controller
9. Easy Peezy Lemon Squeezy!
Did you find this story helpful?
Thanks for voting and helping fellow customers!
Bottom bowl was filled with old grease.
Gail - June 15, 2019
Tool Type
Outdoor Grill
Difficulty
Medium
Time
30-60 minutes
Tools Used
Screwdriver
Parts Used
Removed the heating coil with screw driver. Tossed the old bowl along with all the old ceramic briquettes. Replaced with new bowl and new briquettes. Reattached the heating coil and viola! Done. Easy peasy.
Did you find this story helpful?
Thanks for voting and helping fellow customers!
Electrical cord was broken
Penny - May 17, 2019
Tool Type
Outdoor Grill
Difficulty
Easy
Time
15-30 minutes
Tools Used
Screwdriver, None
When I inserted the electrical cord, the grill did not get hot. Unbeknownst to me the heating element needed to be replaced so I was happy it came as a set. I unscrewed the heating element (2 screws) and replaced it. I then inserted the top and bottom foil insulation bowls. The whole job took me about 15 - 20 minutes. Easy...peasy! Thank you for giving me my grill back!
Did you find this story helpful?
Thanks for voting and helping fellow customers!
No heat from element. Damaged power cords
Michael - May 8, 2019
Tool Type
Outdoor Grill
Difficulty
Easy
Time
15-30 minutes
Tools Used
Screwdriver
Removed and replaced heating element and replaced both top and bottom bowls. The replacement parts you provided fit perfectly
Did you find this story helpful?
Thanks for voting and helping fellow customers!
Bottom bowl was old and dirty
Douglas - February 19, 2019
Tool Type
Outdoor Grill
Difficulty
Easy
Time
Less than 15 minutes
Tools Used
Screwdriver
Parts Used
Removed the electric element component with a screwdriver, replaced the bottom bowl, replaced the element. Like brand new now.
Did you find this story helpful?
Thanks for voting and helping fellow customers!
Load More Install Stories
OEM stands for Original Equipment Manufacturer and means the part you’re buying is sourced directly from the manufacturer who made your product. At eReplacementParts, we sell only genuine OEM parts, guaranteeing the part you’re purchasing is of better design and of higher quality than aftermarket parts.
Our product descriptions are a combination of data sourced directly from the manufacturers who made your product as well as content researched and curated by our content & customer service teams. This content is edited and reviewed internally before being made public to customers.
Our customer service team are at the ready daily to answer your part and product questions. We have a dedicated staff with decades of collective experience in helping customers just like you purchase parts to repair their products.
All our part reviews are solicited directly from other customers who have purchased this exact part. While we moderate these reviews for profanity, offensive language or personally identifiable information, these reviews are posted exactly as submitted and no alterations are made by our team.
All our customer repair instructions are solicited directly from other customers just like you who have purchased and replaced this exact part. While we moderate these reviews for profanity, offensive language or personally identifiable information, these reviews are posted exactly as submitted and no alterations are made by our team.
Based on data from past customer purchasing behaviors, these parts are most commonly purchased together along with the part you are viewing. These parts may be necessary or helpful to replace to complete your current repair.
All our installation videos are created and produced in collaboration with our in-house repair technician, Mark Sodja, who has helped millions of eReplacementParts customers over the last 13 years repair their products. Mark has years of experience in selling and repairing both commercial and residential products with a specialty in gas-powered equipment.
This data is collected from customers who submitted a repair instruction after replacing this exact part. Customers can rate how easy the repair was to complete and how long it took. We aggregate this data to provide a repair rating that allows customers to quickly determine the difficulty and time needed to perform their own repair.