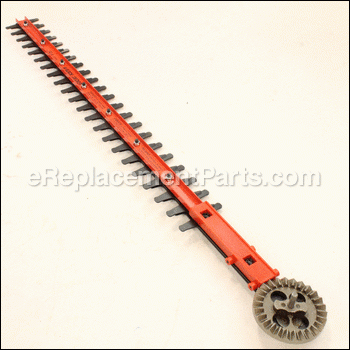

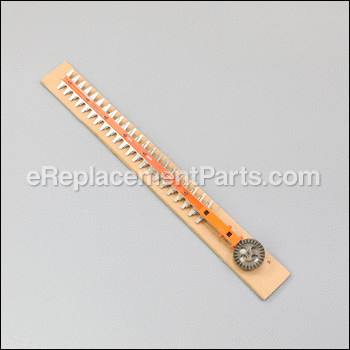

This is an authentic Black and Decker replacement part, sourced from the original manufacturer for use with hedge trimmers. The special blade and gear assembly is a complete part including the guides, gear, blades, and hardware. This blade & gear is available as an individual replacement part, please see model diagram for associative parts.
Blade & Gear 90640927
OEM part for: Black and Decker
Part Number: 90640927
$45.61
In Stock
Compatibility
This part will fit the following 3 machines
Black and Decker
HH2455 Type 1 24in Hedge Trimmer w/Rotating Handle View Diagrams & Manuals
HH2455 Type 2 24in Hedge Trimmer w/Rotating Handle View Diagrams & Manuals
HH2455 (Type 3) Hedge Trimmer Power Tool View Diagrams & Manuals
This item works with the following types of products:
- Hedge Trimmer Parts
- Trimmer Parts
This part replaces obsolete part #: 90520526-01SV
Customer Part Reviews ?
Average Rating (out of 5):
Click to filter by ratings:
5 stars
2
4 stars
0
3 stars
0
2 stars
0
1 stars
0
< PREV
- 1
Timely Response
My lawn service suggested I get a new blade for my hedge trimmer because I was not making clean cuts. I ordered the blade and received it in a very short period of time. I would not be afraid to order parts if I was in a panic and needed them right away.
Guest -
August 17, 2021
Verified Purchase
It was easy and fast
The part works great
Guest -
September 25, 2019
Verified Purchase
t
t
t -
t days ago
Verified Purchase
eReplacementParts Team
t
Questions & Answers ?
Our customer Service team is at the ready daily to answer your part and product questions.

Ask our Team
We have a dedicated staff with decades of collective experience in helping customers just like you purchase parts to repair their products.
Does this fit my product?Questions & Answers for Blade & Gear
This Trimmer has a Special driver to remove the screws, do you have these in stock?
Doyle
asked on 2023-10-21
Hi Doyle,
Glad to hear from you. We do not carry the T15 security driver or the T15 security head. You will need to purchase these items at a local hardware store. We hope this helps!
eReplacementParts Team October 21, 2023
I have a Black & Decker HH2455 24" Type 3 hedge trimmer with a rotating handle. I find that the blade is getting dull and I would like to confirm that this replacement is compatible with it? Also is this blade 24"? Please advise.
J
for model number HH2455 Type 3
asked on 2022-10-31
Hello J, Thank you for contacting us. We have researched the model you have provided and have found the part you are looking for is Part Number:90640927. Very sorry we do not have the length of this blade, however it is a guaranteed fit for this model. We hope this solves your problem!
eReplacementParts Team October 31, 2022
Customer Repair Instructions ?
All our customer repair instructions are solicited directly from other customers just like you who have purchased and replaced this exact part.
Trimmer blade was dull so installed a new one
Linda - January 1, 2019
👍 1 of 2 people found this instruction helpful
Tool Type
Trimmer
Difficulty
Medium
Time
1-2 hours
Tools Used
Screwdriver, Wrench Set
Parts Used
Removed the T15 screw (8?) but one was hidden by factory sticker. Pulled two halves apart and installed new blade. Definitely a two person job.
Did you find this story helpful?
Thanks for voting and helping fellow customers!
Dull blade
Thomas - June 24, 2017
👍 2 of 4 people found this instruction helpful
Tool Type
Hedge Trimmer
Difficulty
Medium
Time
30-60 minutes
Tools Used
Screwdriver
Parts Used
Replaced blade and gear...
Did you find this story helpful?
Thanks for voting and helping fellow customers!
Hedge Trimmer blades were worn
John - August 17, 2018
👍 0 of 1 people found this instruction helpful
Tool Type
Hedge Trimmer
Difficulty
Medium
Time
30-60 minutes
Tools Used
Screwdriver, T15 security driver
Parts Used
1- NOTICE: YOU WILL NEED A T15 SECURITY DRIVER OR A LONG T15 SECURITY HEAD. This tool should have been provided with the part because it is not a standard tool. This added unneeded complexity to the repair.
2- All screws were removed including 2 phillips head screws for the handle. There are 2 separate covers. Try not to jostle the handle base. There are unsecured parts that may fall out. Remember their positions.
3- Carefully pull the shells apart on a flat surface.
4- Remove the bar assembly raising it and moving it side to side. PAY ATTENTION to the positions of the 2 bearing assemblies
5- Redistribute the grease or use new heavy duty grease on the new bar.
6- Remove the bearing assemblies from the old bar and install them on the new one.
7- Lower the new bar into place while positioning the bearing assemblies. You can carefully turn the plastic motor fan to aid in this step.
8- Reinstall the cover over the gear/motor area. This is a tricky maneuver. Frame parts need to fit into the shell cover and you have to do it blind. Fingers will help with alignment. Check to see that the motor wiring is properly routed so they will not be pinched.
9- Reinstall the cover to the handle/switch area. Reinstall the handle. Test.
Did you find this story helpful?
Thanks for voting and helping fellow customers!
OEM stands for Original Equipment Manufacturer and means the part you’re buying is sourced directly from the manufacturer who made your product. At eReplacementParts, we sell only genuine OEM parts, guaranteeing the part you’re purchasing is of better design and of higher quality than aftermarket parts.
Our product descriptions are a combination of data sourced directly from the manufacturers who made your product as well as content researched and curated by our content & customer service teams. This content is edited and reviewed internally before being made public to customers.
Our customer service team are at the ready daily to answer your part and product questions. We have a dedicated staff with decades of collective experience in helping customers just like you purchase parts to repair their products.
All our part reviews are solicited directly from other customers who have purchased this exact part. While we moderate these reviews for profanity, offensive language or personally identifiable information, these reviews are posted exactly as submitted and no alterations are made by our team.
All our customer repair instructions are solicited directly from other customers just like you who have purchased and replaced this exact part. While we moderate these reviews for profanity, offensive language or personally identifiable information, these reviews are posted exactly as submitted and no alterations are made by our team.
Based on data from past customer purchasing behaviors, these parts are most commonly purchased together along with the part you are viewing. These parts may be necessary or helpful to replace to complete your current repair.
All our installation videos are created and produced in collaboration with our in-house repair technician, Mark Sodja, who has helped millions of eReplacementParts customers over the last 13 years repair their products. Mark has years of experience in selling and repairing both commercial and residential products with a specialty in gas-powered equipment.
This data is collected from customers who submitted a repair instruction after replacing this exact part. Customers can rate how easy the repair was to complete and how long it took. We aggregate this data to provide a repair rating that allows customers to quickly determine the difficulty and time needed to perform their own repair.