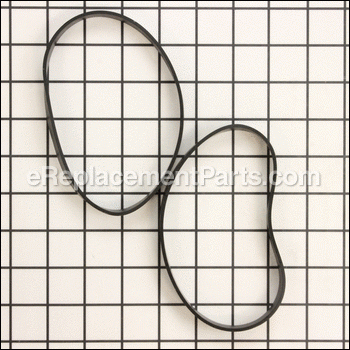
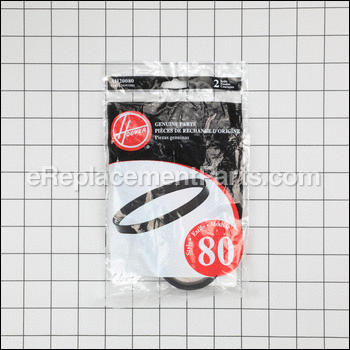
This genuine OEM supplied part is specially made for use with Hoover vacuums. The purpose of the belt is to drive the brush roller assembly. It is installed on the shaft of the motor and on the end of the brush roller. It provides an identical replacement for a missing or a faulty component that was installed on a new unit. Please make sure to check the owners manual and the appropriate diagrams of your model for the correct location and application of this part. Keep in mind this high-quality belt is made of durable rubber and is sold individually.
NOTE: We do have an article and a video on how to install this belt. Here is the link to it.
How to Replace a Vacuum Belt How to Replace a Vacuum Belt " />
Belt-stretch 2 Pack H-AH20080
OEM part for: Hoover
Part Number: H-AH20080
Jump To:
Product Description ?
- Classification: Part
- Weight: 0.01 lbs.
- Shipping: Ships Worldwide
Frequently Purchased Together ?
Compatibility
This Belt-stretch 2 Pack will fit the following 174 machines. Confirm this part works with your model, and view the detailed model diagrams and repair help we have to offer.
Hoover
Show More Compatible ModelsThis item works with the following types of products:
- Vacuum Parts
This part replaces obsolete part #: AH20080, H-562932001, H-38528058, 562932001, 38528058, 38528033
Customer Part Reviews ?
- 1
- 2
Questions & Answers ?
Our customer Service team is at the ready daily to answer your part and product questions.

Ask our Team
We have a dedicated staff with decades of collective experience in helping customers just like you purchase parts to repair their products.
Does this fit my product?Questions & Answers for Belt-stretch 2 Pack
Customer Repair Instructions ?
All our customer repair instructions are solicited directly from other customers just like you who have purchased and replaced this exact part.
Vacuum belt to rotating roller brush
Tool Type
Vacuum
Difficulty
Medium
Time
15-30 minutes
Tools Used
Screwdriver
Parts Used
Clean dust that built up
Place belt on spindle
Place belt on roller brush
Stretch belt enough to place roller back in position
Reattach cover
Brush roll clogged with hair and wouldn't spin causing motor shaft to burn belt.
Tool Type
Vacuum
Difficulty
Easy
Time
Less than 15 minutes
Tools Used
Power Drill
2. Removed top cover. Four screws located on the top of plastic body where logo and height adjustment knobs are, respectively.
3. Removed top cover. Apply gentle rocking pressure to remove cover from rubber gasket. (Looks like a bumper.)
4. With cover off, brush roll and belt are exposed. Remove belt from motor shaft and brush roll from end brackets.
5. Slide new belt onto new brush roll. The correct side has about 1.5 inches of bare plastic with no bristles.
6. With belt on brush roll, hook belt onto motor shaft.
7. Pull brush roll forward and lock into end brackets.
Note: there should be tension on the belt and you should feel a good bit of resistance when pulling forward. The end brackets are built into the body of machine and are hexagonal. Rotate brush roll until it literally snaps into place.
8. Turn on vacuum briefly to verify brush roll spins and belt doesn't bind up.
9. Reinstall top cover.
10. Reinstall hose bracket.
Vacuum belt broke
Tool Type
Vacuum
Difficulty
Easy
Time
Less than 15 minutes
Tools Used
Screwdriver
Parts Used
2. Removed old broken belt.
3. Installed new belt over the motor shaft and brush-roller.
4. Replace bottom plate of vacuum.
Original belt and spool were worn and slipping
Tool Type
Vacuum
Difficulty
Easy
Time
15-30 minutes
Tools Used
Screwdriver
Turned and slid 2 retainer clips and removed a few of the phillips screws to gain access to belt and spool ends.
I pushed belt off shaft, lifted out spool assembly.
Placed new belt on spool, engaged belt on motor shaft, then forced the two square ends of spool into their slots.
Replaced screws, slid and turned two retainer clips to lock assembly in.
Done.
Let it get hot and it broke
Tool Type
Vacuum
Difficulty
Easy
Time
Less than 15 minutes
Tools Used
Screwdriver
Parts Used
Broken vacuum belt
Tool Type
Vacuum
Difficulty
Easy
Time
Less than 15 minutes
Tools Used
Screwdriver, None
Parts Used
belt broke
Tool Type
Vacuum
Difficulty
Easy
Time
Less than 15 minutes
Tools Used
Screwdriver, Nutdriver
Parts Used
The belt on the vacuum broke
Tool Type
Vacuum
Difficulty
Medium
Time
15-30 minutes
Tools Used
Screwdriver
Parts Used
Followed written directions that came with new belts.
Replaced belt without too much trouble.
Closed up the bottom but then realized I had left out the piece below the roller and had to remove the bottom, loft out the roller with attached new belt.
Put the piece that belonged below the roller in place.
Replaced the roller and new belt and closed up again. It would help to have diagrams of the parts along with the explanation of how to repair.
Good belt with enough give to make it attach relatively easily. Very pleased that vacuum now works well again.
Worn out belt and very dirty filter.
Tool Type
Vacuum
Difficulty
Easy
Time
Less than 15 minutes
Tools Used
Screwdriver
2. Lifted up roller and removed belt.
3. Reinstalled new belt over drive motor spindle and roller brush.
4. Stretched belt and placed roller back in guides.
5. Reinstalled roller cover and inserted and tightened screws.
1. Opened filter door removed and replaced filter snd closed access door.
The plastic component that held the roller brush in place broke and caused the roller to be misaligned and grind away other parts of the plastic base.
Tool Type
Vacuum
Difficulty
Easy
Time
Less than 15 minutes
Tools Used
Screwdriver
OEM stands for Original Equipment Manufacturer and means the part you’re buying is sourced directly from the manufacturer who made your product. At eReplacementParts, we sell only genuine OEM parts, guaranteeing the part you’re purchasing is of better design and of higher quality than aftermarket parts.
Our product descriptions are a combination of data sourced directly from the manufacturers who made your product as well as content researched and curated by our content & customer service teams. This content is edited and reviewed internally before being made public to customers.
Our customer service team are at the ready daily to answer your part and product questions. We have a dedicated staff with decades of collective experience in helping customers just like you purchase parts to repair their products.
All our part reviews are solicited directly from other customers who have purchased this exact part. While we moderate these reviews for profanity, offensive language or personally identifiable information, these reviews are posted exactly as submitted and no alterations are made by our team.
All our customer repair instructions are solicited directly from other customers just like you who have purchased and replaced this exact part. While we moderate these reviews for profanity, offensive language or personally identifiable information, these reviews are posted exactly as submitted and no alterations are made by our team.
Based on data from past customer purchasing behaviors, these parts are most commonly purchased together along with the part you are viewing. These parts may be necessary or helpful to replace to complete your current repair.
All our installation videos are created and produced in collaboration with our in-house repair technician, Mark Sodja, who has helped millions of eReplacementParts customers over the last 13 years repair their products. Mark has years of experience in selling and repairing both commercial and residential products with a specialty in gas-powered equipment.
This data is collected from customers who submitted a repair instruction after replacing this exact part. Customers can rate how easy the repair was to complete and how long it took. We aggregate this data to provide a repair rating that allows customers to quickly determine the difficulty and time needed to perform their own repair.


