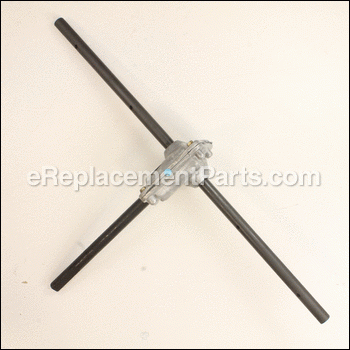


Gearbox Asm-auger 918-04172C
OEM part for: MTD, Yard Machines, Yard Man
Part Number: 918-04172C
$439.44
In Stock
Compatibility
This Gearbox Asm-auger will fit the following 838 machines. Confirm this part works with your model, and view the detailed model diagrams and repair help we have to offer.
This item works with the following types of products:
- Snowblower Parts
This part replaces obsolete part #: 618-04172B, 918-04172B, 618-04172A, 618-04192, 618-04192A, 618-04192B, 918-04192B, 618-04172, 918-04192, 918-04172A, 918-04192A
Customer Part Reviews ?
Average Rating (out of 5):
Click to filter by ratings:
5 stars
1
4 stars
0
3 stars
0
2 stars
0
1 stars
0
< PREV
- 1
semi-easy repair parts fit great
2-3 hour repair parts fit as full replacement
Guest -
December 10, 2022
Verified Purchase
Questions & Answers ?
Our customer Service team is at the ready daily to answer your part and product questions.

Ask our Team
We have a dedicated staff with decades of collective experience in helping customers just like you purchase parts to repair their products.
Does this fit my product?Questions & Answers for Gearbox Asm-auger
No questions have been asked yet
Customer Repair Instructions ?
All our customer repair instructions are solicited directly from other customers just like you who have purchased and replaced this exact part.
Auger gear box ground-flat all gears, creating a total auger failure in the Craftsman 26" snowblower - the gearbox is a pre-assembled part (you cannot just purchase new gears for the old box), so the
Michael - November 8, 2017
👍 2 of 3 people found this instruction helpful
Tool Type
Snowblower
Difficulty
Medium
Time
More than 2 hours
Tools Used
Screwdriver, Pliers, Socket set, Wrench Set, Adjustable Wrench, Vice grips
Parts Used
1. Empty oil and gas from snow blower (it will leak once you flip it over to make the repair).
2. Remove upper plastic cowling from snow blower, then flip over and remove the metal housing/cover to gain access to the under body gears that are driven by the motor. This is where a single screw is anchored into the auger drive shaft (which passes through the snow blower intake area where the auger meets the snow).
3. Take a picture of the drive-wheel area before you start removing parts (just to ensure you know how to put it back). Release springs that hold the drive wheel friction (this makes gaining access to the screw that holds the auger drive shaft MUCH easier). Be careful not to lose screws or springs as you break it down.
4. Locate the single screw, located above the drive pulley, and loosen the screw. it will slowly allow the auger drive shaft to slide out....but you may need to pull the auger shaft with force, pending on how long it's been there, or bent parts, etc. The space to get your wrench in there is painfully small - - this is where a set of needle nose vice grips may be handy (to hold the bolt so that it doesn't fall into the housing area...which is hard to recover.
5. Remove the tines from the old auger shaft, and replace them onto the new shaft EXACTLY how you took them off the old one. This must be done before you re-install the auger. Remove the side supports as well - these also must be in-place before you re-install the new auger shaft into the drive port. Set the old/broken shaft aside (it's junk).
6. Insert the new auger shaft into the same port, taking care to "seat" it correctly into both the drive shaft hole, and the pre-formed inset found within the drive pulley. If you find it's sitting a bit cockeyed, you're not seated fully....slowly rotate either the shaft or drive wheel pulley until they full seat FLAT. Once you get this, start to thread the bolt into the shaft. As you tighten, ensure everything is aligned before you fully tighten).
7. Tighten EVERYTHING you removed TIGHT. These things tend to vibrate themselves apart...do yourself a favor and crank-down on the bolts you're replacing (but don't over-torque or strip).
8. Replace all housing covers. Add oil. Add a small amount of gas. Test run it. There should be no rubbing inside the auger housing, or 1st or 2nd stage tines/blowers. If you're good, you're good...if not, see step#1 and do it again.
9. Good luck. It's not a super complicated job, but absolutely a pain the #$!.
Did you find this story helpful?
Thanks for voting and helping fellow customers!
OEM stands for Original Equipment Manufacturer and means the part you’re buying is sourced directly from the manufacturer who made your product. At eReplacementParts, we sell only genuine OEM parts, guaranteeing the part you’re purchasing is of better design and of higher quality than aftermarket parts.
Our product descriptions are a combination of data sourced directly from the manufacturers who made your product as well as content researched and curated by our content & customer service teams. This content is edited and reviewed internally before being made public to customers.
Our customer service team are at the ready daily to answer your part and product questions. We have a dedicated staff with decades of collective experience in helping customers just like you purchase parts to repair their products.
All our part reviews are solicited directly from other customers who have purchased this exact part. While we moderate these reviews for profanity, offensive language or personally identifiable information, these reviews are posted exactly as submitted and no alterations are made by our team.
All our customer repair instructions are solicited directly from other customers just like you who have purchased and replaced this exact part. While we moderate these reviews for profanity, offensive language or personally identifiable information, these reviews are posted exactly as submitted and no alterations are made by our team.
Based on data from past customer purchasing behaviors, these parts are most commonly purchased together along with the part you are viewing. These parts may be necessary or helpful to replace to complete your current repair.
All our installation videos are created and produced in collaboration with our in-house repair technician, Mark Sodja, who has helped millions of eReplacementParts customers over the last 13 years repair their products. Mark has years of experience in selling and repairing both commercial and residential products with a specialty in gas-powered equipment.
This data is collected from customers who submitted a repair instruction after replacing this exact part. Customers can rate how easy the repair was to complete and how long it took. We aggregate this data to provide a repair rating that allows customers to quickly determine the difficulty and time needed to perform their own repair.