eReplacementParts.com
877-346-4814
Poulan Parts

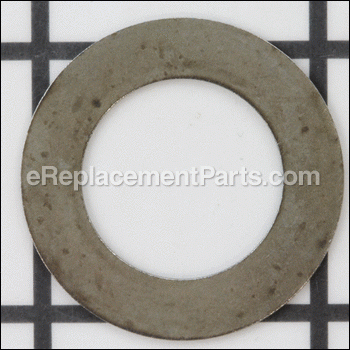
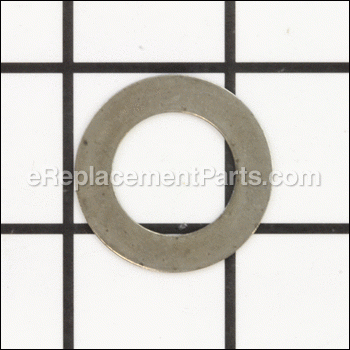
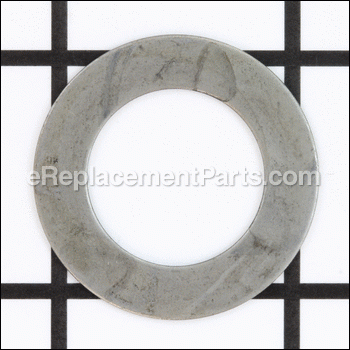
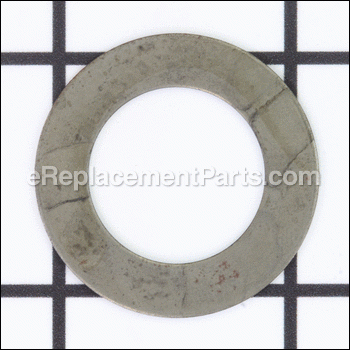
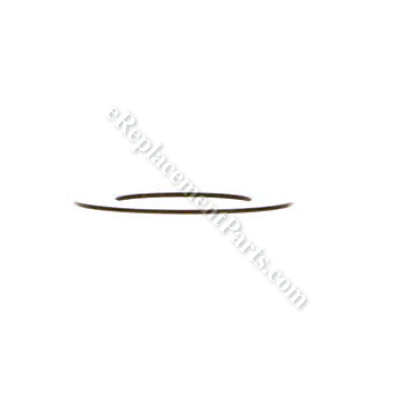
Washer Thrust 532006266

OEM part for: Husqvarna, Poulan, Ryobi

Part Number: 532006266


Install
Videos!
Washer Thrust - 532006266:Husqvarna 360 View
Washer Thrust - 532006266:HusqvarnaWasher Thrust - 532006266:HusqvarnaWasher Thrust - 532006266:HusqvarnaWasher Thrust - 532006266:HusqvarnaWasher Thrust - 532006266:HusqvarnaWasher Thrust - 532006266:Husqvarna 360 View
In Stock
Ships within 1 business day

Minimum Quantity of 2 Required

Easy 30-60 minutes (8 rated repairs)?
OEM: Original Equipment Manufacturer ?
Craftsman Husqvarna Jonsered Poulan Ryobi Weed Eater

Product Description ?

The thrust washer fits next to the ring and the 16 gauge washer. This is an authentic Craftsman replacement part used in compatible lawn tractors. This item is priced as an individual replacement. It is made of metal and may require a pair of pliers during the replacement of this part if it becomes broken.

  • Classification: Part
  • Weight: 0.02 lbs.
  • Shipping: Ships Worldwide

Compatibility

This Washer Thrust will fit the following 6214 machines. Confirm this part works with your model, and view the detailed model diagrams and repair help we have to offer.

Displaying 20 of 6214 matching models.

Don't see yours? Try searching our site for :

6214 total model matches. Try the above search to narrow your results.

This is the official OEM part for the following brands:

  • Craftsman
  • Husqvarna
  • Jonsered
  • Poulan
  • Ryobi
  • Weed Eater

This item works with the following types of products:

  • Lawn Mower
  • Lawn Tractor
  • Snowblower
  • Trimmer

This part replaces obsolete part #: 532124956, , 5321249-31, 6266H, 532124931

Customer Part Reviews ?

5
Average Rating (out of 5):
5 Reviews
Click to filter by ratings:
5 stars
5
4 stars
0
3 stars
0
2 stars
0
1 stars
0
  • Highest Rating
  • Most Recent
< PREV
  • 1
NEXT >
  • Thank you
    Quality parts, very good customer services, fast delivery, received everything I ordered ( was a large order) thank you, keep it up, see you again
    Guest - July 6, 2023 Verified Purchase
    Ordered multiple parts, received them all in a timely fashion.
    Price was very reasonable. Received the order complete, installed on the lawn tractor and was using it the next day. Will use e-replacement again! Thanks for the user friendly site!
    Guest - May 11, 2023 Verified Purchase
    Everything was perfect. Thank you.
    Everything was perfect.
    Guest - June 28, 2022 Verified Purchase
    Mower part
    Perfect fit work like new
    Anonymous - June 22, 2021 Verified Purchase
    Right Part Right Price
    I use only eReplacements for all my parts needs.
    Guest - May 17, 2020 Verified Purchase

    Questions & Answers ?

    Our customer Service team is at the ready daily to answer your part and product questions.

    photo of team member
    Ask our Team

    We have a dedicated staff with decades of collective experience in helping customers just like you purchase parts to repair their products.

    Does this fit my product?

    Questions & Answers for Washer Thrust


    What is the diameter of the shaft in the steering assembly on this model of craftsman lawn tractor?
    Richard for model number 917255581 asked on 2022-06-22
    Hello Richard, Thank you for the question. The Steering Shaft Assy Part Number: 582986601 is 5/8" in diameter. If you need help placing an order, customer service is open 7 days a week. Please feel free to give us a call. We look forward to hearing from you!
    eReplacementParts Team June 22, 2022

    Customer Repair Instructions ?

    All our customer repair instructions are solicited directly from other customers just like you who have purchased and replaced this exact part.

    Easy 30-60 minutes (8 rated repairs)?

    The front axles were bent and the bearing races on one side were worn out. One of the axles had groves in them from the worn bearings.

    John - May 14, 2016
    👍 3 of 3 people found this instruction helpful
    Tool Type

    Lawn Tractor

    Difficulty

    Easy

    Time

    30-60 minutes

    Tools Used

    Screwdriver, Pliers, Socket set, Wrench Set

    Took the caps off of the wheels and the top of the spindle assemblies. i jack up the front of the riding mower and blocked it. Removed the e-clips from each wheel. Pulled them off. Check to see what the problem was. I could that the bearing on one of the wheels was bad. That the other spindle assembly was bent and the other had been worn by the bad bearing. I removed both wheels. Pulled the e -clips off the top of the spindles assemblies and pull them out. Unhooked the tie rods from the spindle assemblies. I pulled them apart and slid them out. I separated them and removed the bad parts. I saw that the link drag was also worn and bent. I removed it from under the steering assembly. I went to the website ordered the correct parts. I found a parts list by entering the serial number from the lawn mower. The website showed me my lawn mower and a picture of all the parts. I found the parts I needed by going the the front end of the lawn mowers pictures. The parts were picture so I could tell what exact parts I needed. I ordered the parts and waited for the parts. It took 3 days for them to come very nice. I clean up the areas of the old grease and anything that needed cleaning before I reassembled the front end of the lawn mowers. I check all the parts to make sure they were correct. I reassembled the lawn mower the same way I took it apart. I reconnected the link drag first. Then I re greased the spindle assembles and slid the black in to their correct position and put the e-clips on. I then connected the link drag to the spindle assembly on the correct side. I connected the tie rod to both sides of the two spindle assemblies. I took the wheel into my shop and use a large vise to hold the wheel so that I could knock out the bad bearings. I used a punch and a hammer to knock them out. I slid the punch down into the wheel so I could find the inner side oft he bearing and tap it out. I removed all four bearing two in each wheel. I examine them and found the one that was bad. I clean out the shell removing the geese and anything else I could find. I cleaned out the area where the grease zerks were so that I could replace the bearings in the correct position. The bearings have a piece of the inner bearing where the grease zerk is supposed to go. You need to place the bearing in the correct position so that the grease zerk fits in that spot. That way the zerk won't get in the way when you put it back in and the grease zerk will work properly when you need to put grease in to the bearing in the wheel. Place the bearings back into the wheel so it is in the correct position. Take block of wood or some to pound the bearings back in. That way you won't damage the bearing. After assembling the wheels . I replaced them back on the spindles and slid the e-clips back on. I tightens ll the nuts and bolts. I regressed all the fittings. I lowered the mower and try the steering assembly out it worked great. I went and test mowed my lawn works great. John
    Did you find this story helpful?
    Thanks for voting and helping fellow customers!

    My machine is old and there was a lot of play in the steering wheel. I needed to replace worn parts.

    Ross - May 10, 2020
    👍 1 of 1 people found this instruction helpful
    1. Had to remove the mower deck
    2. Disassemble the steering column.
    3. Once disassembly was completed, the rest was straight forward. It wasn't all rusted fast. Things came apart easily.
    Did you find this story helpful?
    Thanks for voting and helping fellow customers!

    Drag link broken and worn bushings

    Reggie - July 17, 2020
    Tool Type

    Lawn Tractor

    Difficulty

    Easy

    Time

    More than 2 hours

    Tools Used

    Screwdriver, Pliers, Socket set, Wrench Set, Adjustable Wrench

    This is a extensive repair that required the removal of hood, battery, disconnect wiring, removal of steering assembly. Care should be taken to know where bolts are located for proper replacement, mark where wires are attached on dash and don't get in a hurry.
    Did you find this story helpful?
    Thanks for voting and helping fellow customers!

    Spindle had been gouged by bad bushing

    Wilton - July 8, 2020
    Tool Type

    Lawn Tractor

    Difficulty

    Easy

    Time

    15-30 minutes

    Tools Used

    Screwdriver, Pliers, small hammer

    Jacked up the front end of mower.
    Removed hubcap
    Pried ring clip off
    Removed washers and wheel, as well as inside washer
    Removed spindle cap
    Removed ring clip
    Removed spindle

    Pried out the two plastic bushings in the spindle tube and replaced with two purchased locally (did not show these on the parts diagram that cam with the mower.)
    Replaced parts in reverse from above.
    Installed two new wheel/tire assemblies purchased for 1/2 the price ereplacement parts wanted for two wheels (no tires); purchased from another dealer.
    Did you find this story helpful?
    Thanks for voting and helping fellow customers!

    Bushing wore out in steering

    Scott - June 19, 2020
    Tool Type

    Lawn Tractor

    Difficulty

    Easy

    Time

    30-60 minutes

    Tools Used

    Socket set, Wrench Set

    I removed the mower deck and steering gear put new bushings and washers on then put back together works great.
    Did you find this story helpful?
    Thanks for voting and helping fellow customers!

    Lawn Tractor front-end was damaged.

    Bernard - June 29, 2018
    Removed tires and unhooked steering arms.
    Removed axle.
    Replaced axle and installed new washers and new spindles.
    Secured with new clips and reinstalled steering arms and tires.
    Did you find this story helpful?
    Thanks for voting and helping fellow customers!

    Lost steering bearing an stripped gear shaft. could only turn right!

    Joey - April 13, 2017
    👍 0 of 1 people found this instruction helpful
    Tool Type

    Lawn Tractor

    Difficulty

    Easy

    Time

    30-60 minutes

    Tools Used

    Screwdriver, Socket set, Wrench Set

    Dropped mower deck, removed worn gear and steering shaft. Reassembled in reverse order...
    Did you find this story helpful?
    Thanks for voting and helping fellow customers!

    Steering gear stripped out

    Don - October 11, 2016
    👍 0 of 1 people found this instruction helpful
    Tool Type

    Lawn Mower

    Difficulty

    Easy

    Time

    30-60 minutes

    Tools Used

    Socket set, Wrench Set

    Removed steering wheel, steering shaft and bracket. Welded bracket. Replaced bushings and bearings and reinstalled parts.
    Did you find this story helpful?
    Thanks for voting and helping fellow customers!

    OEM stands for Original Equipment Manufacturer and means the part you’re buying is sourced directly from the manufacturer who made your product. At eReplacementParts, we sell only genuine OEM parts, guaranteeing the part you’re purchasing is of better design and of higher quality than aftermarket parts.

    Learn More

    Our product descriptions are a combination of data sourced directly from the manufacturers who made your product as well as content researched and curated by our content & customer service teams. This content is edited and reviewed internally before being made public to customers.

    Our customer service team are at the ready daily to answer your part and product questions. We have a dedicated staff with decades of collective experience in helping customers just like you purchase parts to repair their products.

    All our part reviews are solicited directly from other customers who have purchased this exact part. While we moderate these reviews for profanity, offensive language or personally identifiable information, these reviews are posted exactly as submitted and no alterations are made by our team.

    All our customer repair instructions are solicited directly from other customers just like you who have purchased and replaced this exact part. While we moderate these reviews for profanity, offensive language or personally identifiable information, these reviews are posted exactly as submitted and no alterations are made by our team.

    Based on data from past customer purchasing behaviors, these parts are most commonly purchased together along with the part you are viewing. These parts may be necessary or helpful to replace to complete your current repair.

    All our installation videos are created and produced in collaboration with our in-house repair technician, Mark Sodja, who has helped millions of eReplacementParts customers over the last 13 years repair their products. Mark has years of experience in selling and repairing both commercial and residential products with a specialty in gas-powered equipment.

    This data is collected from customers who submitted a repair instruction after replacing this exact part. Customers can rate how easy the repair was to complete and how long it took. We aggregate this data to provide a repair rating that allows customers to quickly determine the difficulty and time needed to perform their own repair.

    eReplacementParts.com
    7174 South 400 West
    Suite 5
    Midvale, UT 84047
    visa mastercard discover american express PayPal
    Recent searches:
    Suggested searches:
    Models:
    Manufacturers:
    Need help finding your model number?