

How to Replace the Starter Assembly on a Gas Trimmer
Many 2-cycle trimmer models share similar designs, even between different manufacturers, so the steps for many trimmer repairs are often similar between trimmers.
Likewise, the steps for replacing a 2-cycle trimmer starter assembly are very similar for hundreds of trimmer models, and starter replacements are a very common type of tool repair.
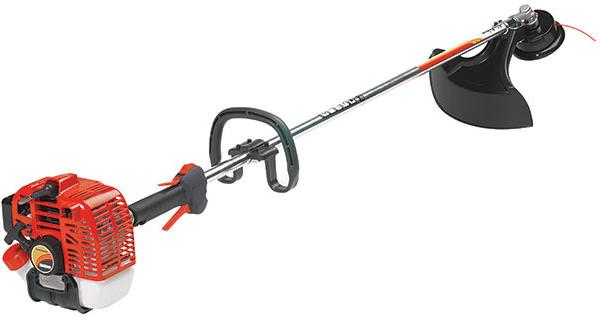
This article covers the general steps to replace a trimmer starter in most 2-cycle trimmers. We use the Shindaiwa T-231 trimmer as our demonstration example.
How Trimmer Starter Assemblies Work
Like the starters of most 2-cycle engines, a trimmer's starter assembly uses several parts to do its job.
Starter assemblies consist of a pulley, a starter pull cord, a return spring that rewinds the cord, and a clutch-like system that engages the engine crankshaft.
- Pulling on the starter cord rotates the starter assembly. Because the starter assembly is engaged in the crankshaft, pulling the starter cord also turns the engine crankshaft.

- Turning the crankshaft causes the engine's flywheel to turn. The flywheel passes magnets as it turns that help it to generate electrical energy.
- Electrical energy from the turning flywheel is transferred to the engine's ignition coil. Electricity then passes from the ignition coil to the spark plug, ignites the engine's fuel, and starts the machine.
In short, your trimmer's 2-cycle engine needs a little human power to help it generate a spark that will start its engine, and the starter assembly is responsible for the first step in converting human power to engine power. It's not hard to see why having a properly working starter is important.
Any part of a starter breaking or becoming damaged usually requires replacing the starter. The most common reason for replacing a starter assembly is the pull cord breaking. Individual parts of a starter can be replaced, but the truth is that the small amount of money you usually save on parts isn't enough to justify the difficult task of rebuilding the assembly.
Starter assemblies usually cost little more than their individual parts, and considering how easy they are to replace, replacing the entire assembly is usually the best choice when just one of its parts fails.
Trimmer Starter Replacement Steps
Of course, these steps may be just a little different for different trimmer models, but the general idea is the same:
- Remove screws and other parts that hold the starter assembly in place.
- Remove the old assembly.
- Install the new assembly.
- Engage the starter in the crankshaft.
- Affix the new assembly by replacing screws and other parts that hold it in place.
We use the Shindaiwa T-231 in our demonstration, but its repair steps will be very similar to those of most trimmers.
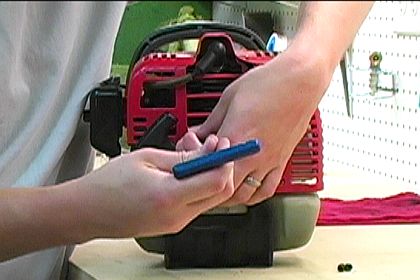
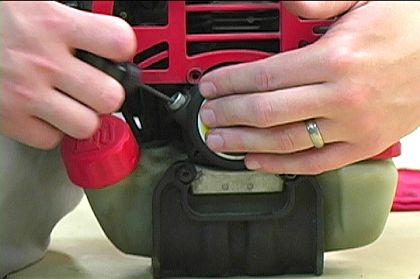
1. Unscrew the four screws holding the starter assembly in place.
- For the T-231, these are the only fasteners holding the assembly down. Unscrew them with a hex driver. Use an appropriate driver for other trimmer models.
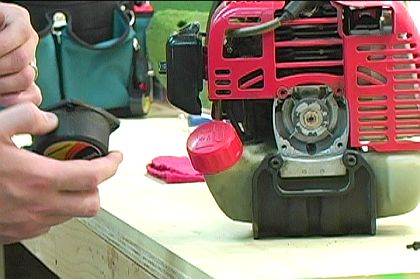
2. Remove the old starter assembly.
- The old starter assembly should slide right out once the screws are removed. You may have to pull on the engine housing a little to help free it up.
- Removing a starter assembly on other trimmer models may involve the removal of other parts.
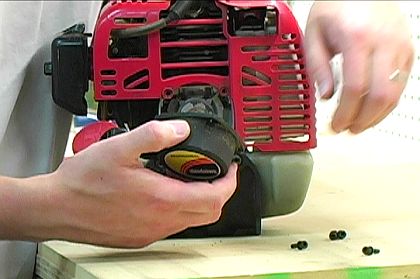
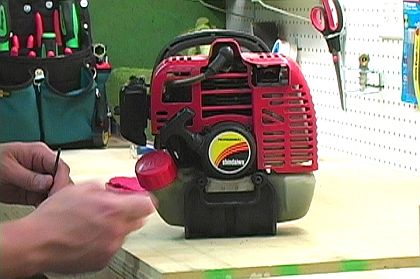
3. Install the new starter assembly.
- The new starter assembly will be ready to install right out of the package. Slide it into place.
- The starter for the Shindaiwa T-231 will actually make a clicking sound when it locks into its correct position.
4. Pull the starter cord to engage the starter in the crankshaft.
- The clutch-like system on the back of the starter assembly must be properly engaged in the engine's crankshaft in order to be installed correctly.
- Give the starter's cord a little pull until you feel the assembly engage in the engine shaft.
5. Replace the four starter assembly screws.
- With the starter assembly engaged and properly installed, it's ready to be affixed in place by returning the four screws that hold it down.
This trimmer starter replacement is now complete.
Conclusion
This repair takes less than five minutes and can save tool users a load of money when they perform it themselves. It's likely that your 2-cycle trimmer starter replacement will be similar to the one we demonstrate in this article and repair video.
Type your trimmer's model number in the "Search by Model Number" field at the top-left of this page. You will be directed to your trimmer's parts page where you can view its breakdown schematic and parts list.
Or, you can find your trimmer model by visiting our Trimmer Parts page. eReplacementParts.com stocks trimmer parts for many major trimmer manufacturers, including Echo trimmer parts, and Tanaka trimmer parts.