eReplacementParts.com
877-346-4814
Husqvarna Parts

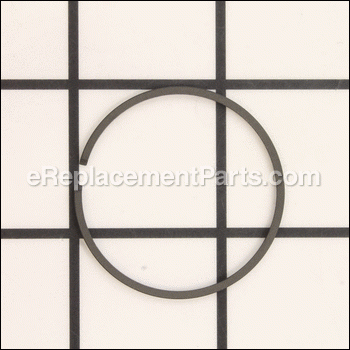
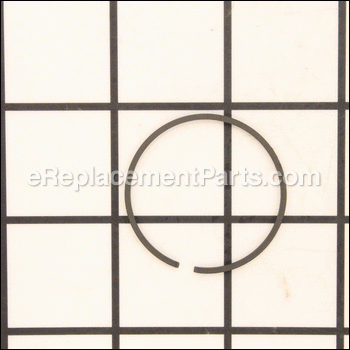
Piston Ring 575227901

OEM part for: Husqvarna, Poulan

Part Number: 575227901


Install
Videos!
Piston Ring - 575227901:Husqvarna 360 View
Piston Ring - 575227901:HusqvarnaPiston Ring - 575227901:HusqvarnaPiston Ring - 575227901:HusqvarnaPiston Ring - 575227901:Husqvarna 360 View
In Stock
Order within the next 4 hours and your part ships today!
Medium 30-60 minutes (8 rated repairs)?
OEM: Original Equipment Manufacturer ?
HusqvarnaPoulan
Does this d-block d-md-none fit my product?

Product Description ?

This genuine manufacturer sourced replacement part is specially made for use with a variety of handheld lawn and garden equipment. This part is installed on top of the piston/connecting rod. Its purpose is to create a seal in the cylinder so that it can build pressure. A worn or broken piston ring will allow combustion gases to escape the seal and enter the crankcase, causing low compression and a loss of power. If compression is reduced significantly, the engine will not run at all. Includes one (1) metal piston ring.

Tools Required: Receptacle for draining fuel, Torx wrenches, spark plug wrench, 10mm wrench (or adjustable), long-nosed pliers, rubber mallet, standard screwdriver, old starter rope (or similar cord), adjustable pliers, 2-cycle engine oil, razor blade, ignition gapping gauge.

• Remove the air cleaner
• Drain the fuel
• Remove the air cleaner case
• Remove the carburetor
• Remove the intake insulator
• Remove the spark plug
• Remove the engine cover
• Remove the insulator gasket
• Remove the starter assembly
• Remove the fuel tank
• Remove the air duct
• Separate the engine
• Bind the engine
• Remove the clutch
• Remove the flywheel
• Remove the starter pulley
• Unbind the engine
• Remove the muffler
• Separate the cylinder from the crankcase
• Remove the piston ring
• Install the piston ring

  • Classification: Part
  • Weight: 0.01 lbs.
  • Shipping: Ships Worldwide

Compatibility

This part will fit the following 61 machines

Husqvarna

125 E (2005-09) Edger View Diagrams & Manuals
125 E (2006-03) Edger View Diagrams & Manuals
125 E (2008-01) Edger View Diagrams & Manuals
125 E (2006-01) Edger View Diagrams & Manuals
128LD 952711969 2010-06 Trimmer/Edger View Diagrams & Manuals
125B 28cc 2-Stroke 170-MPH Gas-Powered Handheld Gas Blower View Diagrams & Manuals
128C (2010-08) Trimmer/Edger View Diagrams & Manuals
125C (2008-06) Trimmer View Diagrams & Manuals
125C (2008-01) Trimmer View Diagrams & Manuals
125C (2008-02) Trimmer View Diagrams & Manuals
125C (2005-06) Trimmer View Diagrams & Manuals
125C (2007-04) Trimmer View Diagrams & Manuals
125C (2005-09) Trimmer View Diagrams & Manuals
125BVX (2008-01) Handheld Leaf Blower View Diagrams & Manuals
125BVX (2007-05) Handheld Leaf Blower View Diagrams & Manuals
125BVX (2011-04) Handheld Leaf Blower View Diagrams & Manuals
125BVX (2010-06) 952711902, Handheld Leaf Blower View Diagrams & Manuals
125BX (2008-06) Handheld Leaf Blower View Diagrams & Manuals
125BX (2010-06) Handheld Leaf Blower View Diagrams & Manuals
128CD 28cc Gas Line Lawn Trimmer View Diagrams & Manuals
125BVX (2001-04) 28cc 2-Cycle Gas Powered 170 Mph Blower/Vac With Smart Start View Diagrams & Manuals
125BVX (2008-06) 28cc 2-Cycle Gas Powered 170 Mph Blower/Vac With Smart Start View Diagrams & Manuals
125R (2006-03) Brushcutter View Diagrams & Manuals
125R (2006-10) Brushcutter View Diagrams & Manuals
125R (2007-10) Brushcutter View Diagrams & Manuals
125R (2008-06) Brushcutter View Diagrams & Manuals
125RJ (2007-04) Brushcutter View Diagrams & Manuals
125RJ (2008-06) Brushcutter View Diagrams & Manuals
125RJ (2009-09) Brushcutter View Diagrams & Manuals
128R (2010-08) Brushcutter View Diagrams & Manuals
125L (2007-04) Trimmer View Diagrams & Manuals
124 R (2010-08) Brushcutter View Diagrams & Manuals
128 RJ (952715759) (2011-08) Row Brushcutter View Diagrams & Manuals
128 RJ (952715754) (2010-08) Brushcutter View Diagrams & Manuals
128 RJ (952711950) (2010-08) Brushcutter View Diagrams & Manuals
124 C (952715671) (2010-08) Trimmer View Diagrams & Manuals
124 C (952715639) (2010-06) Trimmer View Diagrams & Manuals
124 C (2010-06) Trimmer View Diagrams & Manuals
124 L (2010-06) Us Can View Diagrams & Manuals
124 L (2008-06) Trimmer View Diagrams & Manuals
125 LDX (545014337) (2010-08) Trimmer View Diagrams & Manuals
125 LDX (2009-09) Row Trimmer View Diagrams & Manuals
125 LDX (2008-06) Trimmer View Diagrams & Manuals
125 LDX (2007-04) Trimmer View Diagrams & Manuals
128 DJX (966712501) (2012-05) Trimmer View Diagrams & Manuals
128 DJX (966712501) (2011-01) Trimmer View Diagrams & Manuals
128 L (952715755) (2010-08) Row Trimmer View Diagrams & Manuals
128 L (952715750) (2010-08) Eu Au View Diagrams & Manuals
128 L (952711946) (2010-08) Us Can View Diagrams & Manuals
128 LD (952711969) (2010-08) Us Can View Diagrams & Manuals
128 LD (952711953) (2010-08) Us Lowes View Diagrams & Manuals
128LDX (966589201) (2010-06) Us Can View Diagrams & Manuals
128 LDX (952715757) (2012-01) Row Trimmer View Diagrams & Manuals
128 LDX (952715753) (2012-01) Eu Au View Diagrams & Manuals
128 LDX (952711948) (2010-08) Us Can View Diagrams & Manuals
128 LDX (545192137) (2010-08) Row Trimmer View Diagrams & Manuals
130C String Trimmer View Diagrams & Manuals
130L String Trimmer View Diagrams & Manuals
330LK Straight Shaft Gas Trimmer View Diagrams & Manuals

Poulan

PP2822 Hedge Trimmer View Diagrams & Manuals
PP2822 (966513101 2011-03) 22" Gas Powered Hedge Trimmer View Diagrams & Manuals
Show More Compatible Models
Don't see yours? Try searching our site for :

This item works with the following types of products:

  • Edger Parts
  • Hedge Trimmer Parts
  • Trimmer Parts
  • Blower Parts

This part replaces obsolete part #: 5300192-83, 530019283

Customer Part Reviews ?

5
Average Rating (out of 5):
1 Review
Click to filter by ratings:
5 stars
1
4 stars
0
3 stars
0
2 stars
0
1 stars
0
  • Highest Rating
  • Most Recent
< PREV
  • 1
NEXT >
  • Great part and worked as exspected
    Fit perfectly andf quick shipping.
    Guest - November 12, 2019 Verified Purchase
    t
    t
    t - t days ago Verified Purchase
    eReplacementParts Team
    t

    Questions & Answers ?

    Our customer Service team is at the ready daily to answer your part and product questions.

    photo of team member
    Ask our Team

    We have a dedicated staff with decades of collective experience in helping customers just like you purchase parts to repair their products.

    Does this fit my product?

    Questions & Answers for Piston Ring


    No questions have been asked yet

    Customer Repair Instructions ?

    All our customer repair instructions are solicited directly from other customers just like you who have purchased and replaced this exact part.

    Medium 30-60 minutes (8 rated repairs)?

    Low compression

    William - July 2, 2017
    👍 2 of 2 people found this instruction helpful
    Tool Type

    Blower

    Difficulty

    Medium

    Time

    30-60 minutes

    Tools Used

    Screwdriver, Socket set, Nutdriver

    Disassembled replaced piston ring
    Runs like new compression went from 60 lb to 120 lb
    Did you find this story helpful?
    Thanks for voting and helping fellow customers!

    Scuffed piston and stuck ring

    Troy - December 18, 2017
    👍 1 of 1 people found this instruction helpful
    Tool Type

    Blower

    Difficulty

    Medium

    Time

    30-60 minutes

    Tools Used

    Power Drill, Socket set, Torx bits, allen bits

    Clean and debur the piston. Installed new piston ring. Reassemble the blower.
    Did you find this story helpful?
    Thanks for voting and helping fellow customers!

    ring repair.

    ermon - September 1, 2023
    Tool Type

    Trimmer

    Difficulty

    Medium

    Time

    30-60 minutes

    Tools Used

    Pliers, star head screw drivers

    no compression works fine now. thanks
    Did you find this story helpful?
    Thanks for voting and helping fellow customers!

    Low compression. Would not start.

    William - December 28, 2017
    Tool Type

    Blower

    Difficulty

    Medium

    Time

    1-2 hours

    Tools Used

    Screwdriver, Socket set

    Removed the piston and bottom crank case cover. Replaced piston ring which was broken.
    Also replaced crankshaft seals. Replaced crankcase bottom seals.
    Did you find this story helpful?
    Thanks for voting and helping fellow customers!

    Low compression. Would not run

    Stephen - November 25, 2017
    Tool Type

    Trimmer

    Difficulty

    Medium

    Time

    1-2 hours

    Tools Used

    Screwdriver, Pliers, Adjustable Wrench

    Tore down the motor and replaced the piston ring, with help with one of your youtube videos. Compression is good now.
    Did you find this story helpful?
    Thanks for voting and helping fellow customers!

    Hydraulic lock of piston/piston ring broken on removal/piston would stick

    Vic - September 15, 2017
    Tool Type

    Trimmer

    Difficulty

    Medium

    Time

    30-60 minutes

    Tools Used

    Screwdriver, Socket set, Torque Heads

    Removed housings & parts to get to head screws. Removed head from motor & honed inside of cylinder wall. Cleaned carbon fouling from piston & crankcase area. Broke first piston ring during reassembly. Had ordered 2 rings in case of such problem/successfully installed spare ring & reassembled head.
    Did you find this story helpful?
    Thanks for voting and helping fellow customers!

    The edger motor was seized up.

    James - August 26, 2017
    Tool Type

    Edger

    Difficulty

    Hard

    Time

    1-2 hours

    Tools Used

    Screwdriver, Pliers, Nutdriver

    1. Disassembled the edger.
    2. Found the piston ring broken causing the engine to seize up.
    3. Replaced the piston ring.
    4. Reassembled the edger with the new starter cup spring. I broke the old spring with the motor seized up.
    5. Started and used the edger.
    Did you find this story helpful?
    Thanks for voting and helping fellow customers!

    Straight gas was ran thru it. Not mixed.

    Preston - November 13, 2016
    👍 1 of 2 people found this instruction helpful
    Tool Type

    Blower

    Difficulty

    Easy

    Time

    30-60 minutes

    Tools Used

    Screwdriver, Socket set, Wrench Set, Nutdriver, Hex drivers

    Disassembled body.
    Removed cylinder head.
    Replaced piston and ring. Be sure to install the piston ring in the right direction and that the gap closes on the anti rotation pin.
    Reassembled body.
    Runs like brand new.
    Did you find this story helpful?
    Thanks for voting and helping fellow customers!

    OEM stands for Original Equipment Manufacturer and means the part you’re buying is sourced directly from the manufacturer who made your product. At eReplacementParts, we sell only genuine OEM parts, guaranteeing the part you’re purchasing is of better design and of higher quality than aftermarket parts.

    Our product descriptions are a combination of data sourced directly from the manufacturers who made your product as well as content researched and curated by our content & customer service teams. This content is edited and reviewed internally before being made public to customers.

    Our customer service team are at the ready daily to answer your part and product questions. We have a dedicated staff with decades of collective experience in helping customers just like you purchase parts to repair their products.

    All our part reviews are solicited directly from other customers who have purchased this exact part. While we moderate these reviews for profanity, offensive language or personally identifiable information, these reviews are posted exactly as submitted and no alterations are made by our team.

    All our customer repair instructions are solicited directly from other customers just like you who have purchased and replaced this exact part. While we moderate these reviews for profanity, offensive language or personally identifiable information, these reviews are posted exactly as submitted and no alterations are made by our team.

    Based on data from past customer purchasing behaviors, these parts are most commonly purchased together along with the part you are viewing. These parts may be necessary or helpful to replace to complete your current repair.

    All our installation videos are created and produced in collaboration with our in-house repair technician, Mark Sodja, who has helped millions of eReplacementParts customers over the last 13 years repair their products. Mark has years of experience in selling and repairing both commercial and residential products with a specialty in gas-powered equipment.

    This data is collected from customers who submitted a repair instruction after replacing this exact part. Customers can rate how easy the repair was to complete and how long it took. We aggregate this data to provide a repair rating that allows customers to quickly determine the difficulty and time needed to perform their own repair.

    eReplacementParts.com
    7174 South 400 West
    Suite 5
    Midvale, UT 84047
    visa mastercard discover american express PayPal