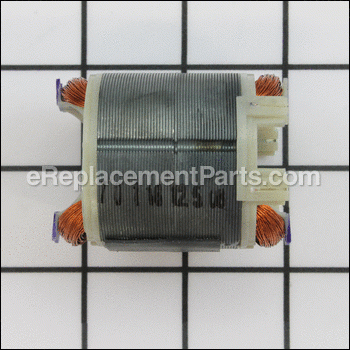
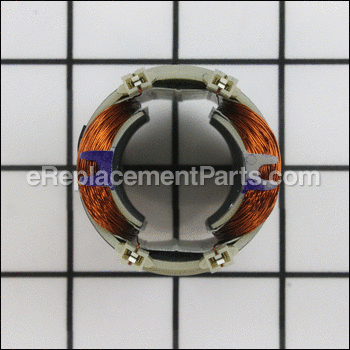
This is a genuine Dremel replacement part that has been sourced from the original manufacturer to be used with rotary tools. The field assembly is one of the motor's main components. This part houses the armature and is used to create an electromagnetic field that allows the armature to rotate. The field is priced as a single item.
Field Assembly 2610006549
OEM part for: Dremel, Bosch
Part Number: 2610006549
7 - 12 business days
Jump To:
Frequently Purchased Together ?
Compatibility
This part will fit the following 4 machines
Dremel
This item works with the following types of products:
- Multi-Tool Parts
Customer Part Reviews ?
- 1
Questions & Answers ?
Our customer Service team is at the ready daily to answer your part and product questions.

Ask our Team
We have a dedicated staff with decades of collective experience in helping customers just like you purchase parts to repair their products.
Does this fit my product?Questions & Answers for Field Assembly
Customer Repair Instructions ?
All our customer repair instructions are solicited directly from other customers just like you who have purchased and replaced this exact part.
Burnt out motor in the mulitool, broken armature and bad brush wear.
Tool Type
MultiTool
Difficulty
Easy
Time
15-30 minutes
Tools Used
Screwdriver, Pliers, Right size torx screw driver.
2.) Took out the screwdriver (Torx) and unscrewed the screws.
3.) Took a small screwdriver to take out the brushes and unscrew the shaft collar as well.
4.) Opened up the casing to the multi-tool.
5.) Keeping in mind not to lose the locking mechanism (shaft lock) for the shaft when opening the case.
6.) Gently pull the wires out from the speed switch and pull the rubber cover to the back bearing.
7.) Slid the armature out of the field assembly for inspection of parts and pull the speed switch off of the field assembly. ( Note put speed switch aside because it will be used later in the assembly process.)
8.) Opened the part boxes to the field assembly and armature w/bearing assembly.
9.) Inspected new parts to make sure everything was in order. Then assembled new field assembly and armature w/bearing assembly together by sliding the armature through the field assembly.
10.) Put the assembled new parts in the case and making sure I put the rubber cover on the end of the bearing to the armature.
11.) Plug in the speed switch to the field assembly that was taken out in step 7. Make sure it goes together and plugs in firmly to the field assembly. ( Note: the armature w/bearing assembly should be easy to rotate back and forth.)
12.) Plug in the power wires into the speed switch making sure the wires are in firmly.
13.) Put the assembly back into the case by making sure everything was in right place. ( Don't forget to make sure the shaft lock is in place still in the case.)
14.) Before closing up the case make sure the armature w/bearing assembly turns free in either direction so the parts have free movement. ( Note: If need takes the pliers and gently press together on the fan and the shaft to move the fan up or down so it is centered on the space provided in the case.)
15.) When everything moves freely put the case back together with the Torx screws, also put the new brushes in and screw in the shaft collar as well.
16.) Once everything is back together, plug in the multitool and turn on the speed switch. If done correctly everything should work properly and now the tool is ready to use.
Field coil was open
Tool Type
MultiTool
Difficulty
Medium
Time
15-30 minutes
Tools Used
Screwdriver
Parts Used
Remove brush caps and brushes
Remove the screws from the housing and separate
Remove the field from the switch and fro around the armature
Install the new shaft lock in the housing
Assemble in reverse order
field assembly burned
Tool Type
MultiTool
Difficulty
Easy
Time
Less than 15 minutes
Tools Used
Screwdriver
Parts Used
2. Removed the stator and the field assembly.
3. Put the stator and new field assembly.
3. Assemble the housing.
3. Ready to use.
The field coil lost continuity on one winding .
Tool Type
MultiTool
Difficulty
Easy
Time
Less than 15 minutes
Tools Used
, Torx bit driver
Parts Used
Dremel wouldn't turn on
Tool Type
MultiTool
Difficulty
Easy
Time
Less than 15 minutes
Tools Used
, Torx driver
Parts Used
2. Removed brush caps and brushes.
3. Used razor blade to carefully cut decals on sides of Dremel longitudinally along case seam.
4. Turned Dremel upside down, removed Torx screws holding lower case half to upper case half, then separated case halves and set lower case half aside.
5. Removed armature, lifted switch and field assembly out of upper case as a unit, and unplugged switch from field assembly.
6. Plugged switch into new field assembly, reinstalled switch and field assembly in upper case, and reinstalled armature.
7. Rejoined upper and lower case halves, replaced Torx screws.
8. Reinstalled brushes and brush caps.
9. Reinstalled nose cap.
Dremel rotary tool would not turn on due to bad field assembly.
Tool Type
MultiTool
Difficulty
Easy
Time
Less than 15 minutes
Tools Used
Screwdriver
Parts Used
2. Disconnected the power cord from the switch.
3. Separated the switch from the field assembly.
4. Pulled the field assembly off of the motor.
5. Installed the new field assembly.
6. Connected the sitch back onto the field assembly.
7. Reconnected the power cord to the switch.
8. Reassembled the tool.
Works like a new tool.
Dremel stopped working.
Tool Type
MultiTool
Difficulty
Easy
Time
15-30 minutes
Tools Used
Screwdriver, Pliers
Copper winding on original field assembly was damaged
Tool Type
MultiTool
Difficulty
Easy
Time
Less than 15 minutes
Tools Used
Screwdriver
2 disconnected old field assembly
3 connected New field assembly
4 replaced screws
5 done
Quit working
Tool Type
MultiTool
Difficulty
Easy
Time
Less than 15 minutes
Tools Used
Screwdriver, Torx bit
Parts Used
Dremel 3000 stopped working after 1 year
Tool Type
MultiTool
Difficulty
Medium
Time
15-30 minutes
Tools Used
Screwdriver, Power Drill, Tweezers
Opened outer case
Lifted out unit and pulled down to slide center unit from switch
Pulled straight down on the switch wires and put wires back in new switch same way.
The field was replaced and the new switch unit keyed in
Hard to put in the button/spring before the whole assembly fits in the housing but you have to keep trying.
Housing goes back on and brushes go back in
OEM stands for Original Equipment Manufacturer and means the part you’re buying is sourced directly from the manufacturer who made your product. At eReplacementParts, we sell only genuine OEM parts, guaranteeing the part you’re purchasing is of better design and of higher quality than aftermarket parts.
Our product descriptions are a combination of data sourced directly from the manufacturers who made your product as well as content researched and curated by our content & customer service teams. This content is edited and reviewed internally before being made public to customers.
Our customer service team are at the ready daily to answer your part and product questions. We have a dedicated staff with decades of collective experience in helping customers just like you purchase parts to repair their products.
All our part reviews are solicited directly from other customers who have purchased this exact part. While we moderate these reviews for profanity, offensive language or personally identifiable information, these reviews are posted exactly as submitted and no alterations are made by our team.
All our customer repair instructions are solicited directly from other customers just like you who have purchased and replaced this exact part. While we moderate these reviews for profanity, offensive language or personally identifiable information, these reviews are posted exactly as submitted and no alterations are made by our team.
Based on data from past customer purchasing behaviors, these parts are most commonly purchased together along with the part you are viewing. These parts may be necessary or helpful to replace to complete your current repair.
All our installation videos are created and produced in collaboration with our in-house repair technician, Mark Sodja, who has helped millions of eReplacementParts customers over the last 13 years repair their products. Mark has years of experience in selling and repairing both commercial and residential products with a specialty in gas-powered equipment.
This data is collected from customers who submitted a repair instruction after replacing this exact part. Customers can rate how easy the repair was to complete and how long it took. We aggregate this data to provide a repair rating that allows customers to quickly determine the difficulty and time needed to perform their own repair.


