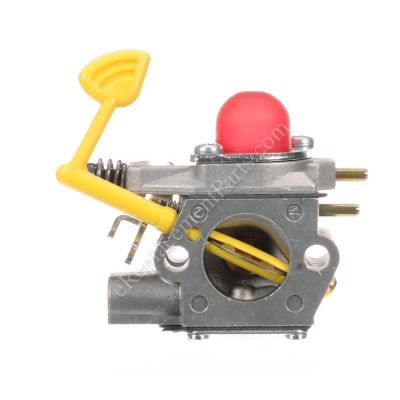
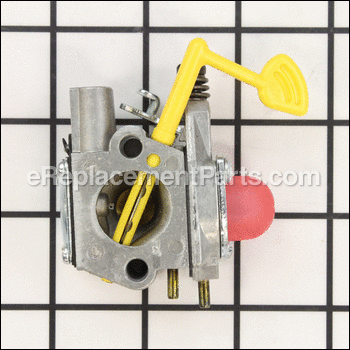
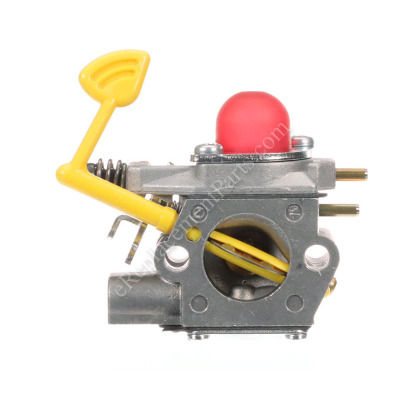
This is a genuine OEM replacement part, it is sold individually. It is used on a variety of Gas Powered Equipment. The purpose of this part is to mix air and gas before the fuel mix goes to the engine. If the engine won't start and the tank is full of fresh fuel, test the carburetor by removing the air filter and pouring about a teaspoon of fuel into the carburetor. Pull the starter rope. If the engine starts and then quickly dies, the carburetor is likely the problem.
Carburetor Assembly 545081831
OEM part for: Poulan, Weed Eater, Husqvarna
Part Number: 545081831
Jump To:
Frequently Purchased Together ?
Compatibility
This part will fit the following 9 machines
Poulan
Weed Eater
Husqvarna
This item works with the following types of products:
- Blower Parts
Customer Part Reviews ?
- 1
Questions & Answers ?
Our customer Service team is at the ready daily to answer your part and product questions.

Ask our Team
We have a dedicated staff with decades of collective experience in helping customers just like you purchase parts to repair their products.
Does this fit my product?Questions & Answers for Carburetor Assembly
Customer Repair Instructions ?
All our customer repair instructions are solicited directly from other customers just like you who have purchased and replaced this exact part.
Hard to start. When it would start, would not take gas.
Tool Type
Blower
Difficulty
Easy
Time
Less than 15 minutes
Tools Used
, allen wrench
Parts Used
Primed bulb 6 times, full choke and fired on first pull. Half choke, cranked and ran. Let warm up for about a minute and placed in run. Ran like a new blower.
P.S. Have used ereplacement parts for several years with great service.
Thanks, Mike
Blower was about 8 years old and did not run smooth. I contribute it to the alcohol gas over the years. Remove and replace carburetor.
Tool Type
Blower
Difficulty
Easy
Time
Less than 15 minutes
Tools Used
Wrench Set
Parts Used
Remove dust cover.
Remove foam air filter
Remove two screws
Remove the two plastic fuel lines
Remove carburetor from throttle rod by turning carburetor
Wipe off fuel and grease from base where carburetor mounts
Replace carburetor onto throttle rod by turning carburetor
Replace the two plastic fuel lines
Replace two screws and snug tight
Replace foam air filter
Replace dust cover
Pump fuel into carburetor and start the engine
The carburetor was malfunctioning...should not have used gasoline containing ethanol...particularly letting it set over winter, etc. Rather than risk damaging the carburetor by cleaning it and replac
Tool Type
Blower
Difficulty
Easy
Time
15-30 minutes
Tools Used
Wrench Set, Allen wrench set
Parts Used
Removed the air filter to expose the two bolts.
Used an allen wrench to loosen the bolts holding the carburetor in place.
Removed the two gas lines from the carburetor that extend to the gas tank.
Installed the new carburetor by attaching the gas lines and fastening the bolts.
Replaced the air filter and cover.
Filled the gas tank with non-ethanol gasoline.
The Poulan Gas Blower started and is working normally.
Blower wouldn't start. Fuel not reaching cylinder. Replace carb. was an easy and least expensive fix.
Tool Type
Blower
Difficulty
Easy
Time
15-30 minutes
Tools Used
Screwdriver
Parts Used
Blower would not stay running
Tool Type
Blower
Difficulty
Easy
Time
Less than 15 minutes
Tools Used
Wrench Set, Allen wrench
Parts Used
2. Removed air filter housing
3. Removed and replaced carb
Easy fix! Thanks!
Cakes with dirt and would not run
Tool Type
Blower
Difficulty
Easy
Time
15-30 minutes
Tools Used
Screwdriver
Parts Used
Engine lacked power and would only stay running at 1/2 choke and only for a short time
Tool Type
Blower
Difficulty
Medium
Time
15-30 minutes
Tools Used
Screwdriver, torx screwdriver
removed torx screws with torx screwdriver.
removed fuel lines with fingers.
removed throttle linkage with hands,
remove carburetor.
reverse procedure.
misdiagnoised, needed to replace partially sheared woodriff key in the flywheel. Now runs great
Replaced the carburator.
Tool Type
Blower
Difficulty
Easy
Time
15-30 minutes
Tools Used
Screwdriver
Parts Used
2. Removed the gas tank.
3. Replaced the hoses and the filter.
4. Removed the carburetor.
5. Installed the new lines.
6. Installed the air cleaner.
Carburetor was not functioning properly. Replacing it was easier than rebuilding.
Tool Type
Blower
Difficulty
Easy
Time
15-30 minutes
Tools Used
Screwdriver, Wrench Set
Parts Used
2. Removed the two carburetor retainer screws.
3. Unhooked the throttle linkage.
4. Disconnected the two fuel lines.
5. Installed new carburetor.
One other major issue I had with this blower was something I found on a YouTube video. One of the engine assembly bolts had backed out and was allowing the compression to blow out through the crack created by this loose bolt. There are two bolts but only one was loose. Very easy repair. Just had to remove the plastic engine cover to expose this area where the loose bolt was located.
Unit was stored for two yeas with the wrong type of fuel. Melted plastic parts + dirt in fuel tank.
Tool Type
Blower
Difficulty
Easy
Time
30-60 minutes
Tools Used
Screwdriver, Socket set, Nutdriver, Knife
2. Removed what was left of fuel lines.
3. Removed and replaced carburetor.
4. Reassembled and put new fuel lines and fuel filter on.
5. Replaced air cleaner filter.
6. Replaced spark plug.
7. Filled with proper fuel.
8. Primed system and started unit for a test run.
Ran great.
OEM stands for Original Equipment Manufacturer and means the part you’re buying is sourced directly from the manufacturer who made your product. At eReplacementParts, we sell only genuine OEM parts, guaranteeing the part you’re purchasing is of better design and of higher quality than aftermarket parts.
Our product descriptions are a combination of data sourced directly from the manufacturers who made your product as well as content researched and curated by our content & customer service teams. This content is edited and reviewed internally before being made public to customers.
Our customer service team are at the ready daily to answer your part and product questions. We have a dedicated staff with decades of collective experience in helping customers just like you purchase parts to repair their products.
All our part reviews are solicited directly from other customers who have purchased this exact part. While we moderate these reviews for profanity, offensive language or personally identifiable information, these reviews are posted exactly as submitted and no alterations are made by our team.
All our customer repair instructions are solicited directly from other customers just like you who have purchased and replaced this exact part. While we moderate these reviews for profanity, offensive language or personally identifiable information, these reviews are posted exactly as submitted and no alterations are made by our team.
Based on data from past customer purchasing behaviors, these parts are most commonly purchased together along with the part you are viewing. These parts may be necessary or helpful to replace to complete your current repair.
All our installation videos are created and produced in collaboration with our in-house repair technician, Mark Sodja, who has helped millions of eReplacementParts customers over the last 13 years repair their products. Mark has years of experience in selling and repairing both commercial and residential products with a specialty in gas-powered equipment.
This data is collected from customers who submitted a repair instruction after replacing this exact part. Customers can rate how easy the repair was to complete and how long it took. We aggregate this data to provide a repair rating that allows customers to quickly determine the difficulty and time needed to perform their own repair.

