eReplacementParts.com
877-346-4814
Delta Parts
Repair Parts Home
  
Power Tool Parts
  
Delta Parts
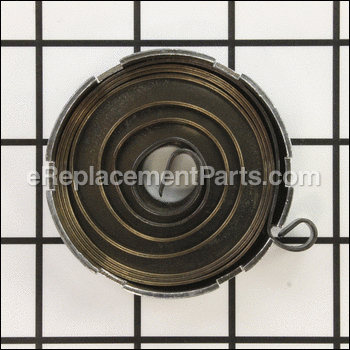
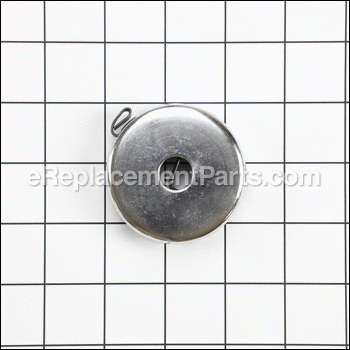
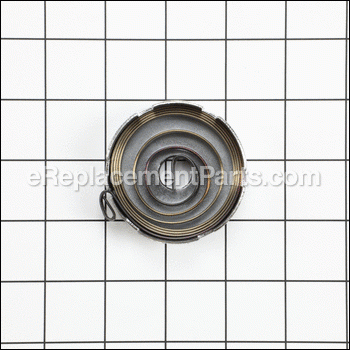
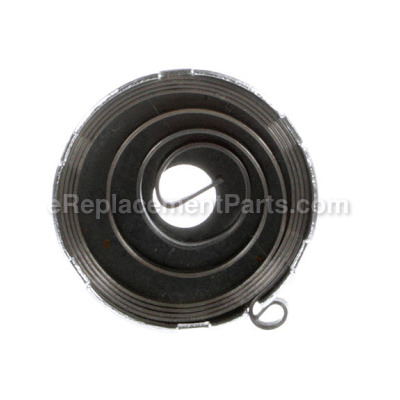
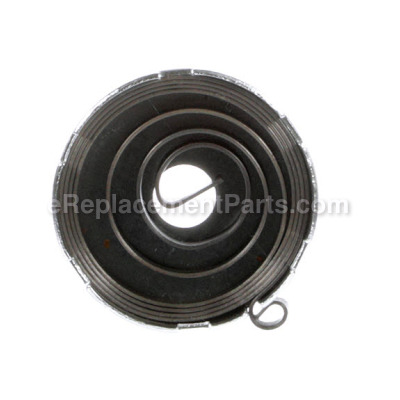
  1310082 Spring With Housing

Spring With Housing 1310082

OEM part for: Delta

Part Number: 1310082


Install
Videos!
Spring With Housing - 1310082:Delta 360 View
Spring With Housing - 1310082:DeltaSpring With Housing - 1310082:DeltaSpring With Housing - 1310082:DeltaSpring With Housing - 1310082:DeltaSpring With Housing - 1310082:Delta 360 View
In Stock
Order within the next 2 hours and your part ships today!
Easy Less than 15 minutes (12 rated repairs)?
OEM: Original Equipment Manufacturer ?
Delta
Does this d-block d-md-none fit my product?

Product Description ?

Genuine Delta replacement part, this part with 2 part.
The Delta 1310082 Spring With Housing is the part of the drill presses listed below that returns the drill chuck back to its original position after using the drill press.
This part contains the spring and the spring housing.

  • Dimensions
  • Diameter: 2-3/8 Inches
  • Height: 5/8 Inch
  • Bore: 9/16 Inch
  • Classification: Part
  • Weight: 0.21 lbs.
  • Shipping: Ships Worldwide

Compatibility

This part will fit the following 14 machines

Delta

11-090 Type 1 Drill Press View Diagrams & Manuals
14-040 Type 1 Drill Press View Diagrams & Manuals
17-965 Type 1 Drill Press View Diagrams & Manuals
17-965 Type 2 Drill Press View Diagrams & Manuals
17-950L 16-1/2" Crosshair Laser Drill Press View Diagrams & Manuals
17-959L 17" Laser Drill Press View Diagrams & Manuals
DP350 12" Variable-Speed Bench Drill Press View Diagrams & Manuals
17-900 Type 1 16-1/2" Drill Press View Diagrams & Manuals
17-900 Type 2 16-1/2" Drill Press View Diagrams & Manuals
14-070 Type 1 14" Floor Drill Press View Diagrams & Manuals
DP250 Type 1 Drill Press View Diagrams & Manuals
DP400 Type 1 Drill Press View Diagrams & Manuals
DP350 Type 1 12" Variable-Speed Bench Drill Press View Diagrams & Manuals
17-970C 17.5" Drill Press View Diagrams & Manuals
Show More Compatible Models
Don't see yours? Try searching our site for :

This item works with the following types of products:

  • Drill Parts
  • Drill Press Parts

Customer Part Reviews ?

4.8
Average Rating (out of 5):
8 Reviews
Click to filter by ratings:
5 stars
6
4 stars
2
3 stars
0
2 stars
0
1 stars
0
  • Highest Rating
  • Most Recent
< PREV
  • 1
NEXT >
  • Worked great
    As described
    Guest - July 24, 2023 Verified Purchase
    Perfect match
    The part I ordered was for an older delta drill press and it was a perfect match it arrived in a timely manner only down side was I’m in canada and the exchange rate was high so it was costly but the drill press works again.thanks chris
    iGlobal - March 17, 2023 Verified Purchase
    Exact
    Part was exactly as ordered. Always good service and good products.
    Howard - November 26, 2019 Verified Purchase
    Great part - just what was needed to fix the problem!
    The part contains the spring that controls the handle movement in an up and down direction...retracts upward after pressure is released on the handle. What we had was broken, but now the drill press is working just like brand new!
    Guest - September 24, 2019 Verified Purchase
    Easy repair.
    Arrived very quickly. Only place I could find this part for my 20+ year old Delta Drill Press. Great site for parts.....
    Guest - August 27, 2019 Verified Purchase
    have not installed yet, part of a community workshop that reopens after labor day
    The part was for a vintage Delta drill press and the part was back ordered. Liked the straight forward way the your company handled the delay. Status notices, offer to cancel, and finally delivery. Have not installed the but looks like the broken part. Thanks
    Guest - August 23, 2019 Verified Purchase
    Drill Press return spring
    This return spring is stock; looks great, like the original and is ready to work. I was quite happy to find this and easily. The woman E Replacements, who helped was professional, went right to the part, ordered it and shipped it. Thank you for having this part!
    Guest - May 17, 2023 Verified Purchase
    It was an easy fix.
    The worst part was the part was not available in a timely manner. Really wasn't your fault but is was bad timing. otherwise it was nice to be kept updated.
    Guest - August 22, 2019 Verified Purchase
    t
    t
    t - t days ago Verified Purchase
    eReplacementParts Team
    t

    Questions & Answers ?

    Our customer Service team is at the ready daily to answer your part and product questions.

    photo of team member
    Ask our Team

    We have a dedicated staff with decades of collective experience in helping customers just like you purchase parts to repair their products.

    Does this fit my product?

    Questions & Answers for Spring With Housing


    No questions have been asked yet

    Customer Repair Instructions ?

    All our customer repair instructions are solicited directly from other customers just like you who have purchased and replaced this exact part.

    Easy Less than 15 minutes (12 rated repairs)?

    Spring broken

    Juan - November 17, 2015
    👍 5 of 5 people found this instruction helpful
    Tool Type

    Drill Press

    Difficulty

    Medium

    Time

    Less than 15 minutes

    Tools Used

    Socket set

    No special instructions.Take apart old spring using 2 nuts. Insert the new spring, set the spring, moving the outer holder until drill bit returns well. Tighten the 2 nuts but not too much. Hold the lnner nut with a wrench and tight the outer nut. Done
    Did you find this story helpful?
    Thanks for voting and helping fellow customers!

    Coil Return Spring Broke

    Steve - January 20, 2017
    👍 1 of 1 people found this instruction helpful
    Tool Type

    Drill Press

    Difficulty

    Easy

    Time

    Less than 15 minutes

    Tools Used

    Adjustable Wrench

    1. Removed the two retaining nuts, then removed spring housing unit.
    2. Cleaned and re-lubricated shaft mechanism.
    3. Installed the spring housing unit, and the two retaining nuts.
    4. Adjusted retaining nuts to eliminate end play in shaft, tightened nuts.
    5. Easy. A 5 year old could do it......an engineer - not so much.
    Did you find this story helpful?
    Thanks for voting and helping fellow customers!

    broken spring

    tom - January 9, 2023
    Tool Type

    Drill Press

    Difficulty

    Easy

    Time

    15-30 minutes

    Tools Used

    Wrench Set

    put new one on
    Did you find this story helpful?
    Thanks for voting and helping fellow customers!

    return spring broken

    Herley - June 4, 2021
    Tool Type

    Drill Press

    Difficulty

    Medium

    Time

    15-30 minutes

    Tools Used

    Screwdriver, Wrench Set

    removed broken spring and housing and replaced with new
    Did you find this story helpful?
    Thanks for voting and helping fellow customers!

    Return spring broken. Drill press always down.

    Scott - February 12, 2021
    Tool Type

    Drill Press

    Difficulty

    Medium

    Time

    30-60 minutes

    Tools Used

    Adjustable Wrench, Grinder.

    There is a plate with 3 tabs on it that goes between the spring and the body of the press. These tabs fit into the spring housing. On my press this "old" plate does not fit the new housing. Therefore I had to slightly grind the edges of two of the tabs to make it fit.
    Other than that throw a few turns on the spring and housing and good as new.
    Did you find this story helpful?
    Thanks for voting and helping fellow customers!

    Drill press coil spring

    Robert - March 20, 2018
    Tool Type

    Drill Press

    Difficulty

    Easy

    Time

    Less than 15 minutes

    Tools Used

    Wrench Set

    Remove the 2 outer nuts
    Slide off chrome cover
    Slide off old spring
    Slide on new spring
    Slide on new cover
    Adjust tension on spring by turning chrome cover
    Tighten nuts
    Complete
    Did you find this story helpful?
    Thanks for voting and helping fellow customers!

    Broken spring

    val - March 5, 2017
    Tool Type

    Drill Press

    Difficulty

    Easy

    Time

    Less than 15 minutes

    Tools Used

    Adjustable Wrench

    Remove coil housing lock nut
    Replace broken spring onto slot on quill shaft
    Load spring tension
    Tighten nut and replace lock nut
    Done
    Did you find this story helpful?
    Thanks for voting and helping fellow customers!

    Check feed return spring snapped.

    Kevin - January 8, 2017
    Tool Type

    Drill Press

    Difficulty

    Medium

    Time

    Less than 15 minutes

    Tools Used

    Wrench Set

    Removed the broken spring by breaking the jam nut contact with two wrenches. Removed the nuts and slid the cover and spring off the feed bolt. Replaced the broken spring and cover with the new parts, then put the nuts back in place loosely so that the spring and cover could be "wound-up" to provide the return tension. Increased the spring tension by turning the spring and cover, held the position and tightened the first nut and then tightened the jam nut against the first nut.
    Did you find this story helpful?
    Thanks for voting and helping fellow customers!

    Quill spring broke and drill head dropped to table.

    GARY - September 13, 2016
    Tool Type

    Drill Press

    Difficulty

    Medium

    Time

    Less than 15 minutes

    Tools Used

    Wrench Set

    When you replace the spring mechanism for the drill press
    you must first take a photo of positions of spring "clip"
    and the pronged washer in relation to where it all fits on
    the press. Then you disassemble. Then you prop up the
    chuck on a block so it is at top dead center. TDC.
    Insert the spring into the slot BUT do so that you have to rotate
    the spring housing CCW to give it enough tension to
    return the chuck to TDC. Some trial/error expected.
    Then tighten the two lock nuts to each other, not
    to the spring housing, or the the drill won't move free.
    Did you find this story helpful?
    Thanks for voting and helping fellow customers!

    Spring had snapped

    Jacob - August 18, 2016
    Tool Type

    Drill Press

    Difficulty

    Easy

    Time

    Less than 15 minutes

    Tools Used

    Socket set, Wrench Set

    1. Remove double nuts on returning rod,
    2. Remove Spring housing,
    3. Set new spring, making sure the inside tab is set in the notch in the rod,
    4. I found it easier to put the housing and partially thread back on at least one of the nuts to keep the whole assembly in place while I tensioned it;
    5. With the spindle entirely retracted, rotate the spring housing to give it tension;
    6. Further tighten (but not completely) the nut so the housing can't snap back - WATCH YOUR FINGERS!! - and test the return tension by bringing the spindle down completely and seeing how it returns back to its return position;
    7. I fiddled with it some to get the right amount of tensioning - for me, it was enough to bring the spindle most of the way up without being violent about its return.
    Did you find this story helpful?
    Thanks for voting and helping fellow customers!

    OEM stands for Original Equipment Manufacturer and means the part you’re buying is sourced directly from the manufacturer who made your product. At eReplacementParts, we sell only genuine OEM parts, guaranteeing the part you’re purchasing is of better design and of higher quality than aftermarket parts.

    Our product descriptions are a combination of data sourced directly from the manufacturers who made your product as well as content researched and curated by our content & customer service teams. This content is edited and reviewed internally before being made public to customers.

    Our customer service team are at the ready daily to answer your part and product questions. We have a dedicated staff with decades of collective experience in helping customers just like you purchase parts to repair their products.

    All our part reviews are solicited directly from other customers who have purchased this exact part. While we moderate these reviews for profanity, offensive language or personally identifiable information, these reviews are posted exactly as submitted and no alterations are made by our team.

    All our customer repair instructions are solicited directly from other customers just like you who have purchased and replaced this exact part. While we moderate these reviews for profanity, offensive language or personally identifiable information, these reviews are posted exactly as submitted and no alterations are made by our team.

    Based on data from past customer purchasing behaviors, these parts are most commonly purchased together along with the part you are viewing. These parts may be necessary or helpful to replace to complete your current repair.

    All our installation videos are created and produced in collaboration with our in-house repair technician, Mark Sodja, who has helped millions of eReplacementParts customers over the last 13 years repair their products. Mark has years of experience in selling and repairing both commercial and residential products with a specialty in gas-powered equipment.

    This data is collected from customers who submitted a repair instruction after replacing this exact part. Customers can rate how easy the repair was to complete and how long it took. We aggregate this data to provide a repair rating that allows customers to quickly determine the difficulty and time needed to perform their own repair.

    eReplacementParts.com
    7174 South 400 West
    Suite 5
    Midvale, UT 84047
    visa mastercard discover american express PayPal