Why Read This Article?
Finish Nailer Repair - Replacing the Driver Guide (Ridgid Part # 79004001022)
Article Breakdown
Finish Nailer Repair - Replacing the Driver Guide (Ridgid Part # 79004001022)
Tools & Materials
- Hammer
- Allen Key
- Chuck Removal Tool
- Vise
- Metal Punch
Safety Guidelines
- It is important to use the correct tools for this repair.
- Using a poorly-fitting allen key and removing a taper-fit chuck without a chuck removal key can be dangerous.
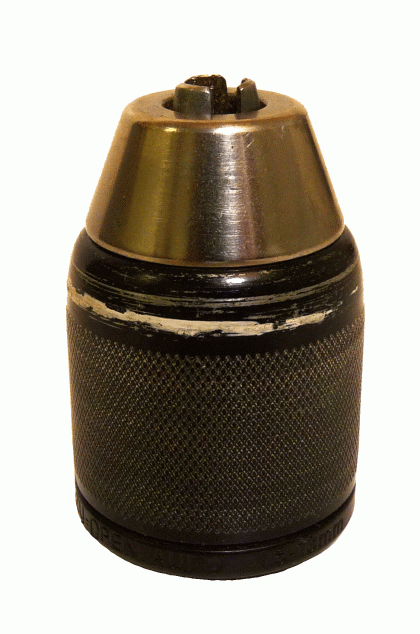 First, it's important to point out that drill chucks come in two basic kinds: 1. threaded-on chucks, and 2. taper-fit chucks. Check drill manuals or diagrams to find out what kind of chuck it is first, because the steps for removal are different for each chuck type.
Removing Threaded-on Drill Chucks
Most handheld drills and drivers have threaded-on chucks, although, that's not always the case. But you can be certain that all keyless chucks are threaded-on chucks. Again, it's best to check the owner's manual if there's any doubt.
Threaded-on chucks are tightly screwed to the drill's spindle and are held in place with a screw deep inside the jaws of the chuck. This screw helps hold the chuck on the spindle during operation, preventing it from spinning off.
The first step for removing a threaded-on chuck is removing that screw in the jaws, which might need an Allen key, torx driver, or flat-head screwdriver, depending on the drill model.
1. Remove the chuck screw.
The most important thing to remember for this step is that chuck screws are reverse-thread and need to be turned clockwise. This reverse threading counteracts the torque of the drill, keeping the chuck tightly connected.
Because those chucks are threaded on so tightly, they won't just spin off the spindle once the chuck screw is removed. Chucks are often torqued on so well that a drill may operate normally if a chuck screw falls out (although this is not recommended).
2. Get a large Allen key.
From this point, some heavy artillery is needed to get the chuck out. You'll need a 90-degree Allen key, like this one:
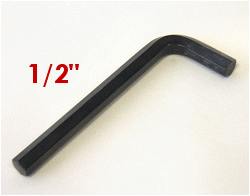
It's best to use the largest Allen key that the chuck can accommodate. This will be a 1/2" key like the one pictured above for most tools, but some drills will only be able to fit a 3/8" key.
Back to top]
3. Position the Allen key.
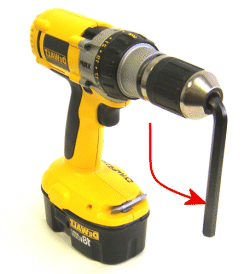
Put the short end of the Allen key into the chuck with the long end hanging out, and tighten the chuck down completely.
4. Use a hammer to turn the Allen key.
Yes, you're going to have to hit that Allen wrench with a hammer.
Use the flat side of a hammer to hit the Allen wrench so that the blow will spin the chuck counter-clockwise (as pictured above). Sometimes it can take a real hard swing, so swinging through smoothly helps.
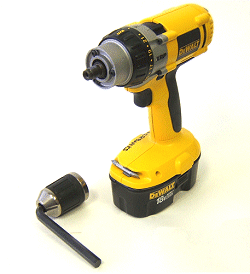
After a successful swing, the chuck will probably spin around a few times and come to a rest on the spindle, looking something like the image below.
Good luck!
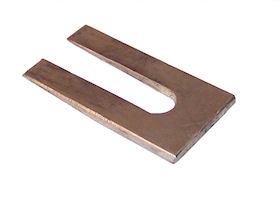
Removing Taper-fit Drill Chucks Taper-fit drill chucks require a different method of removal than the threaded-on chucks. Removing taper-fit chucks is simpler than removing threaded-on chucks, but it also requires a special chuck removal tool. This tool (pictured below) has two arms designed to go around the spindle between the chuck and the spindle housing. It increases in thickness going from the open end to the closed end so that it can separate the chuck from the spindle.
 1. Position the removal tool.
Place the chuck removal tool between the back of the chuck and the spindle housing.
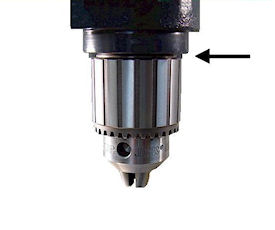 2. Apply a hammer.
Hammer the chuck removal tool until the chuck comes off of the spindle.
That's it! This is very easy with the chuck removal tool, and virtually impossible without one. Without a chuck removal tool, the chuck and spindle will probably have to be removed from the drill. [Back to top]
Removing a Spindle From a Drill Chuck Without a chuck removal tool, a taper-fit chuck will have to come out with its spindle. Some chucks will have an open center where the spindle attaches, making it possible to hammer the spindle out from here. (Note: Hammering the spindle out will only work for chucks that have an open center. Notice in the picture below that center of the chuck is open. Do not use this technique on chucks with closed centers.)
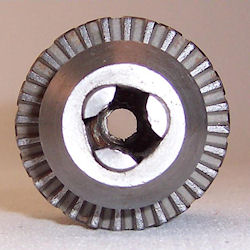 1. Position the chuck/spindle over a vise.
Place the chuck above the jaws of a vise with the spindle hanging loosely between the jaws. Open the chuck all the way.
2. Hammer the spindle out with a metal punch.
Place a metal punch in the center hole of the chuck where the end of the spindle is sitting. Hammer the punch through the hole until the spindle comes off the chuck.
For drill chucks and other power drill parts, see our Drill Parts page to find the replacement parts you need. [Back to top] What we're about.


