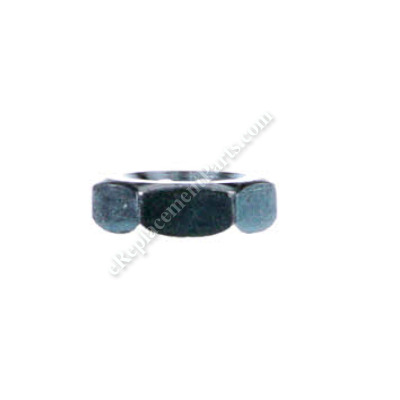
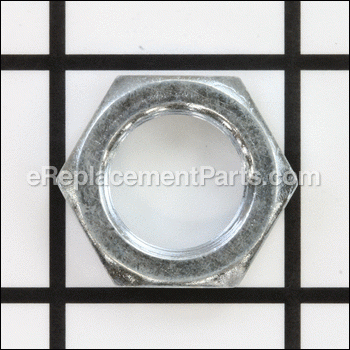
This is an authentic DeWalt replacement part that has been sourced from the original manufacturer to be used with planers. The metal nut assembly is used to secure the pulley to the end of the cutting head assembly. This item is available as an individual replacement part.
Nut 5140010-23
OEM part for: DeWALT
Part Number: 5140010-23
Jump To:
Frequently Purchased Together ?
Compatibility
This part will fit the following 2 machines
DeWALT
This item works with the following types of products:
- Planer Parts
Customer Part Reviews ?
- 1
Questions & Answers ?
Our customer Service team is at the ready daily to answer your part and product questions.

Ask our Team
We have a dedicated staff with decades of collective experience in helping customers just like you purchase parts to repair their products.
Does this fit my product?Questions & Answers for Nut
Customer Repair Instructions ?
All our customer repair instructions are solicited directly from other customers just like you who have purchased and replaced this exact part.
The retainer nut vibrated off the cutter head shaft which caused the drive belt pulley to loosen and wear unevenly, which then destroyed the belt.
Tool Type
Planer
Difficulty
Medium
Time
30-60 minutes
Tools Used
Screwdriver, Socket set, Torx bits
The whole process took less than 30 minutes and was easily accomplished. The most challenging part was getting the new belt to stretch enough to fit over the new pulley and align properly with the drive pulley on the motor.
Loud noise
Tool Type
Planer
Difficulty
Easy
Time
30-60 minutes
Tools Used
Screwdriver, Socket set
Pulley had come loose after nut fell off. Ruined those parts and the key
Tool Type
Planer
Difficulty
Medium
Time
1-2 hours
Tools Used
Screwdriver, Socket set, Wrench Set
Nut fell off cutter head pulley and damage drive belt
Tool Type
Planer
Difficulty
Medium
Time
30-60 minutes
Tools Used
Screwdriver, Socket set, Wrench Set, Adjustable Wrench
Parts Used
Planer drive belt came loose
Tool Type
Planer
Difficulty
Medium
Time
30-60 minutes
Tools Used
Screwdriver, Socket set
Parts Used
Remove necessary panels/covers to gain access to drive belt.
Install new belt on smaller pulley, slide a portion of the belt on the upper edge of the larger pulley, turn the large pulley counterclockwise using a socket wrench while holding pressure on the belt at the large pulley, the belt will stretch enough to slip on the pulley as it turns. Keep turning the larger pulley and applying pressure on the belt until it centers itself on the pulley.
DW735 Dewalt Planer
I viewed a few YouTube videos before attempting the repair. The nut on the blade cylinder fell off and the drive belt was damaged.
Tool Type
Planer
Difficulty
Medium
Time
30-60 minutes
Tools Used
Screwdriver, Socket set, Wrench Set
2. Removed the drive chain tension arm and front chain sprocket and chain.
3. Removed the damaged belt and checked for damage on the blade cylinder sprocket.
4. Installed new nut holding the sprocket.
5. Installed new belt and mounted the chain and sprocket.
6. Attached the chain tension arm.
7. Installed the side cover
8. Installed new cutting blades.
Everything fit and the machine was as good as new!
The drive belt got chewed up cause the pulley retaining nut somehow worked loose and fell off machine at some point.
Tool Type
Planer
Difficulty
Easy
Time
Less than 15 minutes
Tools Used
Socket set, You can use a socket set. I used a lug wrench. :)
Parts Used
OEM stands for Original Equipment Manufacturer and means the part you’re buying is sourced directly from the manufacturer who made your product. At eReplacementParts, we sell only genuine OEM parts, guaranteeing the part you’re purchasing is of better design and of higher quality than aftermarket parts.
Our product descriptions are a combination of data sourced directly from the manufacturers who made your product as well as content researched and curated by our content & customer service teams. This content is edited and reviewed internally before being made public to customers.
Our customer service team are at the ready daily to answer your part and product questions. We have a dedicated staff with decades of collective experience in helping customers just like you purchase parts to repair their products.
All our part reviews are solicited directly from other customers who have purchased this exact part. While we moderate these reviews for profanity, offensive language or personally identifiable information, these reviews are posted exactly as submitted and no alterations are made by our team.
All our customer repair instructions are solicited directly from other customers just like you who have purchased and replaced this exact part. While we moderate these reviews for profanity, offensive language or personally identifiable information, these reviews are posted exactly as submitted and no alterations are made by our team.
Based on data from past customer purchasing behaviors, these parts are most commonly purchased together along with the part you are viewing. These parts may be necessary or helpful to replace to complete your current repair.
All our installation videos are created and produced in collaboration with our in-house repair technician, Mark Sodja, who has helped millions of eReplacementParts customers over the last 13 years repair their products. Mark has years of experience in selling and repairing both commercial and residential products with a specialty in gas-powered equipment.
This data is collected from customers who submitted a repair instruction after replacing this exact part. Customers can rate how easy the repair was to complete and how long it took. We aggregate this data to provide a repair rating that allows customers to quickly determine the difficulty and time needed to perform their own repair.

