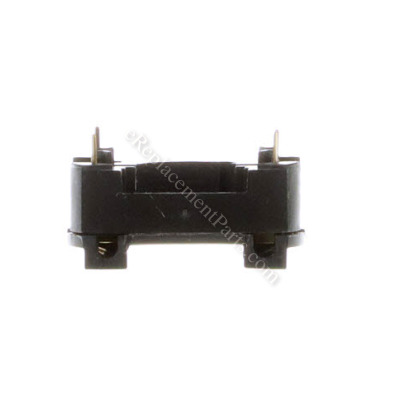
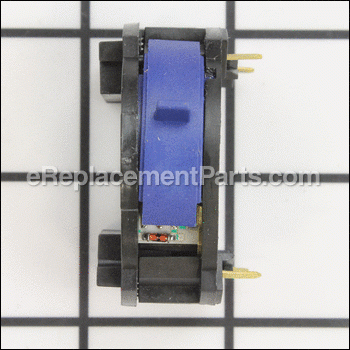
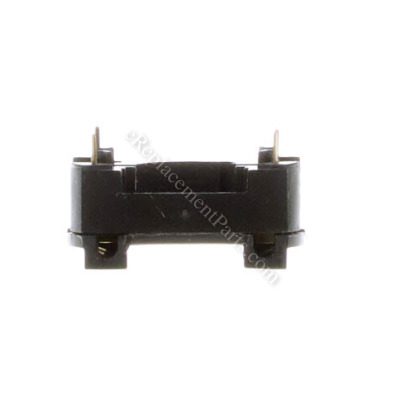
This is a Genuine Manufacturer Approved Dewalt replacement switch used on Dremel Multi-Tools. This part controls on/off and variable speed functions. Over time and because of use a switch will deteriorate and eventually fail requiring a replacement.
Variable Speed On-off Switch 2610912780
OEM part for: Dremel, Bosch
Part Number: 2610912780
Jump To:
Frequently Purchased Together ?
Compatibility
This part will fit the following 2 machines
Dremel
This item works with the following types of products:
- Multi-Tool Parts
Repair Videos ?
|
This article will prepare you for a Dremel 395 Moto-Tool switch repair. The instructions will keep you on task throughou...
March 27, 2013
|
Customer Part Reviews ?
- 1
- 2
Questions & Answers ?
Our customer Service team is at the ready daily to answer your part and product questions.

Ask our Team
We have a dedicated staff with decades of collective experience in helping customers just like you purchase parts to repair their products.
Does this fit my product?Questions & Answers for Variable Speed On-off Switch
Customer Repair Instructions ?
All our customer repair instructions are solicited directly from other customers just like you who have purchased and replaced this exact part.
Variable speed tool would not run at some speed settings.
Tool Type
MultiTool
Difficulty
Medium
Time
30-60 minutes
Tools Used
Screwdriver, Pliers, small pick
Parts Used
Remove the metal bail that is used to hang the tool. Remove the collet nut and collet. Unscrew the plastic cap from the nose of the tool. Using a Torx T-10 driver, remove the four screws that hold the body shell together. With the switch facing down remove the upper half of the shell. Carefully lift out the armature/field coil/switch assembly. The rear ball bearing may have a rubber vibration cushion around it. If so, remove and save it. Remove the two caps that hold the brushes in, and remove the brushes. Slide the armature assembly forward and out of the field coil assembly. Remove and retain the armature lock button and spring. Carefully pull the switch assembly straight back and off the field coil assembly; there are four prongs that connect the fields to the switch--don't bend them.
There are two power leads that connect to the switch assembly. Push a thin pick into the same hole that each wire enters and pull out the pick and the wire together.
Gently, but firmly, push the leads into the holes on the new switch. Pull on them to make sure they are properly captured. I found this to be the hardest part of the repair; the new switch did not capture the leads as firmly as the old switch did.
Assemble the new switch back onto the field coil assembly, making sure that each of the four prongs properly enter the switch connectors. Slide the armature assembly back into the field coil/switch assembly. Replace the rubber cushion back onto the rear ball bearing. Replace the armature lock button and spring back into the lower shell.
Fit the armature/field coil/switch assembly into the lower shell, being sure that the "handle" for the switch projects through the slot in the lower shell. Make sure that the armature lock button and spring are still properly located.
Guide the power wires through the channels in the lower shell to protect them from being pinched or cut when the the halves are tightened. Carefully reinstall the power cord strain relief in its recess in the lower shell.
Replace the upper shell and be sure that it fits comfortably with no strain or bending--it should not need to be forced. Reinstall the four Torx head screws that hold the shells together--snug, but do not over tighten.
Reinstall the brushes, noting that the curve in the brush faces should mate with the curved surface of the armature's commutator. Now would be a good time to install new brushes if the old ones are worn.
Replace the plastic ring on the nose of the tool and the hanging bail on the rear. Replace the collet and collet nut.
Put on eye protection. Make sure the tool is turned "Off". Plug it in and turn it "On" and check it at all speed settings.
On / off switch worn out variable speed
Tool Type
MultiTool
Difficulty
Medium
Time
1-2 hours
Tools Used
, torx
Parts Used
Side note take your time.
Dremel 3962-02 stopped running
Tool Type
MultiTool
Difficulty
Medium
Time
30-60 minutes
Tools Used
Screwdriver
Parts Used
Switch / motor control broke
Tool Type
MultiTool
Difficulty
Easy
Time
Less than 15 minutes
Tools Used
Screwdriver, Pliers
Parts Used
Tool would not run
Tool Type
MultiTool
Difficulty
Easy
Time
15-30 minutes
Tools Used
, Torx driver
Parts Used
Operation was erratic, then stopped.
Tool Type
MultiTool
Difficulty
Easy
Time
15-30 minutes
Tools Used
Screwdriver
Parts Used
Variable switch was no longer variable
Tool Type
MultiTool
Difficulty
Medium
Time
15-30 minutes
Tools Used
, Star Driver for the screws
Parts Used
2. Remove the covers and the brushes to the stator (2 total).
3. Remove the hook that allows you to hang the tool upright (just unclips from the end)
4. Remove 4 screws holding the body together and separate the halves of the body paying particular attention the pin and spring clip that allow you to tighten the head when replacing bits (located at the front end of the tool). These will need to be placed properly to allow for proper assembly.
5. Remove the bearing cover at the end of the drive assembly (rear of the tool)
6. Remove the drive assembly and separate the variable switch and power cord from the base.
7. Remove the wires from the switch with slight pulling pressure and install them into the new switch.
8. Install everything back in the reverse order of above.
Speed control was erratic
Tool Type
Grinder
Difficulty
Medium
Time
15-30 minutes
Tools Used
Screwdriver
Variable-speed Dremel tool stopped working
Tool Type
MultiTool
Difficulty
Easy
Time
Less than 15 minutes
Tools Used
Screwdriver, Torx head screwdriver to remove screws from the tool
Parts Used
Disconnected old switch from the white and black wires.
Installed new switch and reconnected the wires.
Reassembled the other half of the body to line up with holes, ensuring nothing was out of alignment so the rotary part of the tool spun freely.
Reattached the screws.
Unscrewed the caps where the spring-loaded brushes are located.
Popped out the old brushes.
Fit the springs over the new brushes and inserted back in the holes and refastened the caps.
Plugged it in and started it up!
Dremel variable speed switch faulty.
Tool Type
MultiTool
Difficulty
Easy
Time
15-30 minutes
Tools Used
Screwdriver, Torx drive tool required, but able to use flathead
Parts Used
2. Remove brushes.
3. Separate halves.
4. Remove switch assembly.
5. Remove power leads from switch assembly.
6. Install leads into new assembly.
7. Reassemble tool using new assembly.
OEM stands for Original Equipment Manufacturer and means the part you’re buying is sourced directly from the manufacturer who made your product. At eReplacementParts, we sell only genuine OEM parts, guaranteeing the part you’re purchasing is of better design and of higher quality than aftermarket parts.
Our product descriptions are a combination of data sourced directly from the manufacturers who made your product as well as content researched and curated by our content & customer service teams. This content is edited and reviewed internally before being made public to customers.
Our customer service team are at the ready daily to answer your part and product questions. We have a dedicated staff with decades of collective experience in helping customers just like you purchase parts to repair their products.
All our part reviews are solicited directly from other customers who have purchased this exact part. While we moderate these reviews for profanity, offensive language or personally identifiable information, these reviews are posted exactly as submitted and no alterations are made by our team.
All our customer repair instructions are solicited directly from other customers just like you who have purchased and replaced this exact part. While we moderate these reviews for profanity, offensive language or personally identifiable information, these reviews are posted exactly as submitted and no alterations are made by our team.
Based on data from past customer purchasing behaviors, these parts are most commonly purchased together along with the part you are viewing. These parts may be necessary or helpful to replace to complete your current repair.
All our installation videos are created and produced in collaboration with our in-house repair technician, Mark Sodja, who has helped millions of eReplacementParts customers over the last 13 years repair their products. Mark has years of experience in selling and repairing both commercial and residential products with a specialty in gas-powered equipment.
This data is collected from customers who submitted a repair instruction after replacing this exact part. Customers can rate how easy the repair was to complete and how long it took. We aggregate this data to provide a repair rating that allows customers to quickly determine the difficulty and time needed to perform their own repair.


