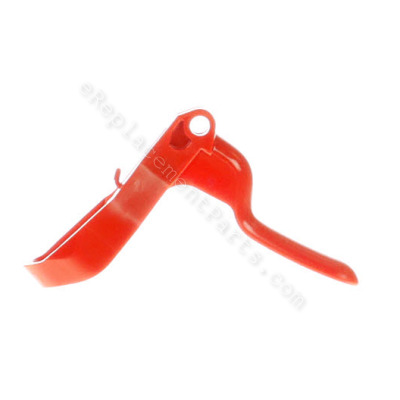
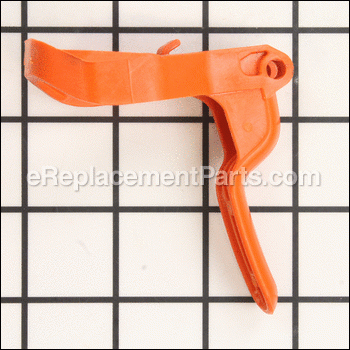
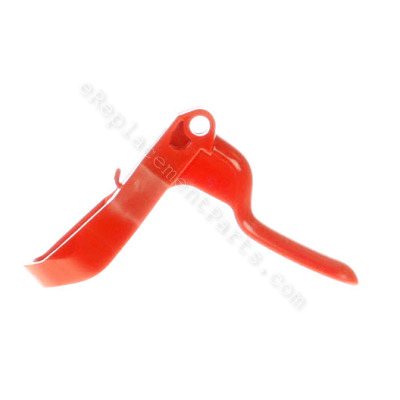
This is an authentic OEM part used in the Husqvarna trimmers listed below. This is the main trigger throttle mechanism attached to lower part of handle. While disassembling handle for this repair, be sure to separate pieces carefully so that no springs are lost. Note detailed positioning of all parts before removing them; proper positioning is vital to tool functioning. Sold individually. Throttle trigger spring is available separately, as part # 530016454.
Note that this trigger fits serial number 2010-73N and higher. For lower serial number models, see trigger part # 545066001.
Trigger 574355301
OEM part for: Husqvarna
Part Number: 574355301
Jump To:
Product Description ?
- Classification: Part
- Weight: 0.02 lbs.
- Shipping: Ships Worldwide
Frequently Purchased Together ?
Compatibility
This part will fit the following 30 machines
Husqvarna
This item works with the following types of products:
- Edger Parts
- Trimmer Parts
Customer Part Reviews ?
- 1
Questions & Answers ?
Our customer Service team is at the ready daily to answer your part and product questions.

Ask our Team
We have a dedicated staff with decades of collective experience in helping customers just like you purchase parts to repair their products.
Does this fit my product?Questions & Answers for Trigger
Customer Repair Instructions ?
All our customer repair instructions are solicited directly from other customers just like you who have purchased and replaced this exact part.
Wife dropped trimmer and broke trigger
Tool Type
Trimmer
Difficulty
Medium
Time
15-30 minutes
Tools Used
Adjustable Wrench, Torques and Allen wrenches
Parts Used
Broke the trigger due to strapping the trimmer to my zero turn mower.
Tool Type
Trimmer
Difficulty
Easy
Time
15-30 minutes
Tools Used
, Impact with star head bit
2. Wired on/off switch, fed the two wires and switch through desired position on new throttle housing.
3. Placed new trigger in proper place along with the new spring (came with trigger).
4. Left throttle housing and right housing fastened together.
5. Make sure all star head screws are tightened (do not over tighten) and then start your machine.
Edger was dropped and the plastic trigger broke off. Also fracturing the post the trigger swivels on. And i broke the spring while dissasembling the housing.
Tool Type
Edger
Difficulty
Easy
Time
15-30 minutes
Tools Used
, Hex bit, and a star bit in a bit driver
2. I reassembled using the new parts
broken trottle cable. broken trigger spring and trigger
Tool Type
Trimmer
Difficulty
Medium
Time
30-60 minutes
Tools Used
Screwdriver, Pliers
2. took screws out of shaft
3. took carburetor cover off
4. disassembled throttle cable and replaced
5. replaced trigger and spring and rerouted in housing and replaced all screws
6. fired that baby up!
Broken trigger
Tool Type
Trimmer
Difficulty
Easy
Time
15-30 minutes
Tools Used
Screwdriver, Pliers, Wrench Set, Allen wrenches
Parts Used
The throtle trigger was broke.
Tool Type
Trimmer
Difficulty
Easy
Time
Less than 15 minutes
Tools Used
Screwdriver, Socket set, Torx bit
Parts Used
Removed shaft connector.
Unhooked cable from trigger.
Slid broken trigger off shaft.
Did the reverse to install the new trigger.
I broke the trigger.
Tool Type
Trimmer
Difficulty
Easy
Time
15-30 minutes
Tools Used
Power Drill, Nutdriver, Hex Set
Parts Used
2-Remove housing
3-Remove motor screw
4-Detach bar
5-Remove trigger
6-Replace trigger
7-Reassemble
8-Tighten screws
9-All done
Trigger broke by falling over against a metal trailor.
Tool Type
Trimmer
Difficulty
Medium
Time
15-30 minutes
Tools Used
Screwdriver, Pliers, Nutdriver
Parts Used
Removed 2 bracket pieces from shaft.
Removed shaft from trimmer base.
Removed trigger cable from trigger and moved wires aside.
Removed trigger spring and trigger from bracket.
Installed new trigger with spring into bracket piece.
Re-attached trigger cable to trigger and set wires in channel.
Re-inserted shaft into base.
Re-affixed brackets around shaft and base with screws.
Went to work!
Trigger broke
Tool Type
Trimmer
Difficulty
Easy
Time
15-30 minutes
Tools Used
, Torques & Allen screws
Parts Used
Remove trigger casing
Loosen Allen screws on shaft & remove shaft.
Unhook cable and hook up new trigger to cable
Slide shaft through trigger in to motor then tighten Allen screws
Put plastic cover back over the the trigger & tighten screws
Trigger assembly broke and coupler was worn
Tool Type
Trimmer
Difficulty
Medium
Time
15-30 minutes
Tools Used
Screwdriver, Wrench Set
Removed bolts from coupler and separated upper and lower drive shaft
Removed coupler from upper drive shaft
Removed screws from trigger handle.
Separated handles halves and slipped throttle cable from trigger
Removed throttle return spring and handle from trigger
Slid trigger down drive shaft to remove
installed new trigger, replaced spring and throttle cable
Re-assembled handle halves and replace screws
Tested trigger for proper function and return unit to service.
Replaced Coupler-
I removed nut and bolts holding coupler to drive shaft
Removed drive shaft with trimmer head
Removed coupler from remaining shaft (this was done to access old trigger)
(After trigger replacement) Installed new coupler
Re-installed drive shaft with trimmer head
Replaced bolts/nuts and secured to drive shaft
OEM stands for Original Equipment Manufacturer and means the part you’re buying is sourced directly from the manufacturer who made your product. At eReplacementParts, we sell only genuine OEM parts, guaranteeing the part you’re purchasing is of better design and of higher quality than aftermarket parts.
Our product descriptions are a combination of data sourced directly from the manufacturers who made your product as well as content researched and curated by our content & customer service teams. This content is edited and reviewed internally before being made public to customers.
Our customer service team are at the ready daily to answer your part and product questions. We have a dedicated staff with decades of collective experience in helping customers just like you purchase parts to repair their products.
All our part reviews are solicited directly from other customers who have purchased this exact part. While we moderate these reviews for profanity, offensive language or personally identifiable information, these reviews are posted exactly as submitted and no alterations are made by our team.
All our customer repair instructions are solicited directly from other customers just like you who have purchased and replaced this exact part. While we moderate these reviews for profanity, offensive language or personally identifiable information, these reviews are posted exactly as submitted and no alterations are made by our team.
Based on data from past customer purchasing behaviors, these parts are most commonly purchased together along with the part you are viewing. These parts may be necessary or helpful to replace to complete your current repair.
All our installation videos are created and produced in collaboration with our in-house repair technician, Mark Sodja, who has helped millions of eReplacementParts customers over the last 13 years repair their products. Mark has years of experience in selling and repairing both commercial and residential products with a specialty in gas-powered equipment.
This data is collected from customers who submitted a repair instruction after replacing this exact part. Customers can rate how easy the repair was to complete and how long it took. We aggregate this data to provide a repair rating that allows customers to quickly determine the difficulty and time needed to perform their own repair.


