eReplacementParts.com
877-346-4814
Metabo HPT (Hitachi) Parts

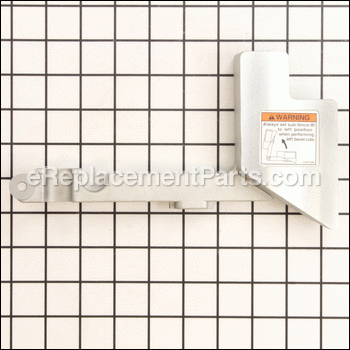
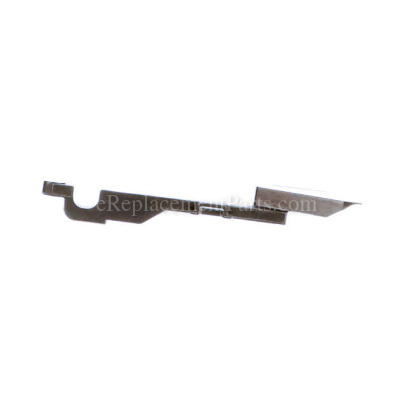
Sub Fence Assembly 325271

OEM part for: Metabo HPT (Hitachi)

Part Number: 325271


Install
Videos!
Sub Fence Assembly - 325271:Metabo HPT (Hitachi) 360 View
Sub Fence Assembly - 325271:Metabo HPT (Hitachi)Sub Fence Assembly - 325271:Metabo HPT (Hitachi)Sub Fence Assembly - 325271:Metabo HPT (Hitachi) 360 View
In Stock
Ships within 1 business day
Easy Less than 15 minutes (27 rated repairs)?
OEM: Original Equipment Manufacturer ?
Metabo HPT (Hitachi)
Does this d-block d-md-none fit my product?

Product Description ?

This is an Original Manufacturer Sourced replacement part used on specific Hitachi 12" Dual Compound Miter Saws. This part is made out of Metal and is Sold Separately. This Sub Fence adds height to right side. It helps with taller moldings and work-Pieces as well.

  • Classification: Part
  • Weight: 0.67 lbs.
  • Shipping: Ships Worldwide

Compatibility

This part will fit the following 3 machines

Metabo HPT (Hitachi)

C12FDH 12" Laser Dual Compound Miter Saw View Diagrams & Manuals
C12LDH 12" Dual Compound Miter Saw View Diagrams & Manuals
C12FDHSM 12 Inch Dual Bevel Miter Saw With Laser Marker View Diagrams & Manuals
Don't see yours? Try searching our site for :

This item works with the following types of products:

  • Miter Saw Parts
  • Saw Parts

Customer Part Reviews ?

5
Average Rating (out of 5):
8 Reviews
Click to filter by ratings:
5 stars
8
4 stars
0
3 stars
0
2 stars
0
1 stars
0
  • Highest Rating
  • Most Recent
< PREV
  • 1
NEXT >
  • Parts were exactly as described
    Hitachi miter saw rails fit perfect
    Guest - August 21, 2023 Verified Purchase
    Perfect!
    Parts worked perfectly. Quick shipping.
    Guest - February 23, 2023 Verified Purchase
    right part
    The part arrived on time and was exactly as I ordered. Will save your company to my bookmarks under Handyman folder and order again when needed.
    robert - July 17, 2019 Verified Purchase
    Back up and running
    Parts fit perfectly. Shipping was on time. We'll buy from you guys again. A plus service
    Guest - July 15, 2019 Verified Purchase
    Excellent Quality
    Excellent quality and delivered very quickly
    Kimberly - July 5, 2019 Verified Purchase
    Replacement Parts
    The parts came on time and were what I expected
    Guest - June 5, 2019 Verified Purchase
    Easy repair
    Gate fence for my radial cut off saw
    Guest - May 20, 2019 Verified Purchase
    Snap,snap!!
    receive my parts really fast got them to my shop and snap snap everything fits. I’m really happy and for sure if I break something else I will order from them again
    Guest - May 6, 2019 Verified Purchase
    t
    t
    t - t days ago Verified Purchase
    eReplacementParts Team
    t

    Questions & Answers ?

    Our customer Service team is at the ready daily to answer your part and product questions.

    photo of team member
    Ask our Team

    We have a dedicated staff with decades of collective experience in helping customers just like you purchase parts to repair their products.

    Does this fit my product?

    Questions & Answers for Sub Fence Assembly


    No questions have been asked yet

    Customer Repair Instructions ?

    All our customer repair instructions are solicited directly from other customers just like you who have purchased and replaced this exact part.

    Easy Less than 15 minutes (27 rated repairs)?

    I damaged the sub-fence by not moving it off to the side when cutting a vertical angle,

    Allen - February 22, 2016
    👍 6 of 6 people found this instruction helpful
    Tool Type

    Miter Saw

    Difficulty

    Easy

    Time

    Less than 15 minutes

    Tools Used

    Wrench Set

    Remove the bolt,nut and washer that secure the sub-fence and replace the sub-fence with the repair sub-fence. Secure bolt, nut and washer as they were before their removal.
    Did you find this story helpful?
    Thanks for voting and helping fellow customers!

    I destroyed the original fence when I cut through a board and hit a nail that I didn't know was in the board. It blew the board out the back of the saw and tore the aluminum fence apart (completely)

    Ted - March 21, 2016
    👍 4 of 5 people found this instruction helpful
    Tool Type

    Miter Saw

    Difficulty

    Easy

    Time

    Less than 15 minutes

    Tools Used

    Screwdriver, Wrench Set, Square, 4 ft. Level

    I first loosely attached one side of the main fence and snugged the bolts finger tight. Next I lowered the blade and squared (used my framing square) the fence with the blade, then tightened the bolts. Next I loosely attached the opposite fence and snugged the bolts finger tight. I placed my 4 ft level across both halves of the fence and aligned the second half with the first, then tightened the bolts. Then I installed the two sub-fences. Super easy and took less than 15 minutes.
    Did you find this story helpful?
    Thanks for voting and helping fellow customers!

    Bent fences

    Barry - December 27, 2016
    👍 2 of 2 people found this instruction helpful
    Tool Type

    Miter Saw

    Difficulty

    Easy

    Time

    30-60 minutes

    Tools Used

    Screwdriver, Wrench Set

    Replaced fences. Easy installation. Unbolted, line up and re-bolted new.
    Did you find this story helpful?
    Thanks for voting and helping fellow customers!

    Fence on miter saw was bent

    Ron - April 28, 2017
    👍 1 of 1 people found this instruction helpful
    Tool Type

    Miter Saw

    Difficulty

    Easy

    Time

    15-30 minutes

    Tools Used

    Screwdriver, Socket set, Wrench Set

    Removed old parts and replaced with new.Then squared the fence to the table and to the blade
    Did you find this story helpful?
    Thanks for voting and helping fellow customers!

    Sub-fence and fence cracked

    Russell - April 26, 2017
    👍 1 of 1 people found this instruction helpful
    Tool Type

    Miter Saw

    Difficulty

    Easy

    Time

    15-30 minutes

    Tools Used

    Wrench Set

    Removed damaged fences and reinstalled new ones. Realigned and shimmer sub-fence at 90° to base.
    Did you find this story helpful?
    Thanks for voting and helping fellow customers!

    Fence guide and saw blade came together violently. Fence and blade had to be replaced.

    Brian - March 23, 2017
    👍 1 of 1 people found this instruction helpful
    Tool Type

    Miter Saw

    Difficulty

    Easy

    Time

    Less than 15 minutes

    Tools Used

    Screwdriver, Socket set

    1. Removed old fence.
    2. Ordered new one.
    3. Installed new fence.

    Note to file: When making bevel cuts, make sure fence is moved out of the way...
    Did you find this story helpful?
    Thanks for voting and helping fellow customers!

    Broken sub fence

    Alfred - March 20, 2017
    👍 1 of 1 people found this instruction helpful
    Tool Type

    Miter Saw

    Difficulty

    Easy

    Time

    Less than 15 minutes

    Tools Used

    Screwdriver, None

    Removed screw, removed broken piece , replaced with new piece, replaced screw
    Did you find this story helpful?
    Thanks for voting and helping fellow customers!

    Saw blade cut in sub fence

    Ira - December 14, 2016
    👍 1 of 1 people found this instruction helpful
    Tool Type

    Miter Saw

    Difficulty

    Easy

    Time

    Less than 15 minutes

    Tools Used

    Screwdriver

    Removed 1 screw form old fence, installed new fence and reinstalled screw.
    Did you find this story helpful?
    Thanks for voting and helping fellow customers!

    Fence broke due to unseen nail in wood. The wood was thrown into fence and also ruined my blade.

    Paul - November 8, 2016
    👍 1 of 1 people found this instruction helpful
    Tool Type

    Miter Saw

    Difficulty

    Easy

    Time

    Less than 15 minutes

    Tools Used

    Socket set, Adjustable Wrench

    1. Removed locknut and bolt.
    2. Removed broken fence.
    3. Placed new fence with bolt and nut.
    4. Tightened locknut tight and backed off 1/4 turn to allow fence to swing.
    Did you find this story helpful?
    Thanks for voting and helping fellow customers!

    Don' know how but all of my miter saw fences got broken,

    JOaquin - March 7, 2016
    👍 1 of 1 people found this instruction helpful
    Tool Type

    Miter Saw

    Difficulty

    Easy

    Time

    15-30 minutes

    Tools Used

    Socket set

    Just unscrewed the broken parts cleaned the area and replaced/screwed back the new parts in place, all I use was my socket set. Then I squared them up and aligned them.
    Did you find this story helpful?
    Thanks for voting and helping fellow customers!

    OEM stands for Original Equipment Manufacturer and means the part you’re buying is sourced directly from the manufacturer who made your product. At eReplacementParts, we sell only genuine OEM parts, guaranteeing the part you’re purchasing is of better design and of higher quality than aftermarket parts.

    Our product descriptions are a combination of data sourced directly from the manufacturers who made your product as well as content researched and curated by our content & customer service teams. This content is edited and reviewed internally before being made public to customers.

    Our customer service team are at the ready daily to answer your part and product questions. We have a dedicated staff with decades of collective experience in helping customers just like you purchase parts to repair their products.

    All our part reviews are solicited directly from other customers who have purchased this exact part. While we moderate these reviews for profanity, offensive language or personally identifiable information, these reviews are posted exactly as submitted and no alterations are made by our team.

    All our customer repair instructions are solicited directly from other customers just like you who have purchased and replaced this exact part. While we moderate these reviews for profanity, offensive language or personally identifiable information, these reviews are posted exactly as submitted and no alterations are made by our team.

    Based on data from past customer purchasing behaviors, these parts are most commonly purchased together along with the part you are viewing. These parts may be necessary or helpful to replace to complete your current repair.

    All our installation videos are created and produced in collaboration with our in-house repair technician, Mark Sodja, who has helped millions of eReplacementParts customers over the last 13 years repair their products. Mark has years of experience in selling and repairing both commercial and residential products with a specialty in gas-powered equipment.

    This data is collected from customers who submitted a repair instruction after replacing this exact part. Customers can rate how easy the repair was to complete and how long it took. We aggregate this data to provide a repair rating that allows customers to quickly determine the difficulty and time needed to perform their own repair.

    eReplacementParts.com
    7174 South 400 West
    Suite 5
    Midvale, UT 84047
    visa mastercard discover american express PayPal