eReplacementParts.com
877-346-4814
Karcher Parts
Repair Parts Home
  
Lawn Equipment Parts
  
Karcher Parts
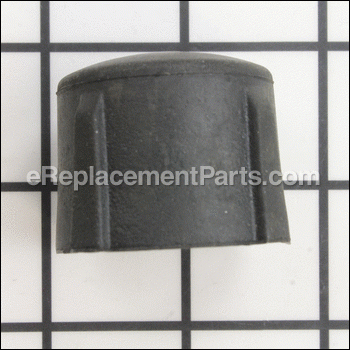
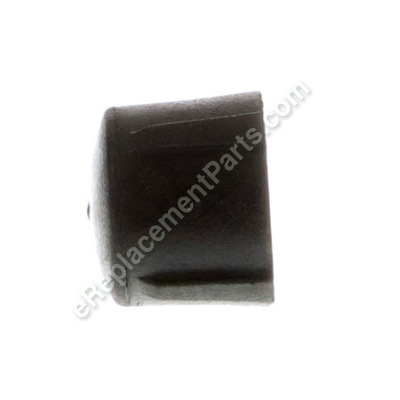
  9.183-405.0 Rubber Dampener 5/16-18femal

Rubber Dampener 5/​16-18femal 9.183-405.0

OEM part for: Karcher

Part Number: 9.183-405.0


Install
Videos!
Rubber Dampener 5/16-18femal - 9.183-405.0:Karcher 360 View
Rubber Dampener 5/16-18femal - 9.183-405.0:KarcherRubber Dampener 5/16-18femal - 9.183-405.0:KarcherRubber Dampener 5/16-18femal - 9.183-405.0:Karcher 360 View
In Stock
Ships within 1 business day
Easy Less than 15 minutes (10 rated repairs)?
OEM: Original Equipment Manufacturer ?
Karcher
Does this d-block d-md-none fit my product?

Product Description ?

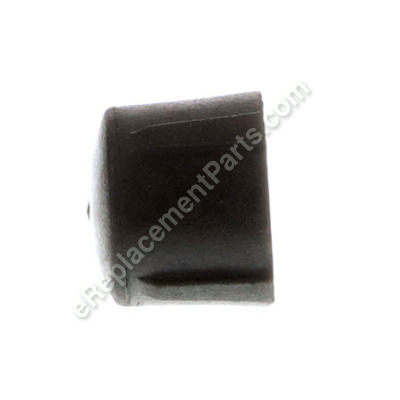
This rubber buffer is an authentic OEM component which is designed for use with Karcher pressure washers. It is attached to the bottom of the frame in order to provide support for the unit. Over time it may wear out, get damaged or lost eventually requiring a replacement. Make sure to refer to the diagrams of your model for the exact location and the correct installation. One durable rubber buffer is included. Note, the bolt that secures this component is sold separately. Replacing this buffer is a simple task that should not require any tools. If your old part does not unscrew, you may use pliers to remove it.

  • Classification: Part
  • Weight: 0.12 lbs.
  • Shipping: Ships Worldwide

Frequently Purchased Together ?

Compatibility

This part will fit the following 45 machines

Karcher

G 1800 LB (1.133-124.0) Gas Pressure Washer View Diagrams & Manuals
K 6000 GH (1.194-109.0) Pressure Washer View Diagrams & Manuals
K 2300 G (1.194-110.0) Pressure Washer View Diagrams & Manuals
HD 3500 G (1.810-994.0) Pressure Washer View Diagrams & Manuals
HD 3500 DH-QC (1.810-996.0) Pressure Washer View Diagrams & Manuals
HD 3500 DH (1.810-997.0) Pressure Washer View Diagrams & Manuals
HD 3500 DB (1.810-998.0) Pressure Washer View Diagrams & Manuals
HD 3501 (1.810-999.0) Pressure Washer View Diagrams & Manuals
K 1800 G (1.133-114.0) Pressure Washer View Diagrams & Manuals
K 2200 G (1.133-115.0) Pressure Washer View Diagrams & Manuals
K 1800 IB (1.133-121.0) Pressure Washer View Diagrams & Manuals
K 1800 AB (1.133-122.0) Pressure Washer View Diagrams & Manuals
K 2200 IB (1.133-211.0) Pressure Washer View Diagrams & Manuals
HD 3000 MTD (1.187-114.0) Pressure Washer View Diagrams & Manuals
HD 2500 HK (1.194-115.0) Pressure Washer View Diagrams & Manuals
HD 2700 DB (1.194-116.0) Pressure Washer View Diagrams & Manuals
HD 2700 DH (1.194-117.0) Pressure Washer View Diagrams & Manuals
HD 2700 DH (1.194-118.0) Pressure Washer View Diagrams & Manuals
HD 2701 DR (1.194-200.0) Pressure Washer View Diagrams & Manuals
HD 2500 MTD (1.194-114.0) Pressure Washer View Diagrams & Manuals
HD 3000 DH (1.187-115.0) Pressure Washer View Diagrams & Manuals
HD 3000 DH (1.187-116.0) Pressure Washer View Diagrams & Manuals
G 2301 LT (1.133-213.0) Pressure Washer View Diagrams & Manuals
HD 3600 DH (1.810-934.0) Pressure Washer View Diagrams & Manuals
G 2300 IB (1.133-214.0) Pressure Washer View Diagrams & Manuals
HD 2600 DK (1.194-122.0) Pressure Washer View Diagrams & Manuals
HD 2700 DH (1.194-123.0) Pressure Washer View Diagrams & Manuals
G 2600 OR (1.194-506.0) Pressure Washer View Diagrams & Manuals
G 2401 OH (1.194-505.0) Pressure Washer View Diagrams & Manuals
G 2500 HT (1.194-307.0) Pressure Washer View Diagrams & Manuals
G 3000 OH (1.194-509.0) Pressure Washer View Diagrams & Manuals
G 2800 OH (1.194-510.0) Pressure Washer View Diagrams & Manuals
G2500PH (11944010) Pressure Washer View Diagrams & Manuals
G 4000 SH (18104000) Pressure Washer View Diagrams & Manuals
G 2500 LH (11944030) Pressure Washer View Diagrams & Manuals
G 2650 OH (11945130) Pressure Washer View Diagrams & Manuals
G 3050 OH (11945150) Pressure Washer View Diagrams & Manuals
G 3025 OH (11945160) Pressure Washer View Diagrams & Manuals
G 3000 BH (11946010) Pressure Washer View Diagrams & Manuals
G 4000 RH (18104010) Pressure Washer View Diagrams & Manuals
G 2500 OH (11945120) Pressure Washer View Diagrams & Manuals
G 2600 PH (11944050) Pressure Washer View Diagrams & Manuals
G 3025 BH (11946020) Pressure Washer View Diagrams & Manuals
G 4000 OH (11948010) Pressure Washer View Diagrams & Manuals
G 2600 PC (11071110) Gas Pressure Washer View Diagrams & Manuals
Show More Compatible Models
Don't see yours? Try searching our site for :

This item works with the following types of products:

  • Pressure Washer Parts

Customer Part Reviews ?

5
Average Rating (out of 5):
6 Reviews
Click to filter by ratings:
5 stars
6
4 stars
0
3 stars
0
2 stars
0
1 stars
0
  • Highest Rating
  • Most Recent
< PREV
  • 1
NEXT >
  • Parts were great
    Made fixing my preasure washer a breeze
    Guest - February 23, 2021 Verified Purchase
    Best website, shipping fast!
    exactly like I need.
    Aginaldo - July 8, 2020 Verified Purchase
    Nice replacement
    I needed new feet for my pressure washer. The model I had, it said the feet were no longer made. So I went and looked at other Karcher pressure washers that had two feet on them. In the parts diagrams I could see that these were close. Even had the same thread size as the originals. The bolts were exactly the same. So with a bit of sleuthing I able to get new feet for my old pressure washer that fit perfectly.
    Guest - May 8, 2020 Verified Purchase
    Parts for a pressure washer.
    First class handling of my order from start to finish. While it was my first experience with your company, it will not be my last. Keep up the good work. John
    Guest - April 7, 2020 Verified Purchase
    Quality Parts that work
    This product was easy to install (fasteners sold separately) and worked as expected. Would purchase again if needed.
    Guest - May 28, 2019 Verified Purchase
    heel bumber for pressure washer
    just like new thanks
    steven - May 3, 2019 Verified Purchase
    t
    t
    t - t days ago Verified Purchase
    eReplacementParts Team
    t

    Questions & Answers ?

    Our customer Service team is at the ready daily to answer your part and product questions.

    photo of team member
    Ask our Team

    We have a dedicated staff with decades of collective experience in helping customers just like you purchase parts to repair their products.

    Does this fit my product?

    Questions & Answers for Rubber Dampener 5/​16-18femal


    No questions have been asked yet

    Customer Repair Instructions ?

    All our customer repair instructions are solicited directly from other customers just like you who have purchased and replaced this exact part.

    Easy Less than 15 minutes (10 rated repairs)?

    Rubber pads were worn down. Lost bolts and knobs from lending machine out.

    Timothy - April 29, 2021
    Tool Type

    Pressure Washer

    Difficulty

    Easy

    Time

    Less than 15 minutes

    Tools Used

    Adjustable Wrench

    Removed old rubber pads and replaced with new ones.
    Removed makeshift bolt and nut and replaced with the correct bolt and knob.
    Did you find this story helpful?
    Thanks for voting and helping fellow customers!

    Karcher rubber buffers were worn & leaving marks on cement

    Steve - November 5, 2019
    Tool Type

    Pressure Washer

    Difficulty

    Easy

    Time

    Less than 15 minutes

    Tools Used

    Pliers

    Remove the bad worn out buffers with the use of pliers (counter clockwise)
    Took the old bolts out too.
    Place the NEW bolts in slots where you removed the old
    Screw the NEW rubber buffers on the bolt (clockwise)
    When tight I used the pliers to tighten them little more snugly
    Easy repair job that took me less than 5 minutes
    Did you find this story helpful?
    Thanks for voting and helping fellow customers!

    Missing parts due to vibration

    Larry - April 10, 2018
    Just installed by hand
    Did you find this story helpful?
    Thanks for voting and helping fellow customers!

    Restoring Karcher pressure washer. Rubber buffers were missing

    Theodore - April 4, 2018
    Tool Type

    Pressure Washer

    Difficulty

    Easy

    Time

    Less than 15 minutes

    Tools Used

    Pliers

    Put the buffers through holes and tightened nuts. Done
    Did you find this story helpful?
    Thanks for voting and helping fellow customers!

    Rubber buffers became detached from the unit and were lost.

    Randall - November 28, 2017
    Tool Type

    Pressure Washer

    Difficulty

    Easy

    Time

    Less than 15 minutes

    Tools Used

    Pliers

    Replaced the missing rubber buffers onto the frame.
    Did you find this story helpful?
    Thanks for voting and helping fellow customers!

    Rubber buffers where worn.

    Laszlo - September 21, 2017
    Tool Type

    Pressure Washer

    Difficulty

    Easy

    Time

    Less than 15 minutes

    Tools Used

    Screwdriver, Wrench Set

    1. Removed the old buffers.
    2. Installed the new ones.

    Did you find this story helpful?
    Thanks for voting and helping fellow customers!

    Rubber buffers which stabilize the washer during use were worn and missing. Missing handle knob

    Keith - September 16, 2017
    Installed the bolts and hand tightened the buffer and knob
    Did you find this story helpful?
    Thanks for voting and helping fellow customers!

    Buffers were worn down

    roberta - May 29, 2017
    Tool Type

    Pressure Washer

    Difficulty

    Easy

    Time

    15-30 minutes

    Tools Used

    Pliers

    Unscrewed old buffers and screwed on the new ones-- easy
    Did you find this story helpful?
    Thanks for voting and helping fellow customers!

    Rubber buffers were missing after loaning machine to family members

    jay - May 25, 2017
    Tool Type

    Pressure Washer

    Difficulty

    Easy

    Time

    Less than 15 minutes

    Tools Used

    Placed carriage bolts in frame. Spun rubber buffers on bolts and tightened by hand
    Did you find this story helpful?
    Thanks for voting and helping fellow customers!

    New rubber feet old ones worn, new caps for wheels

    Mark - March 3, 2016
    Tool Type

    Pressure Washer

    Difficulty

    Easy

    Time

    15-30 minutes

    Tools Used

    , Hammer

    Place bolt thru bottom stand and thread on the feet. Use a mallet to tap the caps onto the axle to secure the wheels.
    Did you find this story helpful?
    Thanks for voting and helping fellow customers!

    OEM stands for Original Equipment Manufacturer and means the part you’re buying is sourced directly from the manufacturer who made your product. At eReplacementParts, we sell only genuine OEM parts, guaranteeing the part you’re purchasing is of better design and of higher quality than aftermarket parts.

    Our product descriptions are a combination of data sourced directly from the manufacturers who made your product as well as content researched and curated by our content & customer service teams. This content is edited and reviewed internally before being made public to customers.

    Our customer service team are at the ready daily to answer your part and product questions. We have a dedicated staff with decades of collective experience in helping customers just like you purchase parts to repair their products.

    All our part reviews are solicited directly from other customers who have purchased this exact part. While we moderate these reviews for profanity, offensive language or personally identifiable information, these reviews are posted exactly as submitted and no alterations are made by our team.

    All our customer repair instructions are solicited directly from other customers just like you who have purchased and replaced this exact part. While we moderate these reviews for profanity, offensive language or personally identifiable information, these reviews are posted exactly as submitted and no alterations are made by our team.

    Based on data from past customer purchasing behaviors, these parts are most commonly purchased together along with the part you are viewing. These parts may be necessary or helpful to replace to complete your current repair.

    All our installation videos are created and produced in collaboration with our in-house repair technician, Mark Sodja, who has helped millions of eReplacementParts customers over the last 13 years repair their products. Mark has years of experience in selling and repairing both commercial and residential products with a specialty in gas-powered equipment.

    This data is collected from customers who submitted a repair instruction after replacing this exact part. Customers can rate how easy the repair was to complete and how long it took. We aggregate this data to provide a repair rating that allows customers to quickly determine the difficulty and time needed to perform their own repair.

    eReplacementParts.com
    7174 South 400 West
    Suite 5
    Midvale, UT 84047
    visa mastercard discover american express PayPal