

Miter Saw: Bad Vibration
If your miter saw has bad vibration, check the bearings, saw blade, blade flange, spindle, and more. Once you have nared down the part responsible for causing the issue, use our repair guide for expert advice on how you can fix this yourself, saving you on time and money.
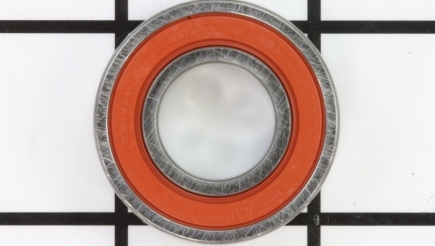
Bearings
When bearings wear out, they will make a gling, moaning or humming noise and will also be accompanied by a vibration. Repair procedures will vary on all makes and models, but will be similar.
To check and replace armature bearings, start by removing the belt cover and then walk the belt off of the pulleys. Some models will have screws holding a sliding bracket in place – loosen these screws. Loosen the belt tensioning screw at the back and remove the belt. Remove the brushes from the miter saw by first taking off the motor end cap, sliding the tension spring over and then pulling out the brushes. Some models will have brush caps on the side, which can be easily removed with a screwdriver. Remove the dust bag bracket. Remove the armature housing from the saw. Pull the armature housing free from the saw and tap the end of the armature lightly with a rubber mallet, or brass hammer, to free it from the housing.
Spin the bearings on the armature shaft to determine which one is bad. For bearings beside the fan, remove the pulley screw. Use a heat gun to heat up the pulley in order to remove it from the shaft, with the keyway. Take out the retaining ring with a small screwdriver by walking it up the shaft. Do not damage the fan.
On some models, the fan is not sold separately and, if damaged, you will have to replace the entire armature. If there is no room between the bearing and the fan for a bearing puller, you will have to score the bearing with a cut off wheel and then insert the bearing into a vice and tighten until it breaks off.
With the outer race now off, use needle-nose pliers to remove the cage and balls. Install the bearing separator onto the inner bearing race and then install the screw back into the armature shaft to avoid damage from the bearing puller. Install the bearing puller onto the separator and proceed to remove the inner race of the bearing.
Next, install the new bearing onto the shaft using a socket that only makes contact with the inner race of the bearing. Tap in place with a hammer.
Now, reinstall the retaining ring and reheat the pulley back up for easy installation on the shaft, making sure to install the keyway with the pulley. Install the pulley screw. To replace the lower bearing on the armature shaft, use a bearing puller to remove it and then install the new one onto the shaft, using a socket that only makes contact with the bearings inner race – to avoid damage – and tap in place with a hammer. Slide the armature back into the housing and lightly tap on the pulley screw with a hammer (to avoid damaging the armature shaft) to seat the lower bearing into the motor housing.
Reinstall the motor assembly to the miter saw and tighten the screws. Reinstall the brushes and the motor end cap, followed by the dust bag bracket, the belt and lastly, the belt cover. To replace the saw bearing, remove the outer flange, blade and inner flange – including any washers. Remove the spindle assembly. Once removed, use a bearing separator to take out the bearing on the shaft and then tap a new one in place on the shaft with a socket that only makes contact with the inner race of the bearing to avoid damage. For the bearing inside the bearing box, use a bearing puller to separate the bearing box (sleeve) from the spindle and then use a socket that only makes contact with the outer race of the bearing. Tap it free with a hammer. Install the new bearing with the same socket to avoid damage and tap it in place with a hammer. Reinstall the spindle assembly into the saw and reattach the inner flange, blade and outer flange. ... Read more
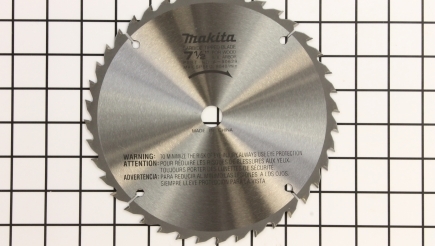
Blades
If the blade is bent, or warped, it will cause a bad vibration. To check and see if the blade is bent, or warped, remove it from the miter saw and lay it on a perfectly flat surface. Visually check all around to make sure the blade is flat. Touch around the blade to make sure it does not move up and down. If it does move as you touch it, then it is warped and you will need to install a new blade.
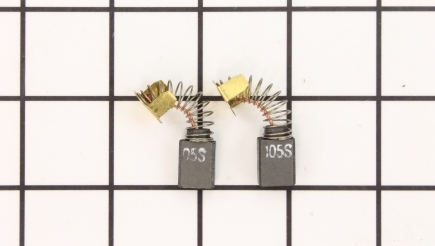
Carbon Brushes
Carbon brushes ride on the commutator in order to provide power to the armature. Eventually, these brushes will wear down. When the brushes become worn, they can cause bad vibrations. To check the condition of these brushes, remove the motor end cap and slide the tension spring to the side. Remove the brushes. Brushes measuring 1/8 of an inch, or less, are worn. Replace the brushes with new ones and then reapply the tension springs. Reinstall the motor end cap. Some models will have brush caps on the side, for easy access to the brushes. Take it off using a screwdriver and pull out the brushes – installing new brushes, if necessary. Brushes should always be replaced in pairs. ... Read more

Flanges
Worn blade flanges will cause the miter saw to have a bad vibration. Check for play within the blade and flange assembly. There should be no play at all between the flange and shaft or the flange and blade. If you notice play, replace the flanges by removing the bolt and removing the outer flange, blade and inner flange. Replace the flanges and reinstall in reverse order.

Spindles
If the spindle is worn, or damaged, it will cause a bad vibration and poor cuts. To change a worn out spindle, remove the outer flange, blade and inner flange – including any washers. Remove the spindle assembly. You can replace the assembly as a unit, which is a good idea as a bad vibration may have damaged the spindle bearings. Install the new spindle assembly and reinstall any washers, the inner flange, blade and lastly, the outer flange.