

How to Replace the Spool on a Weed Eater XT10 String Trimmer
The spool on string trimmer is usually one of the first parts that can become defective. This is due to all of the abuse and smacking they take over the course of their lifetime. Fortunately, most manufacturers make replacing a broken spool very easy -- even more someone who has never repaired before. If you're looking for a bit of assistance with this repair, follow the steps in this guide.

Purchase your replacement XT10 spool here!
Removing the Spool
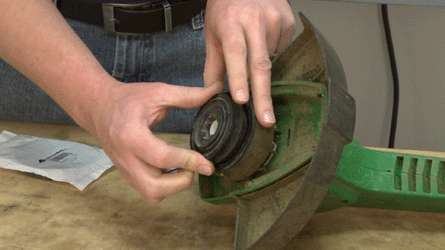
1. Remove the cap
Twist the cap counter-clockwise and pull it away from the trimmer.

2. Remove the button
Simply pull the button off of the spool assembly.

3. Remove the string spool
This is free to be pulled away from the unit.

Installing the New Spool
1. Install the new string spool
Set the new string spool into the spool housing.
Align the trimmer line with the eyelet.

2. Replace the button
Set the button on top of the string spool.

3. Reinstall the cap
Place the cap over the button and turn it clockwise to secure.

Conclusion
And that's how easy it is to replace the spool in your Weed Eater XT10 in less than 15 minutes. Keeping your string trimmer running like new will help it last a long time and save you money for years to come.
Shop for other Weed Eater XT10 replacement parts.