

How to Replace the Choke Knob on a Poulan Chainsaw (Model P3314)


Trouble starting your chainsaw? It's time to face the fix. Whether you are a legendary lumberjack or a weekend woodworker, eReplacementParts.com provides the parts, procedures and facts you need to fearlessly fix what fails you.
The choke knob attaches to the choke plate lever on the carburetor. When the choke knob is pulled out, the choke plate (on the front of the carburetor throat) is rotated to the choked position. The choke draws additional fuel into the carburetor during a cold start.
After years of use, the arm that connects the knob to the choke lever may become fatigued and break off. The knob might get broken accidentally by dropping the saw, kicking the choke knob (often during starting), or if something falls on the saw.
This article provides step-by-step instructions for removing and installing the choke knob on a Poulan chainsaw.
Let's get started.

REMOVING THE CHOKE KNOB [top]
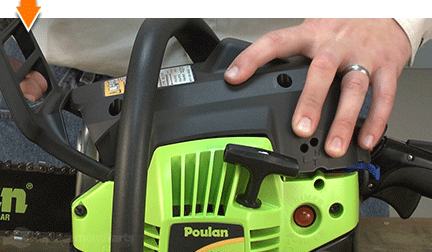
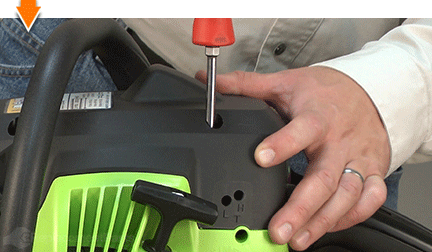
1. Remove the top cover.
Remove the (3) screws securing the top cover to the saw.
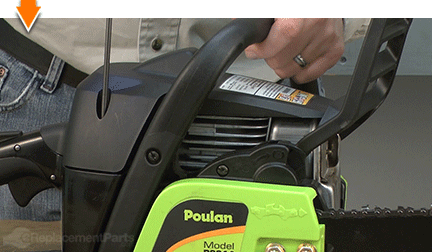
Lift the top cover away from the saw.
2. Remove the air filter cover.
Remove the air filter cover from the air filter housing.

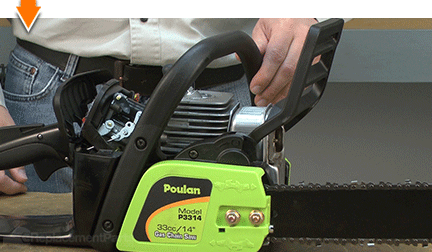
3. Remove the ignition switch lever.
Remove the screw securing the ignition switch lever to the engine.

Slide the ignition switch lever away from the engine.

4. Remove the choke knob.
Pivot the choke knob horizontally until the carburetor linkage (and the choke knob arm) are visible.
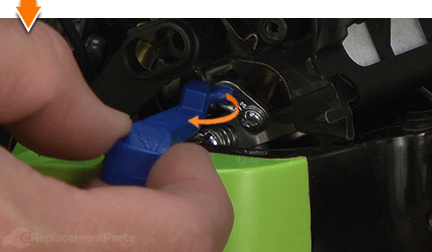
Disconnect the choke knob arm from the carburetor linkage.

INSTALLING THE NEW CHOKE KNOB [top]
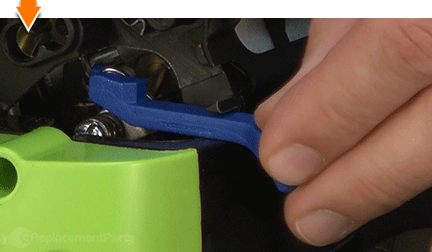
5. Install the choke knob.
Connect the new choke knob arm to the carburetor linkage.

Pivot the choke knob horizontally toward the rear of the saw (until the end of the knob is parallel to the trigger).
REASSEMBLING THE UNIT [top]
6. Reinstall the ignition switch lever.
Use a small screwdriver to press (and hold) the ignition switch spring away from the plastic mounting post (on the engine housing).

Install the ignition switch lever onto the plastic mounting post.

Secure the ignition switch lever with the screw.

7. Reinstall the air filter cover.
Install the air filter cover.

8. Reinstall the top cover.
Install the top cover onto the saw.
Secure the top cover with the (3) screws.

Do-it-yourself repairs like these are easier than you might think: From lawn machines to cordless drills, kitchen mixers to outdoor grills. Our "how-to" articles walk you through each repair from start to finish.
So, doing-it-yourself means never having to do it alone.
Find your next fix here.