

Oscillating Tool: Won't Turn on
If your oscillating tool isn't turning on, not to worry, we can help you diagnose the problem. First, look for signs of wear in tear on the following parts: the circuit board, carbon brush, switch, cord, armature, and field. Once you have determined which part is damaged, read on for tips on how you can repair this yourself - it might be easier then you think. Reference your owner's manual for detailed instruction for your model.
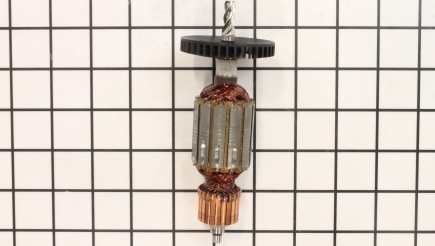
Armatures
The armature is the power-producer of the motor, located inside the field portion of the motor. A damaged armature can cause the oscillating tool not to turn on. To access the armature, remove the brushes and open the housing of the oscillating tool. For some models, the brushes cannot be removed until the housing is open. Lift up the motor and slide the armature out. Inspect the armature for signs of malfunctioning, such as burn marks, melted windings that indicates sparking, overheating and a possible short within the armature. This can cause it not to conduct the flow of electricity. Replace the armature if these signs of damage are present.
You can test the armature to check its condition. There are three test to use when checking an armature. The first is continuity test. With the armature removed from the unit, stand it up on a bench. Attach one end of the ohmmeter to the shaft, for ground, and the other to the bar on the commutator. Move the probe to each bar on the commutator, checking all of the bars. If the ohmmeter shows a reading on one of the bars, this will indicate a short and a bad armature.
The second test is a bar to bar test, to determine the resistance. Attach one probe to a bar on the commutator and the other probe on the bar right beside it. There will be a specific reading for this, depending on the design of the armature. Most importantly, there is not a large fluctuation here between the values, indicating a fault. If there is an increase in resistance, this will indicate there is a broken or burned out wire in the coil. Should the resistance drop, that means there is a short. Move around the commutator, checking each bar.
The third test is the 180-degree test. Attach the two ends of the ohmmeter on the commutator bars, directly across from each other. There will be a specific set of readings for this, depending on the design of your unit. Once again, what is important is that there is not a large fluctuation in values, which would indicate a fault. If there is an increase in resistance, that would indicate a broken or burnt wire. If it drops, there is a short. Continue this test on all the bars If an armature fails any of these tests, it is recommended that you replace it. Install the armature into the field and position the motor assembly back together in the housing. Reassemble the housing back together and reinstall the brushes with the brush caps. ... Read more

Carbon Brushes
The carbon brushes ride on the commutator, supplying power to the armature. If the carbon brushes wear out, they will no longer be able to transmit power to the armature. This will cause the motor to remain off when turned on. To check the condition of the carbon brushes, remove the brush caps and pull out the brushes. The carbon brushes should be even, free from cracks, chips or missing chunks. They should not be under 1/8 of an inch. Any of these symptoms, or anything else out of the ordinary, replace the carbon brushes. Once you have replaced the brushes, reassemble the brush caps. On some models, you will have to open the housing to access and remove the carbon brushes. ... Read more

Fields
The field coil is an electromagnet used to generate a magnetic field. If the field has suffered damage from overheating, sparking or anything else, it can stop conducting electricity and cause the tool to remain off. To access the field, remove the brush caps and pull out the brushes. For some models, the brushes cannot be removed until the housing is open. Open the housing and take a photo of the wires connected to the field before disconnecting them. This will make for easier reattachment later. Lift up the motor and remove the armature from the field. Clean the field with electrical contact cleaner and inspect it for burn marks, melted winding or anything else out of the ordinary.
You can check the condition of the field by performing a couple of tests. Using a multimeter, you can check the field for continuity. Set the multimeter to an ohmmeter and place a lead on each end of the coil in the field. You will have to perform this test for each coil in the field. If the reading is infinity for one, or more, of the coils, then the field is bad and requires replacement. If there is a major variance between the coils, then the field needs to be replaced. Slide the armature into the field and position the field into the housing. Reattach the wires and reassemble the case back together. Install the brushes and brush caps. ... Read more
You can check the condition of the field by performing a couple of tests. Using a multimeter, you can check the field for continuity. Set the multimeter to an ohmmeter and place a lead on each end of the coil in the field. You will have to perform this test for each coil in the field. If the reading is infinity for one, or more, of the coils, then the field is bad and requires replacement. If there is a major variance between the coils, then the field needs to be replaced. Slide the armature into the field and position the field into the housing. Reattach the wires and reassemble the case back together. Install the brushes and brush caps. ... Read more

Power Cords
If the power cord has cracks, frays, splits, exposed wire or anything else that looks bad, then it needs to be replaced as it may not be conducting power to the tool. This is also a health and safety issue. To replace a damaged cord, open the housing of the tool. Remove the screw holding the cable clamp. Pull up on the switch and disconnect the wire terminals and remove the cord. Take out the screw holding the cable clamp and then pull up on the switch and disconnect the wire terminals. Remove the cord and then the guard off the old cord. With the new cord, strip approximately ¼ inch of insulation off each wire end. Install the cord guard. Crimp on the new wire terminals and attach to the switch. Install the switch and cord into the housing. Make sure all wires are in their appropriate channels so they do not get pinched during reassemble. Install the cord clamp and the screw and reassemble the housing back together. ... Read more

Switches
If the on/off switch is malfunctioning, it will not turn on the power to the motor. To inspect the switch and test it, open the housing of the oscillating tool and locate the switch. Remove the switch from the tool and examine it for any signs of damage, such as melting. Disconnect the wires from the switch. Use a multimeter set to an ohmmeter and attach it to the switch. With the switch in the on position, you should get a reading on the ohmmeter and with the switch in the off position, the ohmmeter should read O.L, or nothing. If this is not the case, then the switch is bad. Install a new switch, making note of where the wires attach correctly. Reassemble the housing back together. ... Read more

Circuit Board
The circuit board controls the oscillating tool when you turn it on and adjust the speed. Not all oscillating tools have a circuit board. Over time, and with use, this circuit board can burn out or a wire/component may break loose, making the tool inoperable.
To check the circuit board, remove the brush caps and carbon brushes. Some models do not have caps. Brushes can only be removed once the housing is open. Open the oscillating tool housing and locate the circuit board. Make sure all of the wires are attached to the circuit board before further diagnostics. A broken or loose wire at the circuit board may be the culprit.
Remove the circuit board and examine it for burn marks, melting and broken components. When replacing the circuit board, take a picture or make a diagram of the wire connections, allowing for easier reassembly. Remove the old wires from the circuit board and attach on the new circuit board. Reinstall in the housing and reassemble the housing back together. Reinstall the carbon brushes with the brush caps. ... Read more