

Nailer: Driver Won't Return
If the driver won't return on your nailer, check the following parts: o-rings, bumper, seals, driver, piston ring, springs, piston head valve, trigger valve, air tool oil, and gasket. Once you have the problem part figured out, read on for repair advice to help guide you through your own DIY repair. Refer to your owner's manual for information specific to your model.

Seals
A blown seal can cause the driver not to return. If you can hear air leaking inside the top cap it could be a blown seal. To inspect the seal remove the top cap. Remove the seal and inspect it for rips, cracks or deterioration and replace it if you notice anything. Install the top cap with a new gasket and tighten the screws a little at a time in an alternating pattern to seat the seal properly.

Springs
A malfunctioning spring inside the piston head valve can impact the operation of the nail gun causing a few problems, one of them being, keeping the piston/driver in the down position. For example if it is broken it could be jamming the valve open allowing air in at all times. To check the spring remove the top cover from the nail gun. Remove the valve from the cap. Inspect the valve for signs of a broken spring. Separate the inside portion of the valve from the outside portion. Remove the spring from the inner portion and install a new spring. Reassemble the 2 portions of the valve back together and reassemble back into the top cover. Reinstall to the top cap to the nail gun with a new gasket and tighten the screws in an alternating pattern a little at a time to seat the gasket. ... Read more
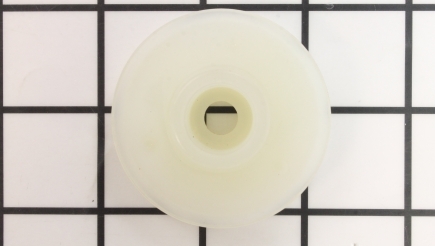
Valves
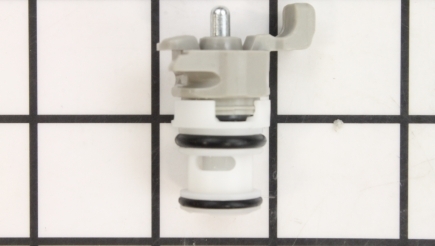
Some models have a one piece piston head valve in the top cap. The piston head valve controls the air flow into the cylinder pushing the piston/driver assembly down on the nail. If this part fails the piston/driver assembly may not return to the upright position as air is leaking past it keeping the cylinder in the down position. To inspect the piston head valve remove the top cap from the nail gun. Pull the piston head valve out with a pick. Inspect it for any signs of damage that will allow air to escape. Install the new piston head valve into the cap. If the piston head valve did not come with new O rings then make sure to install new O rings onto the piston head valve and apply a very small amount of Vaseline or lube to the O rings. Install a new gasket with the top cap and tighten the screws a little at a time in an alternating pattern to seat the seal. ... Read more
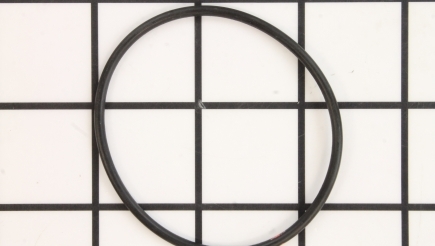
O-Rings
The O rings seal the cylinder with the housing and seal the trigger valve. When O rings fail they will impact the operation of the nailer and can prevent the driver from returning. Purchase an O ring kit for your model and replace all the O rings at the same time is a good idea since you will have it all apart. The kits are inexpensive and have everything you need to restore it to new condition. If 1 O ring is failing it is usually not long before another will follow this will save you time by having to fix it again in the near future.
Remove the top cap off of the nailer, the magazine and the bottom nose piece from the nail gun. Remove the cylinder from the nail gun, you may have to tap on the body with a rubber mallet to free it. Remove the piston/driver assembly from the cylinder. Remove the metal ring that supports the cylinder in the gun. There are O rings placed around the outside of the cylinder, and the metal ring that supports the cylinder. Inspect the O rings for tears, rips, and signs of deterioration.
Replace any damaged O rings (or all the O rings if you are rebuilding it). Remove them by placing a small screw driver under them and lifting up and walking them off. Install the new O rings and apply a little grease to the O ring. The grease is supplied in the kit or you can use Vaseline. Use a very tiny amount only. Remove the cage and valve from inside the head. (Some models just have a one piece piston head valve with O rings). Separate the inside portion of the valve from the outside portion by pulling them apart. There are O rings located on the outside and one on the inside. Replace these O rings. Replace the O ring on the nose piece. Do not apply grease to this O ring.
Reassemble the valve and reinstall into the head with the cage. Install the piston/driver assembly back into the cylinder. Install the nose piece back onto the housing and tighten the screws in an alternating pattern a little at a time to seat the O ring. Slide the metal ring over the cylinder assembly. Make sure the piston is all the way down in the cylinder for easier installation into the housing. Install the cylinder assembly back into the housing. Make sure the driver is aligned properly to the opening in the housing and press the assembly into place. Install the top cap and tighten the bolts a little at a time in an alternating pattern to seat the gasket properly. ... Read more
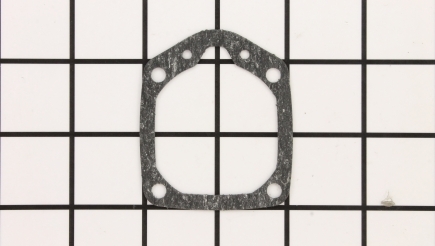
Gaskets
Worn out leaking gaskets can cause the driver not to return as well as other problems. If air is leaking from the top cap or bottom nose piece it can Impact the return of the driver. To replace the top gasket remove the screws and top cap. Clean the surfaces of both pieces and install a new gasket. Install the top cap and tighten the screws a little at a time in an alternating pattern to seat the gasket properly. To change the bottom gasket, remove the magazine and the nose piece. Clean both surfaces, install a new gasket and reinstall the nose piece tightening the screws in an alternating pattern a little at a time to seat the gasket. Reinstall the magazine. ... Read more

Oil
If your driver will not return, the first thing you should do is trying lubricating the tool. Add 5 to 6 drops of air tool oil through the air inlet. Attach the air line and fire the gun a few times to the get the lube to move all through the tool. If this does not solve the problem start trouble shooting the parts.
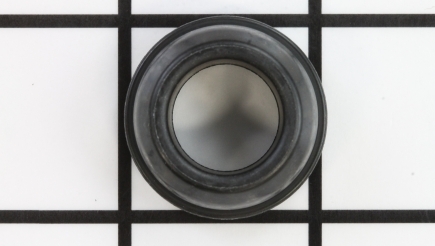
Bumper
The bumper prevents the piston from hitting the bottom of the cylinder causing damage as well as helping it return to the upright position. A deteriorating bumper can impact the return of the driver. You will have to access the bumper to inspect it for wear and damage.
Remove the top cap, the magazine, and the bottom nose piece. Remove the cylinder from the nail gun, and tap on the body with a rubber mallet to free the cylinder. The cylinder will pop right out. Remove the piston/driver assembly out of the cylinder. Remove the bumper from the driver and inspect it for any signs of wear and damage.
Install a new bumper if needed. Reassemble the piston/driver assembly back into the cylinder. Install the cylinder back into the nail gun by pressing it into the housing. Install the nose piece and tighten the screws in an alternating pattern a little at a time to seat the O ring. Reinstall the magazine. Reinstall the top and tighten the screws in an alternating pattern a little at a time to seat the gasket. ... Read more

Rings
If the piston is worn or damaged it can prevent the piston/driver assembly from returning. To inspect the piston ring remove the top cap, remove the piston/driver assembly out of the cylinder and inspect the piston ring for signs of wear, cracks and damage. Replace the piston ring if needed by placing a small screw driver under it and walking the ring off the piston. Install the new piston ring. Add a tiny amount a Vaseline or lube to the ring and install back into the cylinder. Install the top piece with a new gasket and tighten the screws in an alternating pattern a little at a time to seat the gasket. ... Read more
Triggers
The trigger valve controls the flow of air into the cylinder controlling the piston/driver assembly down and on some models back up when released. To replace a worn trigger valve remove the grommet on the side of the roll pin on the trigger. Tap the roll pin out and the trigger will fall away. Some trigger valves are held in with roll pins while others are screwed in. Tap the pins out or unscrew it depending on your set up. Remove the valve and install a new valve. Add Vaseline or lube to the O rings on the new trigger valve before install. Re install the trigger and grommet. ... Read more
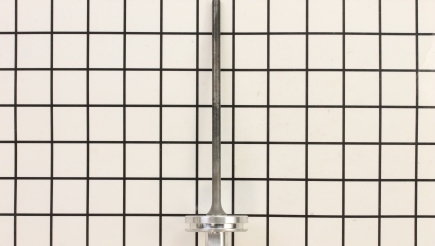
Drivers
The driver is a one piece unit attached to a piston on the top. The piston/driver assembly is placed inside a cylinder. When the trigger is pulled it releases air into the cylinder forcing the piston/driver assembly down on the next nail in line driving it into the material. If the driver is bent it can impact the operation of the nail gun such as the piston/driver assemble getting stuck and not being able to return.
To examine the driver lift the quick release and examine the driver. You may have to take it all apart to get a better view of the driver. To access the piston/driver assembly remove the cap on top of the nail gun and remove the cylinder and driver assembly. (You may need to tap on the side with a rubber mallet to free it up). Remove the piston/driver assembly from the cylinder. If the driver is bent install a piston/driver assembly into the cylinder, apply a small amount of Vaseline or lube to the piston ring first. Install the cylinder back into the housing and reattach the top cap with a new gasket. Tighten the screws in an alternating pattern a little at a time to seat the seal properly. ... Read more
To examine the driver lift the quick release and examine the driver. You may have to take it all apart to get a better view of the driver. To access the piston/driver assembly remove the cap on top of the nail gun and remove the cylinder and driver assembly. (You may need to tap on the side with a rubber mallet to free it up). Remove the piston/driver assembly from the cylinder. If the driver is bent install a piston/driver assembly into the cylinder, apply a small amount of Vaseline or lube to the piston ring first. Install the cylinder back into the housing and reattach the top cap with a new gasket. Tighten the screws in an alternating pattern a little at a time to seat the seal properly. ... Read more