

Hammer Drill: Won't Turn on
If your hammer drill won't turn on, check the carbon brushes, switch, power cord, holder, armature, and field. If you notice any signs of damage or wear and tear on any of these parts, read the corresponding repair advice for how to fix it. Refer to your owner's manual for detailed instructions for your model.

Carbon Brushes
The carbon brushes provide the electrical current to the armature by riding on the commutator. If these wear out, they will no longer be able to transmit power. To check the condition of the brushes, remove the handle and open up the hammer drill case (this will vary on all models). Locate the brush holders and gently pull up on the wire to remove the brush holders from the drill.
On some models you do not have to remove the entire holder, you will unfasten a clip on the holder and pull the brush out. If needed, clean with electrical contact cleaner. Check the condition of the brushes for damage and for anything else out of the ordinary. Brushes should not be 1/8 of an inch, or less, from the wire. Press down on the brush to check for good spring compression.
You can replace the brushes and springs by pressing the tab on the side of the holder to remove the brush and spring. Some models, the brush, spring, and holder are one unit and can only be replaced as such. Clean the holder with electrical contact cleaner and install new brushes and springs, ensuring the tab locks into place on the brush holder. Other models slide a new brush into the holder, applying the clip.
Reinstall back into the drill case, using a small screwdriver to hold the brush down to give you clearance. Reassemble the drill case back together and reattach the handle. ... Read more
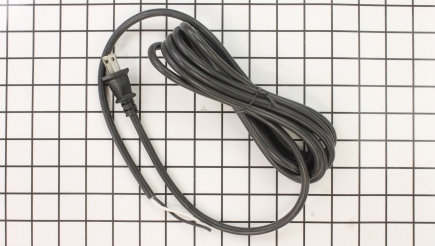
Power Cords
The cord delivers power to the drill from the outlet. Examine the cord for any cracks, splits, cuts, burn marks or anything else out of the ordinary. If you see any of these indications, you should replace the cord as it may not be delivering electricity to the drill. If it is still working, but is damaged, it is just a matter of time before it gets worse and quits. Damaged cords are also a safety hazard. If the power cord looks good, it may have come loose inside the drill.
To check, remove the handle and open the case of the drill. For some models, you will only be required to open the handle on the hammer drill. If the cord is in good shape, check the connections to where the power cord is connected to – usually the switch – making sure there is a good connection and repair any that are not. If the cord requires replacement, remove it from the connections in the drill and remove the cord guard. You may be required to strip the end of the wires on the new cord and attach connectors to the ends. If so, strip approximately ½ inch of the insulation from the wire and crimp the new connectors onto the wire. Install the cord guard on the new cord and attach the cord to the terminals. Make sure the guard is in place on the housing when you reassemble the case back together. Reattach the handle to the case. ... Read more
To check, remove the handle and open the case of the drill. For some models, you will only be required to open the handle on the hammer drill. If the cord is in good shape, check the connections to where the power cord is connected to – usually the switch – making sure there is a good connection and repair any that are not. If the cord requires replacement, remove it from the connections in the drill and remove the cord guard. You may be required to strip the end of the wires on the new cord and attach connectors to the ends. If so, strip approximately ½ inch of the insulation from the wire and crimp the new connectors onto the wire. Install the cord guard on the new cord and attach the cord to the terminals. Make sure the guard is in place on the housing when you reassemble the case back together. Reattach the handle to the case. ... Read more

Switches
The switch supplies power to the motor when you press down on it. Over time, and with use, the switch can wear out. To check the switch for damage, burn marks and melting – indicating a short – you will need to access it. Remove the handle and open up the case of the hammer drill. On some models, you will only have to open the handle. Remove the switch from the drill and detach the electrical connections, ensuring you do not mix up from their original attachment. Examine the switch around the electrical terminals for burn marks and melting, indicating overheating and a shorted-out switch.
Attach a multimeter set to an ohmmeter, to each terminal on the switch to check for continuity. The switch should read infinity, or zero, in the off position and when pressed, you should get a reading. If you do not get a reading in the on position, then the switch is not capable of supplying electricity and requires replacement. Install the new switch in the housing and reattach the wires to the correct connection. Reassemble the case back together, along with the handle. ... Read more
Attach a multimeter set to an ohmmeter, to each terminal on the switch to check for continuity. The switch should read infinity, or zero, in the off position and when pressed, you should get a reading. If you do not get a reading in the on position, then the switch is not capable of supplying electricity and requires replacement. Install the new switch in the housing and reattach the wires to the correct connection. Reassemble the case back together, along with the handle. ... Read more