

Trimmer Parts: Hard to start
If your trimmer is difficult to start, our repair and symptom guide can help you identify and fix this problem. Although a rare symptom, here are some parts to check: fuel lines, fuel vent, primer bulb, and air filter. This is a general guide for your repair; for more detailed information on your model, refer to the owner's manual.
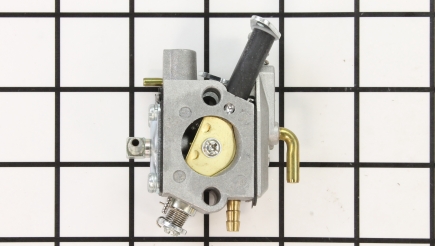
Carburetors
Carburetors dictate the proper air/fuel mix for combustion. Locate the carburetor underneath the air filter, and remove the air cleaner and cap. Use carburetor cleaner to clean out the carburetor, as it can become gummed up easily. Spray the inside of the carburetor and use a soft bristle brush to gently remove the buildup of grime. Check that the choke valve is functioning properly. It should be closed to allow for a rich air/fuel mixture on cold engine start-up for the first couple minutes. If it is not functioning properly, it may require a new cable, rod, or switch depending on the model and how it is attached, as different models are set up differently. Cables do stretch over time and need to be replaced. They are easily replaced by just unhooking them from the attachment points and installing a new cable. ... Read more

Air Filters
The air filter cleans the air, allowing clean-flowing air into the engine to prevent small particles from entering and damaging the cylinder walls and valves. Over time, the air filter will need to be replaced as it becomes clogged with small particles and debris, starving the engine of air and power. Clogged air filters will cause hard starts and even no starts if heavily soiled. Simply remove the air filter cover from the top of the carburetor by the tabs or screws that hold it in place, and replace.

Fuel Filters
The fuel filter is located inside the tank and prevents debris from entering the carburetor and engine, which can lead to damage. You can remove the fuel filter but using a hook and pulling it out of the fuel tank. Check to see if it is partially clogged as it can limit the flow of fuel to the engine. On some models you may have to remove the grommet on the side of the tank and push the fuel line into the tank so you can pull the fuel filter up. Insert a hook into the tank to grab the filter and pull it out. Clean any debris from the filter. Remove the filter by pulling it gently off the fuel line, replace the filter, and reassemble in reverse order. ... Read more
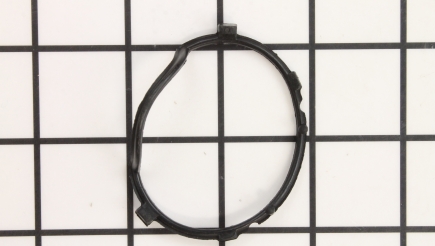
Gaskets
Gaskets perform a seal between joining pieces, sealing off air and fluids from entering and exiting areas where they are not supposed to go. A damaged gasket below a carburetor will pull excess air into the engine, causing the air/fuel mixture to be lean, leading to a hard start situation. To check this, start by removing the air filter then loosen the carburetor bolts. Pinch the fuel line to prevent fuel spill. Remove the fuel line and disconnect any linkages on the carburetor. Check condition of the gasket; look for tears or any indications of leaks. Gaskets are a onetime use, so you will have to replace it at this point regardless of condition. Clean both surfaces where the gasket sits. Re-attach the linkage and fuel line, and bolt the carburetor back down then re-install the air filter housing and filter. ... Read more

Spark Plugs
The spark plug ignites the air fuel mixture in the combustion chamber. To check the plug, carefully remove the wire from spark plug, as they are fragile. Remove spark plug and check condition, sometimes on a 2-stroke engine they can have oily buildup from an improper oil/gas mixture, causing the spark not to jump. Clean the plug and re-gap to the manufacturer's specs, and check for any deposit, breakage, melting, or corrosion. If you see any of these symptoms replace the plug and gap it to the manufacturer's specs.
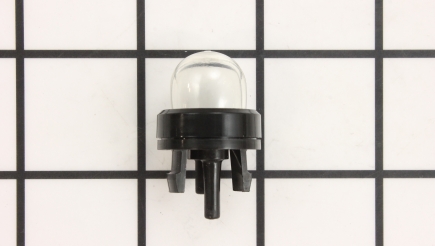
Primer Bulbs
The purpose of the primer bulb is to pull fuel through the fuel line into the carburetor by creating a vacuum. Pressing it twice should give sufficient fuel to mix with air for combustion on a cold start up. Check the primer bulb for any leaks by doing a quick visual inspection. It can also pull air in if cracked. Listen for air entering through cracks. Air entering will cause the air/fuel ratio to be off, causing a hard-to-start symptom. To replace it, simply pull it off with a pair of pliers. Next grab a small pick in reach back into where the bulb came off and grab the clip and pull out. Clean out the housing. Put the new clip on the primer bulb with tabs facing out. Then use a socket that fits over the primer bulb and push it into the housing with a gentle tap with a rubber mallet. Make sure the metal clip is as far as it can go without damaging the primer bulb. This procedure could vary on different models, but all are fairly similar. ... Read more
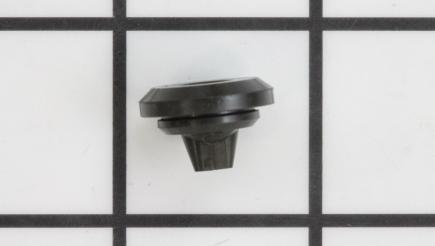
Vents
The fuel vent allows air into the fuel tank as the fuel level drops during use. If blocked it will cause a vacuum and stop the flow of fuel. To check this part. locate the fuel vent just off the fuel tank. It will be attached to a fuel line entering the tank through a grommet, with the fuel delivery and return lines. Once located, simply pull off the clamp, holding it onto the fuel lines. You will need a pressure checker to check for vacuum. Most people will not have this tool on hand. The part is inexpensive and easy to replace.
... Read more

Carb Kits
A carburetor kit contains new parts for the inside of your carburetor. This will restore your carburetor to new condition, preventing any problems and keeping your engine running smoothly.
Fuel that sits for a long period of time, especially mixed with oil, has the tendency to gum up the inside of a carburetor. Remove covers to access the air filter. Remove the air filter housing and air filter, then remove the bolts holding down the carburetor and gasket. Next, gently remove the fuel lines by twisting them and pulling, then remove the carburetor linkage. Remove the carburetor, taking photos to make reassembly easier.
Remove the screws on the bottom of the carburetor and pull the bottom off. Remove the gasket, diaphragm, primer bulb, and the cover. On the bottom of the carburetor, keep track of how the lever, spring, and hinge pin fit together inside the carburetor. Remove the screw and pull these parts out of the carburetor. Clean the carburetor with carburetor cleaner and a soft bristle brush, making sure to get inside all the ports. If you notice any corrosion on the inside, you must install a new carburetor.
Install the needle and lever on the bottom of the carburetor and re-install the screw to secure them in place. Install the gasket, diaphragm, and cover. Make sure to install them in the correct order, referring to your photos as you go. Install the top cover and primer bulb. Re-install the carburetor back onto the engine with a new gasket, and hook back up the linkages and fuel lines. Re-install the air filter housing, filter, and covers. To adjust the carburetor, start with both screws backed out 2 turns from the closed position. One should be idle mix and the other should be high speed. Start the engine and let it warm up for 5 minutes. You may have to keep the throttle open a bit. Slowly turn in the low speed jet, until it starts to die, then back it out another 1/4 to 1/2 turn. Next hold the throttle wide open, and slowly turn in the high speed, until it really starts to smooth out and rev high, and make a screaming noise. Then back this out until it starts to run rough or slows down, and turn it back in to midway between these two positions.
Keep playing with the low speed needle until you get rapid immediate response from the throttle, and good idle with the idle adjustment. Next play with the high speed needle, but always back it out from the setting about 1/4 turn or so, from where it runs the smoothest. This setting of backing it out will allow more fuel when under a load, and keep your 2 cycle motor from running too lean. Put a load on it and just tweak the settings a hair at a time. Also make sure your oil/gas is mixed at the proper ratio. Most will start and run with both screws open 2 turns initially. Don’t close the high speed off any more than necessary, regardless of how well it runs. ... Read more
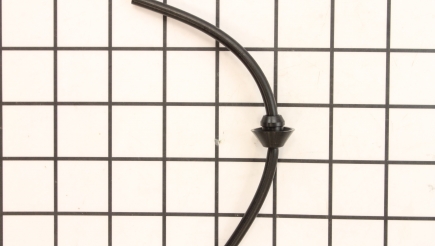
Fuel Lines
The purpose of the fuel lines is to deliver fuel from the tank to the carburetor, where it is mixed with air for combustion. If your trimmer is hard to start it could be a result of blocked or obstructed fuel lines. Gently pull the fuel line off the carburetor in a twisting motion, and do the same on the fuel tank. Some models may require you to remove a rubber grommet on the side of the tank first, where the fuel line feeds into. You can simply blow through the lines looking for anything unusual coming out, such as thick oily substances or blockages. If you see anything unusual coming out, or hear a partial blockage, it's best to replace the line. Lines should also be replaced if they look old and weather-cracked, as they could leak and cause a fire. ... Read more