

Engine Parts: Only runs with the choke on
If your engine only runs with the choke on, check the springs, gasket, air filter, diaphragm, and carb. Our repair and troubleshooting guide will help you understand the cause of your problem and how to best repair it. Note: this is a general repair guide. Check the manual provided by your owner for more specific repair information related to your model.

Springs
The carburetor may contain springs that control certain valves. If your engine only runs with the choke on, you should check if all the springs are fully operational. Look for any disconnected, damaged, or missing springs. Check a repair manual for you model to ensure that all the springs are where they should be, and that they are installed correctly.
Carburetors
The carburetor mixes air and fuel together to the proper ratio for combustion. A carburetor that is set up incorrectly can cause the engine RPMs to surge up and down. To repair the carburetor, first locate both idle screws; one will be marked L (low) and one will be marked H (high). Turn both screws in to shut off the flow of fuel, then turn in the opposite direction for two turns. Now, start the engine, and let it idle for a few minutes to allow it to reach operating temperature. Start your adjustments by turning the L screw clockwise until the engine starts to slow, then turn it counter-clockwise until it starts to slow again. You will want to set the adjustment screw in the midpoint of the two previous spots. Using a tachometer to gauge engine speed, set the idle speed screw to bring the engine to 1750 RPM for aluminum-cylinder engine or 1200 RPM for an engine with a cast-iron cylinder sleeve. Then, at full throttle, turn the high speed or main jet screw clockwise until the engine begins to slow. Next, turn the screw the other way until the engine slows again. As before, you will want to set the adjustment screw at the midpoint of these two turns. Once adjusted, check the engine acceleration by moving the throttle from idle to fast. The engine should accelerate smoothly. If it does not, you will need to re-adjust the mixture screws. ... Read more

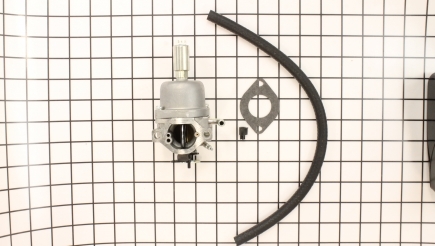
Gaskets
The gasket under the carburetor prevents excess air from entering the engine, which can cause the engine to run lean. If this gasket is damaged, it can cause the engine to only run when the choke is on. To check the condition of this gasket, first remove the air cleaner housing and filter and pinch off the fuel lines to prevent a spill. Next, remove the fuel line from the carburetor and remove the bolts securing it to the engine. Disconnect the linkage at the carburetor and inspect the gasket for signs of deterioration. The gasket must be replaced regardless of condition, as they are designed for one-time use. Now you can clean both mounting surfaces, install a new gasket, and re-install the carburetor. Hook the linkage and fuel line back up, remembering to un-pinch the fuel line to allow fuel to flow again. Finally, re-install the air cleaner housing and filter. ... Read more

Diaphrams
Some engines use carburetors that house a diaphragm to regulate the fuel mixture. Over time, this diaphragm will start to deteriorate and can cause the rate of fuel to decrease. This can impact your overall engine performance. To solve this issue, first remove the air filter housing assembly. Remove the carburetor from the engine by unbolting it. Then, pinch off the fuel lines to prevent a fuel spill, and remove the fuel line. Remove the carburetor and the linkages, and remove the gasket under the carburetor. Next, remove the screws on the bottom of the carburetor and pull the bottom off. Remove the gasket and the diaphragm, and install a new gasket with a new diaphragm. Now, reinstall the cover back onto the carburetor and hook the linkage back up. Then, re-install the carburetor back onto the engine with a new gasket underneath it and reattach the fuel line (remember to un-pinch the fuel line before you re-attach it). Finally, reattach the air filter housing and filter. ... Read more

Carb Kits
A carburetor kit contains everything you need to rebuild your carburetor after it becomes sticky or damaged. When rebuilding the carburetor, it’s a good idea to take pictures of all the parts as you take it apart so you’re aware of where they go during reassembly. Start by removing the air filter housing unit and air filter. Pinch off the fuel line to prevent fuel from flowing, then remove the fuel line. Locate the bolts securing the carburetor to the engine and air intake and remove them. Disconnect the linkages from the carburetor, and the carburetor should now slide right off. Set the engine on a bench and begin disassembly by removing the nut on the bowl, then removing the bowl and gasket. Next, remove the float pin and the needle valve. Unscrew the main jet screw and dump it out with the emulsion tube, then remove the plastic throttle stop and the metering plug out of the carburetor. Spray the carburetor, fuel bowl, and all the small orifices with carburetor cleaner and wipe them clean. If you notice any corrosion inside the carburetor or the bowl, you will need a new carburetor. To begin with the rebuild process, re-install the new emulsion tube and main jet, and tighten them down. Next, install a new metering plug, re-install the throttle stop screw and thread it until it sticks out the other side about 1/16 of an inch. Next, install the new spring on the needle valve, snap the new needle valve into the new float, and reattach the float into the carburetor by sliding the new pin in. Now, install the new bowl O-ring, reinstall the bowl and tighten it down. Once rebuilt, re-install the carburetor with a new gasket, sealing it to the intake. Then, reattach the linkages and fuel line, and remember to un-pinch the fuel line to allow the fuel to flow. Finally, reattach the air filter housing back onto the engine. ... Read more