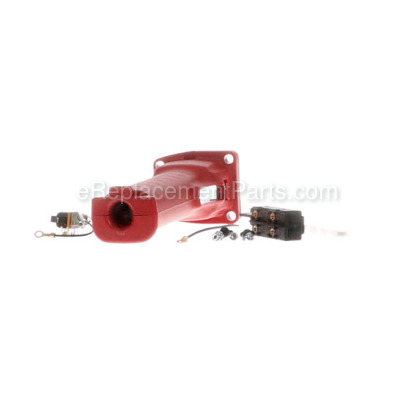
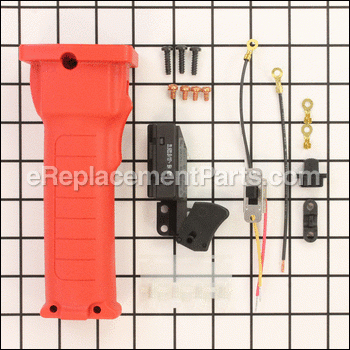
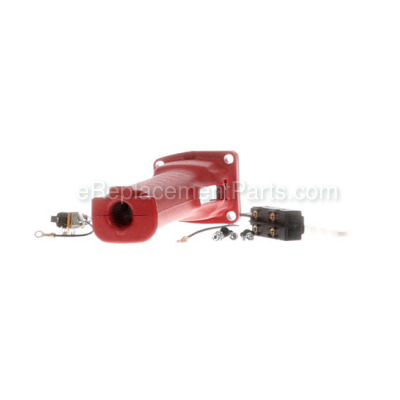
This switch is an OEM genuine replacement part. It is used in Milwaukee electric drills/drivers. Included is one (1) each of: switch handle casing, trigger switch, reversing switch, and cord clamp. A total of seven (7) screws are also included. Power cord and cord protector are sold separately. A Torx screwdriver is needed for this repair.
On-off Reversing Switch 23-66-1421
OEM part for: Milwaukee
Part Number: 23-66-1421
Jump To:
Frequently Purchased Together ?
Compatibility
This On-off Reversing Switch will fit the following 23 machines. Confirm this part works with your model, and view the detailed model diagrams and repair help we have to offer.
Milwaukee
Show More Compatible ModelsThis item works with the following types of products:
- Drill Parts
- Electric Drill Parts
This part replaces obsolete part #: 23-66-1420
Customer Part Reviews ?
- 1
Questions & Answers ?
Our customer Service team is at the ready daily to answer your part and product questions.

Ask our Team
We have a dedicated staff with decades of collective experience in helping customers just like you purchase parts to repair their products.
Does this fit my product?Questions & Answers for On-off Reversing Switch
Customer Repair Instructions ?
All our customer repair instructions are solicited directly from other customers just like you who have purchased and replaced this exact part.
Reversing switch and trigger switch inoperative
Tool Type
Electric Drill
Difficulty
Medium
Time
30-60 minutes
Tools Used
Screwdriver, Pliers
Parts Used
2. Removed plastic handle.
3. Used o-ring pick to remove wires from old switch.
4. New handle is a bit longer, so I stripped cord to fit.
5. Crimped on new connectors.
6. Installed all wires.
7. ** When I fitted up the new handle to the drill, I found that the cut out for the green ground screw was not correct so that the handle would not mate securely to the drill. I took my Dremel tool and carved out a notch where the ground screw could correctly nest.
8. Drill is back in action and ready to break your arm if you don't respect it's torque!
9. Thank you, ereplacement parts!!!
The Milwaukee Super Hole Shooter drill would not reverse. Would only run on the forward direction no matter which position the reversing switch was in.
Tool Type
Electric Drill
Difficulty
Easy
Time
30-60 minutes
Tools Used
Screwdriver, Pliers, Torx driver set
Parts Used
Reversing switch bad
Tool Type
Electric Drill
Difficulty
Easy
Time
15-30 minutes
Tools Used
Screwdriver, Wire cutters/wire strippers
Parts Used
Switch broke
Tool Type
Electric Drill
Difficulty
Easy
Time
15-30 minutes
Tools Used
Screwdriver, Pliers
Parts Used
Trigger wasn’t engaging drill
Tool Type
Electric Drill
Difficulty
Medium
Time
Less than 15 minutes
Tools Used
Screwdriver, Crimp tool?
Parts Used
Trigger got stuck
Tool Type
Electric Drill
Difficulty
Easy
Time
1-2 hours
Tools Used
Screwdriver, Pliers, Wire strippers
Open handle and remove screws from the
clamp holding the pigtail wire.
Open replacement handle and follow instructions.
Tool Type
Electric Drill
Difficulty
Medium
Time
Less than 15 minutes
Tools Used
Screwdriver, Pliers, Crimpers, wire strippers, small pick
Reverse switch on drill was no longer operational.
Tool Type
Electric Drill
Difficulty
Easy
Time
15-30 minutes
Tools Used
Screwdriver
Parts Used
OEM stands for Original Equipment Manufacturer and means the part you’re buying is sourced directly from the manufacturer who made your product. At eReplacementParts, we sell only genuine OEM parts, guaranteeing the part you’re purchasing is of better design and of higher quality than aftermarket parts.
Our product descriptions are a combination of data sourced directly from the manufacturers who made your product as well as content researched and curated by our content & customer service teams. This content is edited and reviewed internally before being made public to customers.
Our customer service team are at the ready daily to answer your part and product questions. We have a dedicated staff with decades of collective experience in helping customers just like you purchase parts to repair their products.
All our part reviews are solicited directly from other customers who have purchased this exact part. While we moderate these reviews for profanity, offensive language or personally identifiable information, these reviews are posted exactly as submitted and no alterations are made by our team.
All our customer repair instructions are solicited directly from other customers just like you who have purchased and replaced this exact part. While we moderate these reviews for profanity, offensive language or personally identifiable information, these reviews are posted exactly as submitted and no alterations are made by our team.
Based on data from past customer purchasing behaviors, these parts are most commonly purchased together along with the part you are viewing. These parts may be necessary or helpful to replace to complete your current repair.
All our installation videos are created and produced in collaboration with our in-house repair technician, Mark Sodja, who has helped millions of eReplacementParts customers over the last 13 years repair their products. Mark has years of experience in selling and repairing both commercial and residential products with a specialty in gas-powered equipment.
This data is collected from customers who submitted a repair instruction after replacing this exact part. Customers can rate how easy the repair was to complete and how long it took. We aggregate this data to provide a repair rating that allows customers to quickly determine the difficulty and time needed to perform their own repair.


