



Bosch Parts

Bosch Portable Planer Planer Jointer Replacement Parts For Model PL2632 (3601EA4310)

We Sell Only Genuine Bosch Parts

Popular Parts for Bosch PL2632 (3601EA4310)

Search Within Model

Questions & Answers for Bosch PL2632 (3601EA4310)

Browse all Parts Search by Area
Page A Diagram and Parts List for PL2632 3601EA4310 Bosch Planer Jointer
Page A
Page B Diagram and Parts List for PL2632 3601EA4310 Bosch Planer Jointer
Page B
Previous
Showing All Parts
Next
Page A
Page A Diagram and Parts List for PL2632 3601EA4310 Bosch Planer Jointer
Page B
Page B Diagram and Parts List for PL2632 3601EA4310 Bosch Planer Jointer
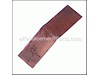
  • PAD – Part Number: 2609101407
    PAD
    Part Number: 2609101407
      Special Order
    $6.16
  • HEXAGON-SOCKET KEY – Part Number: 2607950025
    HEXAGON-SOCKET KEY
    Part Number: 2607950025
      In Stock
    $7.36
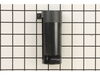
  • DUST BAG – Part Number: 2605411035
    DUST BAG
    Part Number: 2605411035
    ★★★★★
    ★★★★★
    (1)
      In Stock
    $83.86
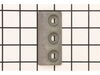
  • GUIDE – Part Number: 2609111859
    GUIDE
    Part Number: 2609111859
      Special Order
    $21.96
  • O-RING – Part Number: 1610210043
    O-RING
    Part Number: 1610210043
      In Stock
    Minimum Quantity of 2 required
    $6.16
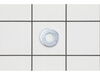
  • PLAIN WASHER – Part Number: 2916011014
    PLAIN WASHER
    Part Number: 2916011014
      In Stock
    Minimum Quantity of 2 required
    $6.16
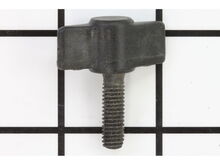
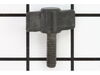
  • WING SCREW 6X20 – Part Number: 1613480008
    WING SCREW 6X20
    Part Number: 1613480008
    ★★★★★
    ★★★★★
    (2)
      In Stock
    Minimum Quantity of 2 required
    $6.55
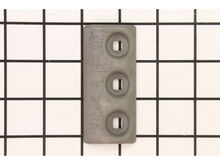
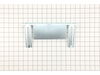
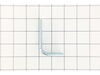
  • BRACKET – Part Number: 2609112158
    BRACKET
    Part Number: 2609112158
      In Stock
    $11.29
  • SCREW – Part Number: 2910281201
    SCREW
    Part Number: 2910281201
      In Stock
    Minimum Quantity of 2 required
    $6.16
  • WING NUT – Part Number: 2609199008
    WING NUT
    Part Number: 2609199008
      In Stock
    $6.16
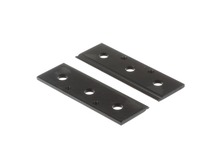
  • PAD – Part Number: 2609101668
    PAD
    Part Number: 2609101668
      Special Order
    $6.16

Questions & Answers

?

Ask our Team

We have a dedicated staff with decades of collective experience in helping customers just like you purchase parts to repair their products.

  • 1
Sort by:  
Sorry, we couldn't find any existing answers that matched.
Try using some different or simpler keywords, or submit your new question by using the "Ask a Question" button above!
How do the power cord wires come loose from the switch?
Monte For model number PL2632 - March 17, 2022

Hi Monte, Thank you for your question. Each time you plug your planer in to use it, the wires will heat and cool and expand and contract. Overtime, through continued use of the planer the wires will loosen because of this. If you have any questions, please let us know. We are open 7 days a week. We look forward to hearing from you!

eReplacementParts Team
March 17, 2022

Did this question help you?
Thank you for voting!
I was planing a piece and in mid stroke the plane slowed way down and had no power. Air blew everything, still very slow rpm and no power, smelled smoke. Would you guess armature or field?
Jerry For model number PL2632 - April 10, 2023

Hi Jerry and thank you for contacting us. It sounds catastrophic for sure and I am thinking of the motor as well. Armature Test Once you have it apart clean it with an electrical contact cleaner only and inspect both the armature and field for burn marks and/or melted insulation indicating a short meaning the part is bad and requires replacement. Make sure all the bars are on the commutator and that it is free of debris between bars. Make sure the bearing on the armature spins smoothly with no noise. If it makes a sound and/or feels rough then it requires replacement. If the parts appear to be good then there is 3 test to perform when checking the armature for continuity. The first test is the 180-degree test. This is where you measure the resistance of the windings on the commentator by placing the probes from the OHM meter onto the commentator bars. You do this by placing the probes opposite 180 degrees from each other on the bars. You are looking for a reading, that is it. If it shows O.L (Out of Limits) or infinity) then the armature is bad and requires replacing. You want similar readings all the way around the commutator. If they vary in range a lot then the commutator is bad and the armature requires replacement. The next test is a bar-to-bar test that measures each individual loop. You do this by placing the probes on adjacent commentator bars. You won?t know the readings for your model but you are looking for them to be close together. Any wide variation in the readings will indicate a bad armature. The last test is the bar-to-ground test. You do this by placing the black or ground probe on the tip of the armature shaft and attaching the positive (red) to each bar around the commutator. Here you want the OHM meter to read O.L. (Out of Limits) or infinity which means the circuit is open. If you get a reading then the circuit is closed ( a short in the armature ) and requires replacing, Field Test To perform a field test attach the probes from the OHM meter between the coil input wire and the coil output wire. Repeat the test for the other coil(s). The values are not important but they should be the same or relatively close. A drop in resistance between the coils indicates a short between windings and a resistance spike could indicate broken, burnt-through wires. You can also confirm if you have a bad field by attaching one of the probes to a coil wire end while touching the other probe to the outside casing of the field. If you get a reading then the field is bad if there is no reading then the field is good. Do this for each coil. I hope this helps and good luck with your repair.

eReplacementParts Team
April 10, 2023

Did this question help you?
Thank you for voting!