eReplacementParts.com
877-346-4814
Husqvarna Parts
Repair Parts Home
  
Power Tool Parts
  
Husqvarna Parts
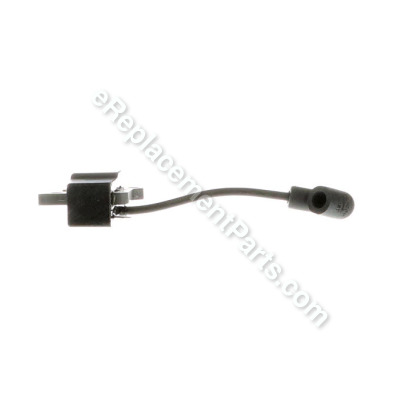
  573935702 Ignition Module

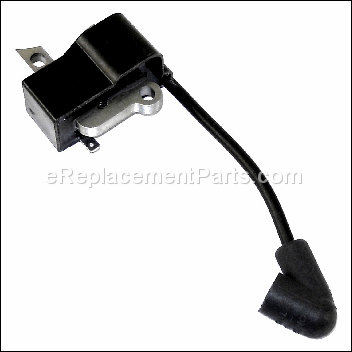
Ignition Module 573935702

OEM part for: Husqvarna, Jonsered

Part Number: 573935702


Install
Videos!
Ignition Module - 573935702:Husqvarna 360 View
Ignition Module - 573935702:HusqvarnaIgnition Module - 573935702:HusqvarnaIgnition Module - 573935702:HusqvarnaIgnition Module - 573935702:Husqvarna 360 View
In Stock
Order within the next 13 hours and your part ships today!
Easy 15-30 minutes (11 rated repairs)?
OEM: Original Equipment Manufacturer ?
HusqvarnaJonsered
Does this d-block d-md-none fit my product?

Product Description ?

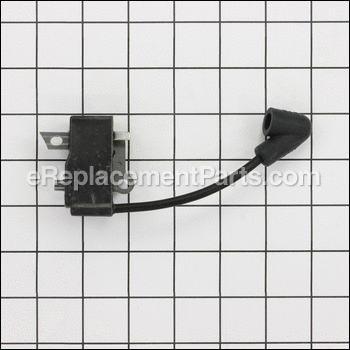
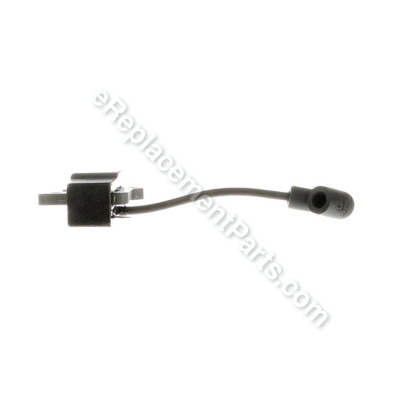
This ignition module is a genuine OEM sourced replacement part that is specially made for use with Husqvarna chainsaws. The purpose of this part is to supply pulses of high voltage electricity to the spark plug. This ignition module is sold individually, it includes the durable rubber insulated wire and the spark plug boot.

  • Classification: Part
  • Weight: 0.21 lbs.
  • Shipping: Ships Worldwide

Frequently Purchased Together ?

Compatibility

This part will fit the following 17 machines

Husqvarna

435 (2008-05) Chainsaw View Diagrams & Manuals
435 E (2008-05) Chainsaw View Diagrams & Manuals
440 E (2008-05) Chainsaw View Diagrams & Manuals
445 (2007-03) Chainsaw View Diagrams & Manuals
445 (2007-09) Chainsaw View Diagrams & Manuals
445 E (2007-03) Chainsaw View Diagrams & Manuals
445 E (2007-09) Chainsaw View Diagrams & Manuals
450 E (2007-03) Chainsaw View Diagrams & Manuals
450 E (2007-09) Chainsaw View Diagrams & Manuals
450 (2011-07) Chainsaw View Diagrams & Manuals
450 (2010-09) Chainsaw View Diagrams & Manuals

Jonsered

CS2245 (2008-09) Chain Saw View Diagrams & Manuals
CS2245 (2009-02) Chain Saw View Diagrams & Manuals
CS2245 S (2008-09) Chain Saw View Diagrams & Manuals
CS2245 S (2009-02) Chain Saw View Diagrams & Manuals
CS2250 S (2008-09) Chain Saw View Diagrams & Manuals
CS2250 S (2009-02) Chain Saw View Diagrams & Manuals
Show More Compatible Models
Don't see yours? Try searching our site for :

This item works with the following types of products:

  • Chain Saw Parts
  • Saw Parts

This part replaces obsolete part #: 544243801, 573935701, 505427201

Customer Part Reviews ?

4.3
Average Rating (out of 5):
4 Reviews
Click to filter by ratings:
5 stars
3
4 stars
0
3 stars
0
2 stars
1
1 stars
0
  • Highest Rating
  • Most Recent
< PREV
  • 1
NEXT >
  • Easy Repair.
    Part was in great condition , fit perfectly and was easy to install. Chainsaw was never this easy to start.
    Calvin - June 16, 2020 Verified Purchase
    Started on the second pull
    It arrived on time and fixed the chain saw
    Guest - October 15, 2019 Verified Purchase
    arrived quick-works great
    Guest - July 30, 2019 Verified Purchase
    huqvarner
    I clicked on huqvarner web site and got you very misleading
    Guest - November 6, 2019 Verified Purchase
    t
    t
    t - t days ago Verified Purchase
    eReplacementParts Team
    t

    Questions & Answers ?

    Our customer Service team is at the ready daily to answer your part and product questions.

    photo of team member
    Ask our Team

    We have a dedicated staff with decades of collective experience in helping customers just like you purchase parts to repair their products.

    Does this fit my product?

    Questions & Answers for Ignition Module


    Ordered a ignition coil for 450 chainsaw ,now it starts but wont rev backfires and cuts off! Is this another bad coil? Already checked flywheel key, and gapped @ .3mm
    Michael for model number 450 asked on 2022-04-14
    Hello Michael, Thank you for the question. The correct gap for this is .010 inches/.25mm. I would try resetting the gap to .25mm. A business card is perfect for setting the gap. Loosen the module then insert a business card in between the flywheel and the module. Rotate the flywheel so that the magnets are facing the module then let the magnets pull the module in. Next, tighten the module and remove the business card and fire up the engine. You may also want to make sure the spark plug is clean and gapped as well. I hope this helps and good luck with your repair.
    eReplacementParts Team April 14, 2022

    Customer Repair Instructions ?

    All our customer repair instructions are solicited directly from other customers just like you who have purchased and replaced this exact part.

    Easy 15-30 minutes (11 rated repairs)?

    Chainsaw abruptly quit running and would not restart

    David - January 22, 2016
    👍 21 of 21 people found this instruction helpful
    Tool Type

    Chain Saw

    Difficulty

    Easy

    Time

    15-30 minutes

    Tools Used

    Nutdriver, Torx bit

    Problem was diagnosed by pulling plug. Saw that it was getting gas, so with the plug attached to the lead and grounded to the top of the cylinder I pulled the starter rope and saw no spark. I suspected a bad ignition module. I ordered one and replaced it and the saw started right up. Very easy to replace on the Husqvarna 454: Remove side cover, unscrew module and replace, gap the module at.010 from the flywheel magnets. replace cover, put in a new spark plug.
    Did you find this story helpful?
    Thanks for voting and helping fellow customers!

    Saw stopped abrubtly and would not restart.

    Mike - May 5, 2016
    👍 7 of 7 people found this instruction helpful
    Tool Type

    Chain Saw

    Difficulty

    Easy

    Time

    Less than 15 minutes

    Tools Used

    Screwdriver, Hex keys

    Remove spark plug and check for spark, compression and gas.
    No spark noted.
    Replaced ignition module, saw starts and runs.
    Be sure to check gap between module and flywheel magnet at 0.10, flywheel should turn freely as it passes the module.
    Did you find this story helpful?
    Thanks for voting and helping fellow customers!

    Would not start

    Paul - January 30, 2017
    👍 3 of 3 people found this instruction helpful
    Tool Type

    Chain Saw

    Difficulty

    Medium

    Time

    Less than 15 minutes

    Tools Used

    Screwdriver, Hex tool Set, .012 feeler gauge

    1. Removed starter assembly
    2. Removed old ignition module
    3. Installed new module checking gap with feeler gauge
    4. Replaced starter assembly
    5. Started saw to check out repair
    Did you find this story helpful?
    Thanks for voting and helping fellow customers!

    Intermittant and no spark.

    Paul - August 29, 2016
    👍 2 of 2 people found this instruction helpful
    Tool Type

    Chain Saw

    Difficulty

    Easy

    Time

    15-30 minutes

    Tools Used

    Screwdriver, hex key, feeler gauge

    Remove recoil side cover, blow out debris with air compressor. Note clearance between flywheel and coil poles. Remove screws holding coil, detach wires. Reverse process to reassemble, Reset clearance on coil, tighten screws while maintaining the clearance. Put cover back on and tighten cover screws. Screws need to be very snug as the vibration will loosen them otherwise. Been there so order a couple extra when you order the coil. Done- runs like a champ now.
    Did you find this story helpful?
    Thanks for voting and helping fellow customers!

    Ignition Module stop firing

    Harvey - July 30, 2021
    Tool Type

    Chain Saw

    Difficulty

    Easy

    Time

    15-30 minutes

    Tools Used

    Power Drill, Socket set, fila gauge

    Removed pull starter rope cover , removed screws that hold old module , removed old module . Installed new module and screws , set with fila gauge tighten screws reinstalled pull starter rope cover .
    Did you find this story helpful?
    Thanks for voting and helping fellow customers!

    No spark on chainsaw

    Benedict - October 18, 2019
    Tool Type

    Chain Saw

    Difficulty

    Easy

    Time

    15-30 minutes

    Tools Used

    Just removed the side plate that includes the starter pully and the starter module is right there.
    Did you find this story helpful?
    Thanks for voting and helping fellow customers!

    Chainsaw would not start

    Anthony - May 30, 2019
    Tool Type

    Chain Saw

    Difficulty

    Easy

    Time

    Less than 15 minutes

    Tools Used

    Screwdriver

    Replaced ignition coil
    Did you find this story helpful?
    Thanks for voting and helping fellow customers!

    Chainsaw would not start

    Brian - August 27, 2018
    Tool Type

    Chain Saw

    Difficulty

    Easy

    Time

    15-30 minutes

    Tools Used

    Screwdriver, Nutdriver, Feeler gauge, spark plug wrench

    Did you find this story helpful?
    Thanks for voting and helping fellow customers!

    Chain Saw would not start, was not getting any ignition spark

    John - August 7, 2018
    Tool Type

    Chain Saw

    Difficulty

    Medium

    Time

    30-60 minutes

    Tools Used

    Screwdriver, Socket set, Hex wrench #4 (module screws)

    Went to your web site and found what the problem might be.
    Ordered the ignition module that was for my saw.
    The part install was quite simple, removed top cover. then had to remove the pull start cord assembly, 4 screws (one complete assembly). The ignition module was right under a plastic cover, remover the 4 screws on the module and the spark plug wire. Installed the new module and covers. The saw started right up and has been running like new.

    Thanks to the info on your web site it helped me ID the problem and order the right part.
    Did you find this story helpful?
    Thanks for voting and helping fellow customers!

    Engine stalled and wouldn't restart. No Spark.

    Tim - November 28, 2016
    👍 1 of 2 people found this instruction helpful
    Tool Type

    Chain Saw

    Difficulty

    Medium

    Time

    Less than 15 minutes

    Tools Used

    Screwdriver, Allen wrench for ignition module

    1. Remove spark plug, check for fuel fouling, clean, gapped correctly.
    2. Pull starter cord with plug attached and side electrode resting on engine.
    3. Note lack of spark, even in dark garage.
    4. Remove kill switch circuit wire attached to module & pull starter cord.
    5. Note still no spark. Remove (pull cord) cover & Ignition Module.
    6. Order Ignition Module from eReplacementParts using the old IM's part number.
    7. Review other people's feedback for magneto to ignition module air gap (.010").
    8. Discover that common business card is .010" thick & confirm with micrometer.
    9. Install ignition module using business card to hold gap while tightening bolts.
    10. Check that magneto does not contact ignition module when spinning.
    11. Replace cover, connect kill switch wire, install/connect spark plug & air filter cover.
    11. Start engine!
    Note: This module failed on me before I got through a full gallon of bar oil (in 2 years). It must have been defective to fail after so few hours of use. Part number has been updated too.
    Did you find this story helpful?
    Thanks for voting and helping fellow customers!

    OEM stands for Original Equipment Manufacturer and means the part you’re buying is sourced directly from the manufacturer who made your product. At eReplacementParts, we sell only genuine OEM parts, guaranteeing the part you’re purchasing is of better design and of higher quality than aftermarket parts.

    Our product descriptions are a combination of data sourced directly from the manufacturers who made your product as well as content researched and curated by our content & customer service teams. This content is edited and reviewed internally before being made public to customers.

    Our customer service team are at the ready daily to answer your part and product questions. We have a dedicated staff with decades of collective experience in helping customers just like you purchase parts to repair their products.

    All our part reviews are solicited directly from other customers who have purchased this exact part. While we moderate these reviews for profanity, offensive language or personally identifiable information, these reviews are posted exactly as submitted and no alterations are made by our team.

    All our customer repair instructions are solicited directly from other customers just like you who have purchased and replaced this exact part. While we moderate these reviews for profanity, offensive language or personally identifiable information, these reviews are posted exactly as submitted and no alterations are made by our team.

    Based on data from past customer purchasing behaviors, these parts are most commonly purchased together along with the part you are viewing. These parts may be necessary or helpful to replace to complete your current repair.

    All our installation videos are created and produced in collaboration with our in-house repair technician, Mark Sodja, who has helped millions of eReplacementParts customers over the last 13 years repair their products. Mark has years of experience in selling and repairing both commercial and residential products with a specialty in gas-powered equipment.

    This data is collected from customers who submitted a repair instruction after replacing this exact part. Customers can rate how easy the repair was to complete and how long it took. We aggregate this data to provide a repair rating that allows customers to quickly determine the difficulty and time needed to perform their own repair.

    eReplacementParts.com
    7174 South 400 West
    Suite 5
    Midvale, UT 84047
    visa mastercard discover american express PayPal