This is a genuine ECHO/Shindaiwa replacement part
It is compatible with the machines listed below.
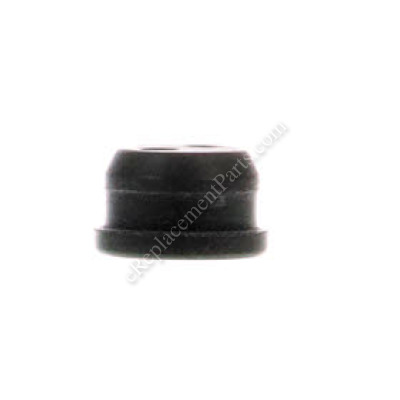
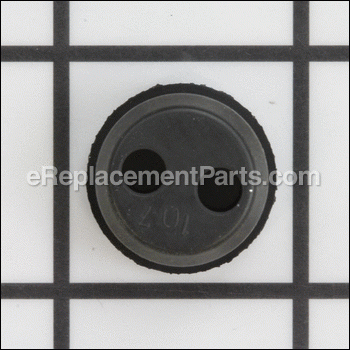
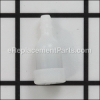
The Grommet is placed into the fuel tank.
And depending on the model number,the Vent tube or Fuel return line and fuel line are inserted through the holes in the Grommet.
A worn Grommet will cause fuel to leak from the tank.
When replacing the Grommet it is advisable to replace the fuel lines at the the same time.
Grommet 13211544331
OEM part for: Echo, Little Wonder, Shindaiwa
Part Number: 13211544331
Jump To:
Product Description ?
- Classification: Part
- Weight: 0.01 lbs.
- Shipping: Ships Worldwide
Frequently Purchased Together ?
Compatibility
This part will fit the following 251 machines
Echo
Little Wonder
Shindaiwa
This item works with the following types of products:
- Grass Trimmer Parts
- Trimmer Parts
- Drill Parts
- Vacuum Parts
- Chain Saw Parts
- Saw Parts
- Blower Parts
- Hedge Trimmer Parts
This part replaces obsolete part #: 13211544330, 132115-44330
Repair Videos ?
|
Filthy Filters? This article will show you how to install a filter kit on an Echo SRM-225 trimmer....
May 27, 2015
|
Customer Part Reviews ?
- 1
Questions & Answers ?
Our customer Service team is at the ready daily to answer your part and product questions.

Ask our Team
We have a dedicated staff with decades of collective experience in helping customers just like you purchase parts to repair their products.
Does this fit my product?Questions & Answers for Grommet
Customer Repair Instructions ?
All our customer repair instructions are solicited directly from other customers just like you who have purchased and replaced this exact part.
Leaking gas
Tool Type
Hedge Trimmer
Difficulty
Medium
Time
30-60 minutes
Tools Used
Screwdriver, Pliers
Grommet / lines had diteriated from age
Tool Type
Hedge Trimmer
Difficulty
Easy
Time
15-30 minutes
Tools Used
Screwdriver, Pliers, Wrench Set
fuel groomet
Tool Type
Trimmer
Difficulty
Easy
Time
Less than 15 minutes
Tools Used
Screwdriver
Parts Used
Used Blower would not run.
Tool Type
Blower
Difficulty
Medium
Time
1-2 hours
Tools Used
Screwdriver, Pliers, Wrench Set, Nutdriver
Parts Used
2. Removed fuel lines, grommet from Fuel Tank
3. Drained all fuel and sediment from tank
4. Disassembled, cleaned all carburetor parts
5. Bought a primer bulb retail; none was included in kit
6. Cut new gasket to Intake; none was included in repair kit.
7. Reassembled Carburetor; Would start, not run with fresh fuel.
8. Watched YouTube video on this carburetor
9. Reassembled carburetor again, carefully Blowing Starting Ether through all passages
10. Reinstalled Carburetor & fuel lines, started and ran; adjusted mixture screws.
Fuel leaking from fuel line grommet on fuel tank.
Tool Type
Blower
Difficulty
Medium
Time
15-30 minutes
Tools Used
Screwdriver, Pliers, Socket set
2. Removed primer bulb to access fuel line and return line.
3. Pulled fuel filter out of tank with hook end of a coat hanger (high tech, right?) & removed filter.
4. Disconnected fuel & return line and removed grommet with lines as an assembly.
5. Installed new fuel filter on new fuel line.
6. Put a light coat of motor oil on both lines to help slide through new grommet.
7. Lightly coated grommet with motor oil, inserted grommet with fuel lines/filter attached into fuel tank opening.
8. Install fuel line and return line, primer bulb, air filter, and filter cover.
Pressed prime bulb, pulled starter rope and check for leaks. Everything checked out ok. Problem solved 👍🏼
Fuel delivery issue
Tool Type
Hedge Trimmer
Difficulty
Easy
Time
15-30 minutes
Tools Used
Screwdriver, Pliers
Would only run with the choke closed.
Tool Type
Trimmer
Difficulty
Easy
Time
15-30 minutes
Tools Used
Screwdriver, Air gun
Running poorly & leaking fuel
Tool Type
Trimmer
Difficulty
Medium
Time
30-60 minutes
Tools Used
Screwdriver, 6\\
Essentially, I rebuilt the carburetor and replaced all the fuel lines, including the tank vent, filter and the seal in the cap. Needed the scale to check the needle arm height, which needed a slight tweak.
Be sure to lay out all of the removed seals and gaskets as the carb comes apart to be sure the the new parts get installed in the correct order and orientation.
Once all together, a couple of pulls to prime the carb (it has no priming bulb) and it started right up, and runs like new! No fuel leaks either! Only ethanol-free fuel from now on!!!
Echo trimmer just plain old! Fuel line had collapsed and grommet had begun to disintegrate.
Tool Type
Trimmer
Difficulty
Easy
Time
Less than 15 minutes
Tools Used
Screwdriver
Connected new fuel filter line and vent line to new rubber grommet
Pushed new fuel filter into tank
Snapped grommet into place
Added fuel and fired it up
New life for excellent but older Echo weed whacker!
Chain saw would not idle
Tool Type
Chain Saw
Difficulty
Medium
Time
1-2 hours
Tools Used
Screwdriver, Pliers, Allen wrench (hex key)
2. Removed top saw plastic case cover
3. Took phone photos of the carburetor, fuel, and vent lines, and throttle and choke linkage.
4. Loosened control backing plate
5. Unscrewed carburetor
6. Detached fuel and vent lines, grommets and control linkages
7. Plucked fuel filter from tank using a hooked shaped wire
8. Reattached fuel, vent lines, grommets and linkages to new carburetor while cleaning dirt and sawdust along the way
9. Reattached carburetor and put on new air filter and spark plug
OEM stands for Original Equipment Manufacturer and means the part you’re buying is sourced directly from the manufacturer who made your product. At eReplacementParts, we sell only genuine OEM parts, guaranteeing the part you’re purchasing is of better design and of higher quality than aftermarket parts.
Our product descriptions are a combination of data sourced directly from the manufacturers who made your product as well as content researched and curated by our content & customer service teams. This content is edited and reviewed internally before being made public to customers.
Our customer service team are at the ready daily to answer your part and product questions. We have a dedicated staff with decades of collective experience in helping customers just like you purchase parts to repair their products.
All our part reviews are solicited directly from other customers who have purchased this exact part. While we moderate these reviews for profanity, offensive language or personally identifiable information, these reviews are posted exactly as submitted and no alterations are made by our team.
All our customer repair instructions are solicited directly from other customers just like you who have purchased and replaced this exact part. While we moderate these reviews for profanity, offensive language or personally identifiable information, these reviews are posted exactly as submitted and no alterations are made by our team.
Based on data from past customer purchasing behaviors, these parts are most commonly purchased together along with the part you are viewing. These parts may be necessary or helpful to replace to complete your current repair.
All our installation videos are created and produced in collaboration with our in-house repair technician, Mark Sodja, who has helped millions of eReplacementParts customers over the last 13 years repair their products. Mark has years of experience in selling and repairing both commercial and residential products with a specialty in gas-powered equipment.
This data is collected from customers who submitted a repair instruction after replacing this exact part. Customers can rate how easy the repair was to complete and how long it took. We aggregate this data to provide a repair rating that allows customers to quickly determine the difficulty and time needed to perform their own repair.

