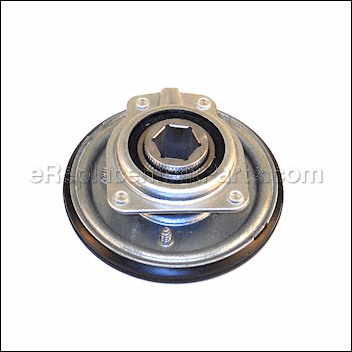
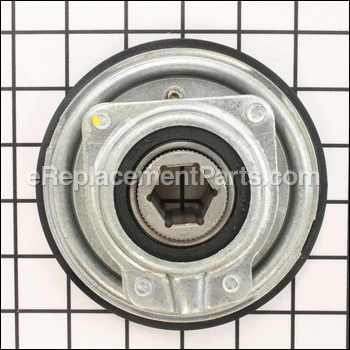
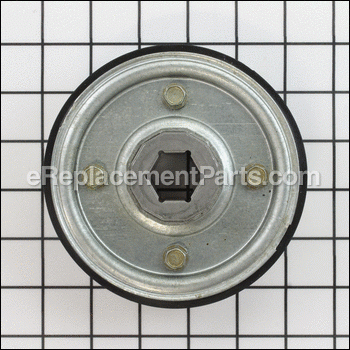
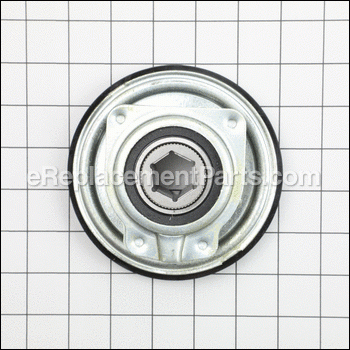
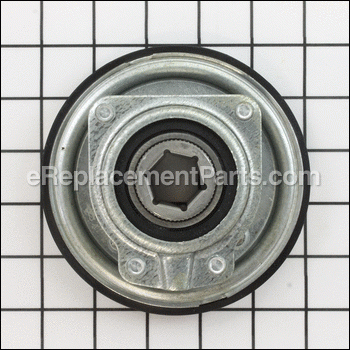
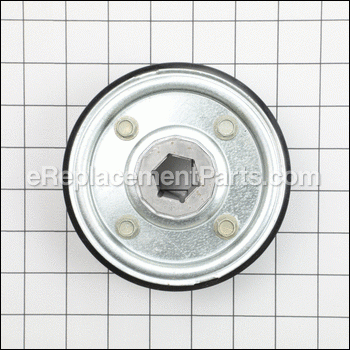
Wheel Assy Frictio 984-0042C
Part Number: 984-0042C
Order within the next 11 hours
and your part ships today!
and your part ships today!
*This part replaces obsolete part #: 684-0042C, 684-0042, 618-0064, 984-0042B, 790-00011, 718-0301A, 784-5617, 784-5617A, 684-0042A and 684-0042B.
Product Information
Description:
| It is a genuine item that is supplied directly from the original manufacturer for use with snowthrowers. The friction disc is an important component of the drive mechanism that helps to propel the equipment forward. Unfortunately, over time it may wear out or get damaged eventually requiring a replacement. If the friction disc is worn or damaged, the snowblower will move slowly, erratically or not move at all. Please make sure to check the diagrams of your model for the correct location and application of this part. Keep in mind this high-quality assembly is made of durable metal and is sold individually. |
Compatibility
the 150+ compatible machines
This part is compatible with the following machines:
Ryobi
MTD
247-315A401 (1997) Chipper
245-315B000 (1995) Chipper
316E610E382 (1996) Snowblower
316E640F382 (1996) Snowblower
317E610E382 (1997) Snowblower
31AE600E382 (1998) Snowblower
31AE640F382 (1998) Snowblower
31AE600E382 (1999) Snowblower
31AE6C0F382 (1999) Snowblower
31AE600E300 (2003) Snowblower
31AE660G300 (2003) Snowblower
31AE6COF300 (2003) Snowblower
31AE600E300 (2004) Snowblower
31AE660G300 (2004) Snowblower
31AE6C0F300 (2004) Snowblower
31AH660G300 (2004) Snowblower
31AE6AHE722 (2005) Snowblower
31AE6BHE722 (2005) Snowblower
31AE6GLF722 (2005) Snowblower
31AE6LLG722 (2005) Snowblower
31AH6LKH722 (2005) Snowblower
317E640F033 (1997) Snowblower
316-610E147 (1996) Snow Blower
316-611D118 (26274) (1996) Snow Blower
316-641E118 (1996) Snow Blower
316E610E088 (TMO-3525302) (1996) Snow Blower
316E641E205 (1996) Snow Blower
316E660G352 (1619743) (1996) Snow Blower
316E611D352 (1652656) (1996) Snow Blower
316E640F013 (1996) Snow Blower
316E661E118 (537980) (1996) Snow Blower
316E740F352 (1652670) (1996) Snow Blower
316E740F752 (1652670) (1996) Snow Blower
315E610E000 (1995) Snow Blower
315E640F000 (1995) Snow Blower
316E760F118 (590678) (1996) Snow Blower
315-611D000 (1995) Snow Blower
315-641E000 (1995) Snow Blower
315-661E118 (1995) Snow Blower
315E641E000 (1995) Snow Blower
315E660G000 (1995) Snow Blower
314-610E000 (1994) Snowblower
315E740F000 (1995) Snow Blower
314-612E000 (1994) Snowblower
314-640F000 (1994) Snowblower
314-642F000 (1994) Snowblower
313-610E000 (1993) Snowblower
314-660G000 (1994) Snowblower
313-612E000 (1993) Snowblower
313-640F000 (1993) Snowblower
313-642F000 (1993) Snowblower
313-660G000 (1993) Snowblower
312-640F000 (1992) Snowblower
312-660G000 (1992) Snowblower
312-610E000 (1992) Snowblower
31AE6LFH718 (2005) Snow Thrower
31AE6LFH304 (2005) Snow Thrower
31AE6LFH372 (2005) Snow Thrower
31AE6LFH401 (2005) Snow Thrower
31AE6LFH720 (2005) Snow Thrower
31AE6LFH730 (2005) Snow Thrower
31AE6LFH301 (2005) Snow Thrower
31AE6LFH709 (2005) Snow Thrower
31AE6LFH371 (2005) Snow Thrower
31AE6LFH307 (2005) Snow Thrower
31AE6LFH513 (2005) Snow Thrower
31AE6LFH713 (2005) Snow Thrower
31AE6LFH382 (2005) Snow Thrower
31AE6LFH000 (2005) Snow Thrower
31AE6LFH121 (2005) Snow Thrower
31AE6LFH205 (2005) Snow Thrower
31AE6LFH705 (2005) Snow Thrower
31AE6LFH706 (2005) Snow Thrower
31AE6LFH026 (2005) Snow Thrower
31AE6LFH726 (2005) Snow Thrower
31AE6LFH054 (2005) Snow Thrower
31AE6LFH745 (2005) Snow Thrower
31AE6LFH754 (2005) Snow Thrower
31AE6LFH704 (2005) Snow Thrower
31AE6LFH029 (2005) Snow Thrower
31AE6LFH229 (2005) Snow Thrower
31AE6LFH134 (2005) Snow Thrower
Yard Machines
31AE6GLF723 (2005) Snowblower
31AE6LFH718 (2005) Snowblower
31AE6LLG723 (2005) Snowblower
31AE600E161 (1999) Snowblower
31AE600E161 (1998) Snowblower
31AE6LFH718 (2005) Snowblower
31AE6LLG723 (2005) Snowblower
31AE600E161 (1999) Snowblower
31AE600E161 (1998) Snowblower
31AE640F000 (1998) Snowblower
317E610E000 (1997) Snowblower
316E610E000 (1996) Snowblower
316E640F000 (1996) Snowblower
317E610E000 (1997) Snowblower
316E610E000 (1996) Snowblower
316E640F000 (1996) Snowblower
Bolens
Yard Man
315E753F401 (1995) Snowblower
315E633E401 (1995) Snowblower
316E613D401 (1996) Snowblower
316E633E401 (1996) Snowblower
315E733E401 (1995) Snowblower
316E633E701 (1996) Snowblower
316E733E401 (1996) Snowblower
316E733E701 (1996) Snowblower
316E753F401 (1996) Snowblower
316E753F701 (1996) Snowblower
317E623D401 (1997) Snowblower
317E633E401 (1997) Snowblower
317E753F401 (1997) Snowblower
31AE623D401 (1998) Snowblower
317E663H401 (1997) Snowblower
31AE633E401 (1998) Snowblower
317E733E401 (1997) Snowblower
31AE653F401 (1998) Snowblower
31AE663H401 (1998) Snowblower
31AE6B3H401 (1998) Snowblower
31AE753F401 (1998) Snowblower
31AE6B3H401 (1999) Snowblower
31AE753F401 (1999) Snowblower
31AE663H401 (2000) Snowblower
31AE553F401 (1999) Snowblower
31AE573H401 (1999) Snowblower
31AH553G401 (2001) Snowblower
31AE633E401 (1999) Snowblower
31AH763G401 (2001) Snowblower
31AE663H401 (1999) Snowblower
31AE663H401 (2002) Snowblower
31AE763G401 (2002) Snowblower
31AE663H401 (2003) Snowblower
31AH553G401 (2000) Snowblower
31AE993I401 (2003) Snowblower
31AH763G401 (2000) Snowblower
31AE633E401 (2001) Snowblower
31AE993J401 (2003) Snowblower
31AE663H401 (2001) Snowblower
31BH5C3F401 (2003) Snowblower
31BH5Q3G401 (2003) Snowblower
31BH763G401 (2003) Snowblower
31AE993J401 (2004) Snowblower
31AH5C3F401 (2002) Snowblower
31BH5C3F401 (2004) Snowblower
31BH5Q3G401 (2004) Snowblower
31AH5Q3G401 (2002) Snowblower
31BH763G401 (2004) Snowblower
31AE643E401 (2004) Snowblower
31AE663H401 (2004) Snowblower
31AE993I400 (2004) Snowblower
31AE5KLF701 (2005) Snowblower
31AE6GLF701 (2005) Snowblower
31AH7L3G701 (2005) Snowblower
31AH7S3G701 (2005-2) Snowblower
Products Compatibility
This item works with the following types of products:
- • Chipper / Shredder
- • Snowblower
Questions & Answers for Wheel Assy Frictio
No questions have been asked yet
Repair Instructions: Submitted by Customers Like You
3 of 3 people found this instruction helpful
Tool Type:
Snowblower
Parts Used:
Repair Difficulty:
Easy
Time Spent Repairing:
15-30 minutes
Tools Used:
Screwdriver, Wrench Set, Nutdriver
The rubber on the friction wheel was worn off
Took the back plate off, drained the gas from the tank, tipped the snow blower on its front, removed the wheels pulled the axle removed the old part replaced it with the new part and reassembled.
Did you find this story helpful?
Thanks for voting and helping fellow customers!
1 of 1 people found this instruction helpful
Tool Type:
Snowblower
Repair Difficulty:
Easy
Time Spent Repairing:
30-60 minutes
Tools Used:
Screwdriver, Wrench Set
Correct parts
Removed worn parts and reinstalled new parts. It took about 1 hour including readjustment of cable actuating friction wheel. The compartment where the friction Disc assembly is contained is very tight requiring the plate be inserted at an angle before inserting pivot pins in their proper holes. Reinstalling the friction wheel was simple with the bearings removed, after the friction wheel was in place the reinstalling the bearings was easy.
Did you find this story helpful?
Thanks for voting and helping fellow customers!
Tool Type:
Snowblower
Parts Used:
Repair Difficulty:
Easy
Time Spent Repairing:
30-60 minutes
Tools Used:
Socket set, Wrench Set, Snap ring pliers
Friction wheel was 30 years old and needed replacing
Removed skid plate by removing four 3/8 hex head screws
Remove 1/2” bolt in the ends of the drive shaft
Using snap ring pliers remove or slide to the center of the driveshaft the retainer ring for the chain drive
Slide driveshaft towards the chain drive pulley and out of the barring .
You should have enough room to remove old friction wheel off the opposite end of the driveshaft. If you need more room to remove the actuator remove the cotter pin and separate amateur.
At this point your Removal is done.
Install new friction wheel make sure to insert the actuator and slide the driveshaft into the barring and in stall the bolt. Now slide the chain drive pulley back over to where it belongs. Slide snap ring over to retain the chain pulley in its place. Put the other bolt in the end of the driveshaft. Make sure the actuator is working properly before reconnecting the amateur with the cotter pin. Make sure snap ring is in the retaining grove. If all is operating correctly replace skid plate. Tighten all bolts.... now wait for the next snowstorm
Did you find this story helpful?
Thanks for voting and helping fellow customers!
Reviews
4 Reviews
Average Rating (out of 5):
Click to filter by ratings:
5 stars
3
4 stars
0
3 stars
0
2 stars
1
1 stars
0
< PREV
- 1
worked great
very easy to install
Guest -
February 1, 2022
Verified Purchase
Quick and easy repair!
The Friction wheel was in pristine condition when it arrived. A very quick and easy disassemble and reassemble while apart I was able to tweak other adjustments, Now my snowblower runs a lot better than I first got it
Guest -
January 4, 2021
Verified Purchase
Same as original part
My 25 year old snow blower lives again. After the local lawn and garden shop told me it couldn’t be repaired I watched a couple YouTube videos and decided I could do it myself. The replacement part matched perfectly. I was up and running in about 1.5 hours.
Guest -
August 1, 2019
Verified Purchase
Work as should
Part took 11 days longer than what I paid for but worked as it should.
Guest -
January 13, 2022
Verified Purchase
Verified Purchase
eReplacementParts Team
< PREV
- 1
Product Information

