





































Our customer service team are at the ready daily to answer your part and product questions. We have a dedicated staff with decades of collective experience in helping customers just like you purchase parts to repair their products.

Echo Handheld Blower Leaf Blower / Vacuum Replacement Parts For Model PB-250LN (P40212001001 - P40212999999)
We Sell Only Genuine Echo Parts
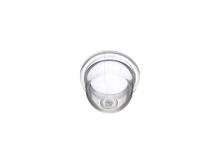
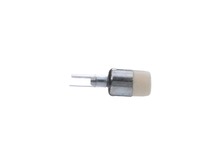
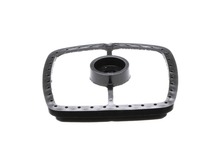
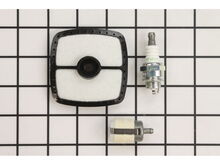
Popular Parts for Echo PB-250LN (P40212001001 - P40212999999)
In Stock
$8.62
In Stock
$6.27
In Stock
$7.82
In Stock
$10.31
In Stock
$6.16
In Stock
$11.11
In Stock
$26.09
In Stock
Minimum Quantity of 2 required
$6.16
Search Within Model
Questions & Answers for Echo PB-250LN (P40212001001 - P40212999999)
Browse all Parts
Search by Area
_WW_1.gif "Blower_Tubes Diagram and Parts List for PB-250LN P40212001001 - P40212999999 Echo Leaf Blower / Vacuum")
_WW_2.gif "Carburetor_--_Rb-K106 Diagram and Parts List for PB-250LN P40212001001 - P40212999999 Echo Leaf Blower / Vacuum")
_WW_3.gif "Engine_Cover_Exhaust Diagram and Parts List for PB-250LN P40212001001 - P40212999999 Echo Leaf Blower / Vacuum")
_WW_4.gif "Engine_Short_Block_-_Sb1104 Diagram and Parts List for PB-250LN P40212001001 - P40212999999 Echo Leaf Blower / Vacuum")
_WW_5.gif "Fan_Cover_Ignition_Throttle_Control Diagram and Parts List for PB-250LN P40212001001 - P40212999999 Echo Leaf Blower / Vacuum")
_WW_6.gif "Fuel_System Diagram and Parts List for PB-250LN P40212001001 - P40212999999 Echo Leaf Blower / Vacuum")
_WW_7.gif "Intake Diagram and Parts List for PB-250LN P40212001001 - P40212999999 Echo Leaf Blower / Vacuum")
_WW_8.gif "Labels Diagram and Parts List for PB-250LN P40212001001 - P40212999999 Echo Leaf Blower / Vacuum")
_WW_9.gif "Repower_Kits Diagram and Parts List for PB-250LN P40212001001 - P40212999999 Echo Leaf Blower / Vacuum")
_WW_10.gif "Starter Diagram and Parts List for PB-250LN P40212001001 - P40212999999 Echo Leaf Blower / Vacuum")
Previous
Showing All Parts
Next
Blower_Tubes
_WW_1.gif "Blower_Tubes Diagram and Parts List for PB-250LN P40212001001 - P40212999999 Echo Leaf Blower / Vacuum")
-
A-1
 $14.37
 -
A-2
$18.70
Carburetor_--_Rb-K106
_WW_2.gif "Carburetor_--_Rb-K106 Diagram and Parts List for PB-250LN P40212001001 - P40212999999 Echo Leaf Blower / Vacuum")
-
B-1
$6.16
-
B-2
$8.62
-
B-3
$6.16
-
B-4
$6.16
-
B-5
$6.73
-
B-6
$7.30
-
B-7
$36.07
-
B-8
$6.16
-
B-10
$6.16
-
B-11
$6.21
-
B-12
$8.62
-
B-13
$6.47
-
B-14
$25.43
-
B-15
$6.16
-
B-16
$7.96
-
B-17
$6.16
-
B-18
$6.16
-
B-19
$6.16
-
B-20
$21.57
-
B-31
$13.26
-
B-800
$82.28
Engine_Cover_Exhaust
_WW_3.gif "Engine_Cover_Exhaust Diagram and Parts List for PB-250LN P40212001001 - P40212999999 Echo Leaf Blower / Vacuum")
-
C-1
$6.16
-
C-1
$6.16
-
C-2
$6.16
-
C-3
-
C-4
$6.16
-
C-5
$6.16
-
C-6
$6.16
-
C-7
$6.16
-
C-8
$6.16
-
C-9
$6.16
-
C-10
$6.16
-
C-11
$6.16
-
C-12
$6.16
-
C-13
$84.45
-
C-14
$6.73
Engine_Short_Block_-_Sb1104
_WW_4.gif "Engine_Short_Block_-_Sb1104 Diagram and Parts List for PB-250LN P40212001001 - P40212999999 Echo Leaf Blower / Vacuum")
-
D-1
$150.10
-
D-2
$6.16
-
D-3
$113.79
-
D-4
$6.16
-
D-5
$71.62
-
D-6
$9.27
-
D-7
$9.28
-
D-8
$6.16
-
D-9
$6.16
-
D-10
$132.25
-
D-11
$14.37
-
D-12
$6.16
-
D-13
$131.23
-
D-14
$6.16
-
D-15
$9.34
-
D-16
$6.16
-
D-17
$11.45
-
D-18
$6.16
Fan_Cover_Ignition_Throttle_Control
_WW_5.gif "Fan_Cover_Ignition_Throttle_Control Diagram and Parts List for PB-250LN P40212001001 - P40212999999 Echo Leaf Blower / Vacuum")
-
E-1
$18.96
-
E-2
$6.16
-
E-3
$17.84
-
E-4
$6.16
-
E-5
$6.55
-
E-6
$6.16
-
E-7
$13.31
-
E-8
$6.16
-
E-9
$6.16
-
E-10
$6.16
-
E-11
$6.16
-
E-12
$6.16
-
E-13
$6.16
-
E-14
$6.16
-
E-15
$6.16
-
E-16
$10.13
-
E-17
-
E-18
$6.55
-
E-19
$6.16
-
E-20
$6.16
-
E-21
$6.16
-
E-22
$6.16
-
E-23
$6.16
-
E-24
$6.16
-
E-25
$88.08
-
E-26
$150.10
-
E-27
$10.90
-
E-28
$31.21
-
E-29
$6.16
-
E-30
$6.16
-
E-31
$6.16
-
E-32
$9.92
-
E-33
$6.16
-
E-34
$6.16
-
E-34
$6.16
-
E-35
$6.16
-
E-36
$6.16
-
E-37
$82.90
-
E-38
$26.09
-
E-38
$26.09
Fuel_System
_WW_6.gif "Fuel_System Diagram and Parts List for PB-250LN P40212001001 - P40212999999 Echo Leaf Blower / Vacuum")
-
F-1
$8.15
-
F-2
$6.16
-
F-3
$6.16
-
F-4
$6.16
-
F-5
$6.16
-
F-6
$6.16
-
F-7
$6.16
-
F-8
$6.16
-
F-9
-
F-10
$6.16
-
F-11
$8.70
-
F-12
$6.16
-
F-13
$6.16
-
F-14
$7.82
-
F-15
$6.16
-
F-16
-
F-17
$6.16
-
F-18
$6.16
-
F-19
$11.11
-
F-20
$6.27
-
F-21
$30.98
-
F-22
$26.09
-
F-22
$26.09
Intake
_WW_7.gif "Intake Diagram and Parts List for PB-250LN P40212001001 - P40212999999 Echo Leaf Blower / Vacuum")
-
G-1
$6.16
-
G-2
$9.09
-
G-3
$10.31
-
G-4
$10.31
-
G-5
$6.16
-
G-6
$6.16
-
G-7
$14.37
-
G-9
$6.16
-
G-10
$6.16
-
G-11
$16.04
-
G-12
$6.55
-
G-13
$6.16
-
G-14
$6.16
-
G-15
$26.09
-
G-15
$26.09
Labels
_WW_8.gif "Labels Diagram and Parts List for PB-250LN P40212001001 - P40212999999 Echo Leaf Blower / Vacuum")
-
H-1
$6.16
-
H-2
$6.16
-
H-3
-
H-4
$6.16
-
H-5
$6.16
-
H-6
$6.16
-
H-7
$16.47
-
H-8
$6.16
Repower_Kits
_WW_9.gif "Repower_Kits Diagram and Parts List for PB-250LN P40212001001 - P40212999999 Echo Leaf Blower / Vacuum")
-
I-1
$26.09
-
I-5
$26.09
-
I-9
$30.98
Starter
_WW_10.gif "Starter Diagram and Parts List for PB-250LN P40212001001 - P40212999999 Echo Leaf Blower / Vacuum")
-
J-1
$6.16
-
J-2
$6.16
-
J-3
$6.16
-
J-4
$57.22
-
J-5
$6.75
-
J-6
$8.05
-
J-7
$6.16
-
J-8
$18.23
-
J-9
$14.16
-
J-10
$6.16
-
J-11
$6.16
-
J-12
$16.03
-
J-13
$6.16
-
J-14
$6.16
✖
Questions & Answers
?
Ask our Team
We have a dedicated staff with decades of collective experience in helping customers just like you purchase parts to repair their products.
- < Prev
- 1
- Next >
Sort by:
Sorry, we couldn't find any existing answers that matched.
Try using some different or simpler keywords, or submit your new question by using the "Ask a Question" button above!
Try using some different or simpler keywords, or submit your new question by using the "Ask a Question" button above!
Does the replacement part for our echo blower attachment end in 561?
Debbie
For model number PB-250LN
- October 27, 2022
Hello Debbie, Thank you for the question. The Fan Tip Nozzle is part number 21001420561. We hope this helps!
eReplacementParts Team
October 27, 2022
Did this question help you?
Thank you for voting!
What are the readings for a bad ignition coil and a good ignition coil. My blower starts and runs fine but shuts off after 5 minutes and I can't start it back up until it cools down
Tyler
For model number PB-250LN
- November 17, 2022
Hello Tyler, Thank you for writing. That symptom sounds more like a dirty and out of tune carburetor, not a bad ignition coil. If you are not getting a spark then I recommend replacing the coil. The spark plug wire itself should read 2.5k to 5k OHMS, as for the other wires I have no specs for that but again this sounds more of a carburetor issue and I recommend spraying the inside of the carburetor with carburetor cleaner, you may want to tilt the engine so it runs out or with the engine running just spray a little at a time to prevent stalling the engine. If the problem persists then rebuild the carburetor as it may have some build-up of fuel breaking down in there. This happens over time. To tune a carburetor these are directions right from B&S. 1. Loosen the large set screw on top of the air filter with a flathead screwdriver and remove the air filter from the carburetor. 2. Locate the idle adjustment screw on the side of the carburetor. Gently turn the screw clockwise with a screwdriver until the valve touches the seat. Then, back the screw off counterclockwise for one-and-a-half turns. 3. Look on the opposite side of the carburetor, for the high-speed adjustment screw -- if your carburetor has one. Gently turn the screw clockwise until the valve touches the seat, then back this screw off one-and-a-half turns as well. 4. Check to see if your engine has a large bowl on the bottom side of the carburetor that houses the float. If so, it will have a single screw on the bottom of the bowl. Turn the screw clockwise until it stops turning, then back it off for one-and-a-half turns. 5. Replace the air filter on top of the carburetor and secure it by tightening the screw in the centre of the air filter. 6. Start the engine and let it half-throttle for about five minutes to warm up. Then, slowly turn the idle adjustment screw -- which you adjusted in Step 3 -- clockwise until the engine begins to slow. Note the position of the screw and then begin turning the screw counterclockwise. The engine will normalize, then eventually will begin to slow once again. Note the position where it begins to slow a second time and rotate the screw clockwise to a point halfway between the two positions where the engine began to slow. You have now fine-tuned the idle adjustment. 7. Increase the throttle to full speed. Repeat the adjustments you made on the idle screw on the high-speed screw -- on the opposite side of the carburetor from the idle screw. 8. Test the engine under varying workloads. If the engine runs roughly under any conditions, adjust the idle or high-speed screw to fine-tune the adjustments. I hope this helps and good luck with your repair.
eReplacementParts Team
November 17, 2022
Did this question help you?
Thank you for voting!
✖