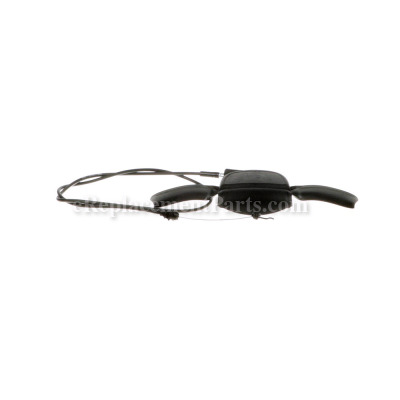
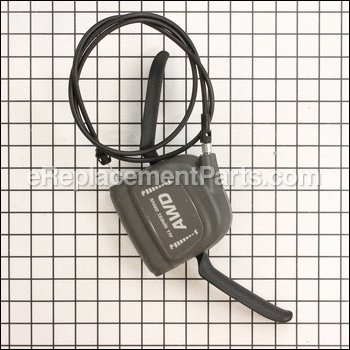
This authentic item is supplied directly from the original equipment manufacturer for use with Husqvarna lawn mowers. It is an identical replacement for a missing or a faulty control assembly that was installed on a new unit. This is a complete component that includes the rubber insulated cord and the control handle. Please make sure to refer to the appropriate diagrams of your model for the correct location and application of this part. Keep in mind this high-quality control assembly is sold individually.
Control 589818807
OEM part for: Husqvarna
Part Number: 589818807
Jump To:
Frequently Purchased Together ?
Compatibility
This part will fit the following 11 machines
Husqvarna
This item works with the following types of products:
- Lawn Mower Parts
This part replaces obsolete part #: 5813511-01, 5014075-05, 581351101
Customer Part Reviews ?
- 1
- 2
Questions & Answers ?
Our customer Service team is at the ready daily to answer your part and product questions.

Ask our Team
We have a dedicated staff with decades of collective experience in helping customers just like you purchase parts to repair their products.
Does this fit my product?Questions & Answers for Control
Customer Repair Instructions ?
All our customer repair instructions are solicited directly from other customers just like you who have purchased and replaced this exact part.
Self propelled hand control broke.
Tool Type
Lawn Mower
Difficulty
Easy
Time
Less than 15 minutes
Tools Used
Screwdriver
Parts Used
Broken control handle
Tool Type
Lawn Mower
Difficulty
Medium
Time
15-30 minutes
Tools Used
Pliers, Socket set, Torx driver
Parts Used
2. Tipped mover over onto right side.
3. Removed blade.
4. Removed rear cover.
5. Removed old control cable.
6. Installed new control cable.
7. Replaced rear cover and blade.
8. Righted mower.
9. Installed control head.
All Wheel Drive function would not engage
Tool Type
Lawn Mower
Difficulty
Easy
Time
15-30 minutes
Tools Used
Screwdriver, Pliers
Parts Used
2) Removed 4 screws from handlebar wheel drive control.
3) Removed 3 cable zip ties and 2 plastic cable clamps from mower bar.
4) Tilted mower on side and disconnected drive cable from bottom of mower
5) Using needle nosed pliers, squeezed underside of plastic cable anchor and pushed upwards and out to free cable from mower chassis.
6) Reverse steps to install new cable.
7) Adjust drive tension on new cable.
8) Removed mower blade nut.
9) Removed mower blade.
10) Installed new blade.
11) Tightened mower blade nut.
**Complete**
Cable was too short
Tool Type
Lawn Mower
Difficulty
Easy
Time
30-60 minutes
Tools Used
Screwdriver, Wrench Set
Parts Used
Replace drive control handle and attached cable with spriing
Tool Type
Lawn Mower
Difficulty
Medium
Time
30-60 minutes
Tools Used
Screwdriver, Pliers, Socket set
Parts Used
2. Drained fuel from tank into container for reuse.
3. Lifted mower to expose cover fasteners on underside.
4. Removed cover fasteners on top of mower housing and underside and removed cover
taking care not to loose lightweight spring attached to cover and transmission housing.
5. Removed old cable and control handle. Save screws and steel base plate to reuse.
6. Attached new control handle using the old steel base plate and some old screws.
7. Replaced cable with spring end and lightweight spring.
8. Replaced cover.
9. Lowered mower and added fuel.
10. Started and tested drive.
11. Adjusted drive
Transmission handle broke
Tool Type
Lawn Mower
Difficulty
Medium
Time
30-60 minutes
Tools Used
Screwdriver, Wrench Set, Torx bit, needle nose pliers
Parts Used
2. Because I couldn't get the shroud off, I cut the cable and pushed it through the top to get it out.
3. Removed spring with needle nose pliers.
4. Removed existing, broken transmission assembly.
5. Pushed new cable through existing hole.
6. Had to loosen tension cable to have enough slack to get cable end fitting in proper hole with needle nose pliers..
7. Reassembled transmission box and installed on handle.
8. Reinstalled spring with needle nose pliers.
9. Started mower and tested with success.
People with smaller hands may be able to do this repair a little easier. I have bratwurst for fingers making it tricky. Much easier if you can put the mower up on a bench or similar. Patience! $50 part and probably saved $100 in labor.
One of my handles, to engage the drive, broke inside the control box.
Tool Type
Lawn Mower
Difficulty
Easy
Time
Less than 15 minutes
Tools Used
Screwdriver
Parts Used
Lawn mower self propel handle broke
Tool Type
Lawn Mower
Difficulty
Easy
Time
30-60 minutes
Tools Used
Screwdriver, Pliers, Socket set, Nutdriver, Allen wrench
Parts Used
2. Placed new unit on and attached new cable to drive mechanism.
Really pretty straightforward. Inserting the cable into the drive mechanism was a bit trying due to tight space and limited maneuverability, but I eventually succeeded.
Clutch/speed control broken actuator arm on one side - Huskvarna AWD
Tool Type
Lawn Mower
Difficulty
Medium
Time
Less than 15 minutes
Tools Used
Screwdriver, Pliers
Parts Used
2. Removed the cable attachment in the deck and the transmission link. Cable attachment in the deck best done from below by squeezing the plastic grippers and pushing it up through the deck.
3. Replaced the control on the handle bar.
4. Reattached the cable and reattached the link to the transmission.
5. Started the engine and tested the clutch operation - OK!
OEM stands for Original Equipment Manufacturer and means the part you’re buying is sourced directly from the manufacturer who made your product. At eReplacementParts, we sell only genuine OEM parts, guaranteeing the part you’re purchasing is of better design and of higher quality than aftermarket parts.
Our product descriptions are a combination of data sourced directly from the manufacturers who made your product as well as content researched and curated by our content & customer service teams. This content is edited and reviewed internally before being made public to customers.
Our customer service team are at the ready daily to answer your part and product questions. We have a dedicated staff with decades of collective experience in helping customers just like you purchase parts to repair their products.
All our part reviews are solicited directly from other customers who have purchased this exact part. While we moderate these reviews for profanity, offensive language or personally identifiable information, these reviews are posted exactly as submitted and no alterations are made by our team.
All our customer repair instructions are solicited directly from other customers just like you who have purchased and replaced this exact part. While we moderate these reviews for profanity, offensive language or personally identifiable information, these reviews are posted exactly as submitted and no alterations are made by our team.
Based on data from past customer purchasing behaviors, these parts are most commonly purchased together along with the part you are viewing. These parts may be necessary or helpful to replace to complete your current repair.
All our installation videos are created and produced in collaboration with our in-house repair technician, Mark Sodja, who has helped millions of eReplacementParts customers over the last 13 years repair their products. Mark has years of experience in selling and repairing both commercial and residential products with a specialty in gas-powered equipment.
This data is collected from customers who submitted a repair instruction after replacing this exact part. Customers can rate how easy the repair was to complete and how long it took. We aggregate this data to provide a repair rating that allows customers to quickly determine the difficulty and time needed to perform their own repair.


