


Woodworking: Routers 101
Fixed Base
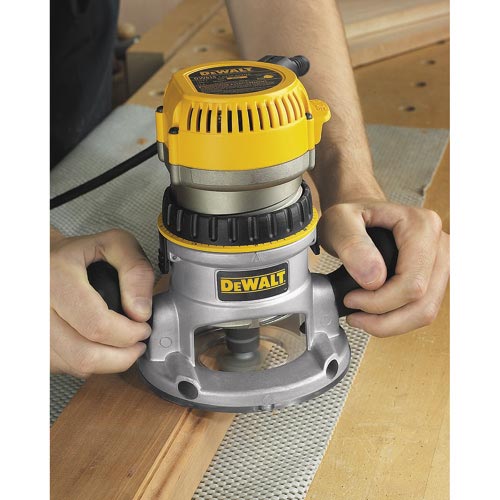
Fixed base routers feature a base that’s adjusted to the proper height for the desired cut and the base is then locked, or “fixed”, in place. With a fixed base router, the height of the bit is never adjusted while the cut is taking place. Fixed base routers will usually provide the most rigid connection between the base and the router motor, which translates into a smooth and clean finished cut on the work piece.
Plunge
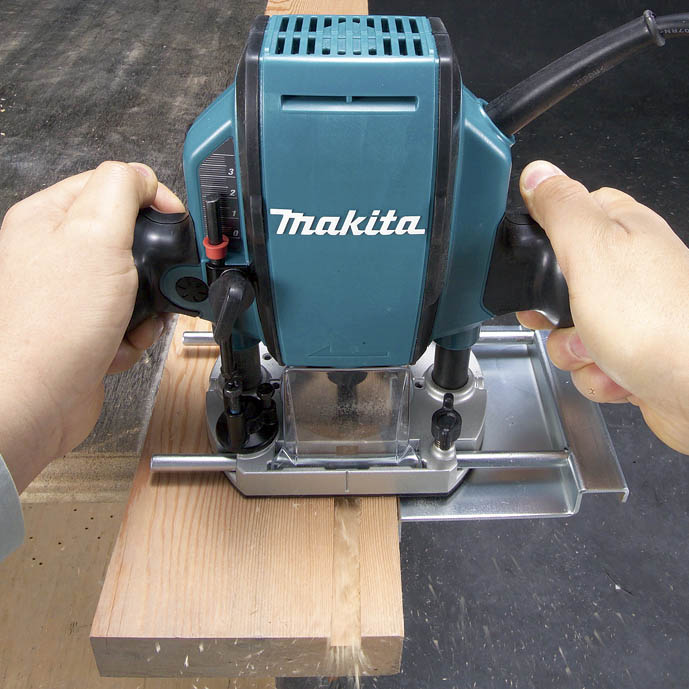
Plunge routers allow the user to adjust the height of the router bit while the router is in operation. This makes it easy to make start and stop cuts, such as when making a blind dado on a shelf or cabinet. This added flexibility comes at somewhat of a price; plunge routers tend to not have as tight of a connection between the motor and the base which can lead to some vibration at the bit and chatter on the workpiece. Plunge routers also tend to be a little top heavy and the handles are mounted higher up on the motor adding to instability.
Laminate Trimming

Laminate trimmers were originally designed for cutting and trimming laminate during the construction of countertops. Laminate trimmers have an assortment of different bases available just for the various cuts required when doing countertop work. Although they were designed to do a very specific task, woodworkers quickly realized the laminate trimmer makes for a great general purpose router. Laminate trimmers are small, light, and are used with one hand. This makes them perfect for many routing jobs, such as adding a small roundover to a piece or even routing dovetails with a jig.
So, if we had to suggest purchasing only one router for your shop, we’d go with a high quality, 2 HP, plunge router. A router like this will provide a good blend of size, flexibility and power.
Choosing a Router Bit Selecting a bit for your router should always be decided by the project(s) you plan to work on. We recommend staying away from bit sets, as most of the bits included in these sets will rarely be used in your shop. With that said, it’s still important to have a few generic router bits in your arsenal to help complete any surprise project that may come up. Whether you need to borrow or purchase, we recommend adding the following bits to your router inventory: straight bits in the ¼”, ½” and ¾” sizes, roundover bits in the ¼”, 3/8” and ½” sizes, and a few decorative (Ogee, Chamfer, Cove & Bead) bits. Bits will typically come in both ¼” and ½” shank size. Always purchase the ½” shank when you have the option. They give you more stability and a better quality finish than smaller-sized shanks.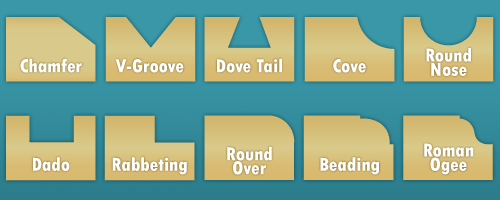
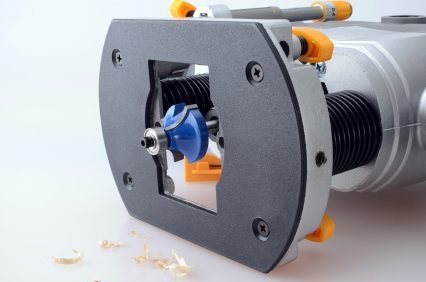
Attaching a Bit
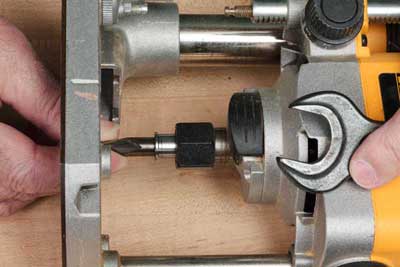
The first step in using your router, is to clamp the desired bit into the routers collet chuck. This is done by sliding the bit into the collet and then tightening the collet nut with a wrench. This process safely and properly secures the bit into the router.
Setting the Depth
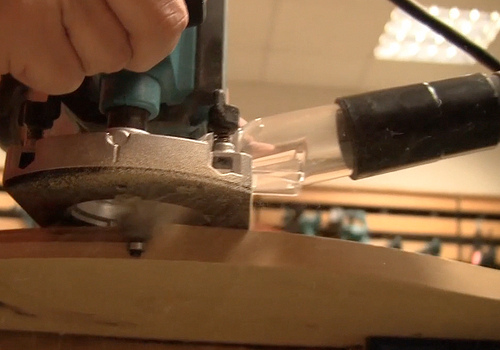 Photo by toolstop via Flickr
Next, you’ll want to set the depth of the router bit. As a rule of thumb, you can expect the bit to cut as deep as the bit is long. Or in other words, measuring the distance between the router base and the end of the bit will equal the same depth of the cut. A ruler or small adjustable square with rule will make setting the depth much easier. It’s always a good idea to test the depth of a cut before routing your workpiece. This way you can make sure the cut is what you really want before you start routing that expensive piece of exotic hardwood.
Operating Tips
 Photo by cheryl.reed via Flickr
When routing with a handheld router you should always route from left to right. If you route from right to left the router will tend to climb over the wood you are attempting to route. This is dangerous and can lead to loss of control of the router. A router mounted in a router table will be just opposite. There the wood should be fed from the right to the left. Remember, as with any tool, let the router do the work. Don’t force it and don’t try removing a large amount of material in a single pass. Use multiple passes, lowering the bit with each pass.
Using a Jig
A jig - or a device that holds a piece of work and guides the tools operating on it – is one of the easiest methods for accuracy and repeatability of a project. In other words, it’s a stencil for your router.
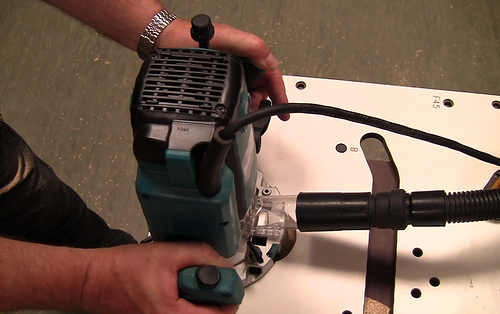 Photo by toolstop via Flickr
There are as many jigs and accessories for routers as there are woodworking challenges. The most popular jigs are to make various types of joinery. Dovetail and mortising jigs make strong, durable and attractive joints for tables and cabinetry. There are straightedge guides to help you route straight, accurate lines with a bit that doesn’t have a ball bearing guide. Jigs for planning and jointing with the router. Jigs for cutting perfect circles. Jigs for shaping the arch on an arched top, raised panel door. Even jigs to allow you to make wooden pens and dowels with your router. The possibilities of new jig designs is only limited by your imagination. And as you gain more experience in the wood shop, you may enjoy making new jigs almost as much as your projects.
Once you get into the habit of using your router on a regular basis, you’ll understand why so many modern woodshops can’t function without one. They shape, they finish, and help turn your projects into something special. What router/bit combination do you use at home? Do you have any routing suggestions for our readers that wasn't included in this article? Let us know in the comments!
WRITTEN BY
EREPLACE CONTENT TEAM
Comprised of creative, experienced video producers, writers, and graphic designers, the eReplacementParts.com Content Team is focused on using their diverse knowledge base to create high-quality informative content to achieve our simple mission: Help the world fix things. Whether it be through tips, guides, or hacks, we ensure that every piece of content includes only expert knowledge, to guarantee that you can do the job right the first time!