Woodworking: Jointers 101

Woodworking: Jointers 101

Whether you’re looking to add more functionality to your shop, or if you’re just trying to build up a decent tool collection, buying a quality jointer is one of the more important purchases you can make.

Simply put, jointers straighten the warped edges and faces of your lumber. If you’ve ever had the experience of trying to work with lumber that’s not straight, you’ll understand how valuable this tool actually is to your workshop.

Our in-house expert Mark, echoed this sentiment by saying, “In my opinion, the jointer is considered one of the three core pieces of equipment in your shop, right up there with the table saw and planer.”

If you don’t already own a jointer, or are looking to upgrade your existing setup, we’ll help you choose the right one and give you some tips on how to best use it.


How they Work

Without getting too technical, it’s easiest to understand the operation of a jointer by looking at its main components; the infeed table, the outfeed table, the cutterhead and the fence.

The infeed and outfeed tables support the work piece as it passes through the jointer. The outfeed table sits at exactly the same height as the knives on the cutterhead. The infeed table may be adjusted up and down which determines the amount of material that will be removed by the cutterhead each time a board is drawn across the jointer. It’s critical that the infeed and outfeed tables be perfectly parallel to each other. The fence supports the workpiece and ensures that the jointed edge is perfectly square to the face. The fence can also be tilted on many jointers which allows you to bevel the edge.


Types of Jointers

There are a variety of jointer types and models on the market, so choosing the correct one for your needs can be a bit tricky.

There are two major classes of jointers; stationary and benchtop. Both are useful in the right hands, but choosing the right one for your needs will be dependent on a number of criteria, including the size of your shop and the project load it needs to handle.


Benchtop machines are small and light weight. They’re perfect for very small woodshops where every square foot of space is important and must be justified. The downside to a benchtop jointer is that the tables will be relatively short. A typical benchtop jointer will have about 24” of total table length. This will work fine to straighten workpieces about 36” and shorter, but you’ll find it lacking with longer lumber. Most benchtop jointers will be fairly narrow, usually 4” or less, which will limit the amount of face jointing you can do.


Stationary machines are larger, sit on their own cabinet and usually have tables that are at least 40” long. Stationary machines typically have at least a 6” knife and go as wide as 12”. A common jointer in the home woodshop is a 6” wide machine with a 46” long bed. A machine like this will be able to handle most of the tasks a seasoned woodworker will need to accomplish.

Recently many manufactures have brought 6” longbed jointers to the market with tables as long as about 60”. For the woodworker that plans to do a lot of face jointing, the 8” jointer is the way to go. The 8” width will handle the majority of face jointing needs. Most 8” jointers have beds of at least 60” and some even go beyond 70”.

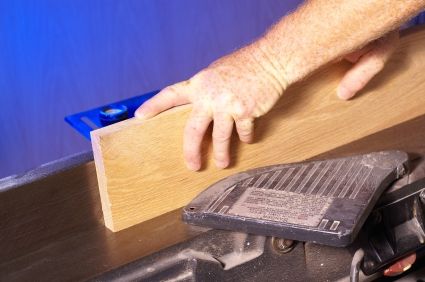
For our money the 8” jointer is the best all-around jointer for the serious hobbyist woodworker.


Jointer Basics

Using your jointer starts by first evaluating the workpiece you plan to joint. You’ll want to first examine the edge and face of the targeted board to find out what way it’s warped or bowed — the goal being to find the face or edge of the board that’s concave. This is important because you’ll rarely want to pass a convex warped edge through you jointer. Doing so will create a long taper across your workpiece and will require you to remove much more material than jointing the concave warp would.

Once you’ve found the concave warped edge and face of the board, you’ll need to determine which direction to run the board through the jointer. As a rule of thumb, always run the board through your jointer in the same direction as the grain — running against the grain will cause tear-out or chipping of the workpiece.

Now that you’ve inspected your lumber, you’re ready start jointing.

First, run the face you have selected through the jointer. This will give you one flat and straight face on the workpiece. Next, run the edge you selected through the jointer. You’ll now have one straight and flat face, a straight edge and one perfectly square corner on the workpiece.

From here you’re ready to move on to planing your workpiece and shaping it with a table saw.


Jointer Safety

If used properly the jointer is no more dangerous than any other tool in your woodshop. Most jointer accidents occur when the user removes the cutterhead guard which exposes the razor sharp, quickly spinning knives. Do NOT do this. There’s no good reason to remove the guard while the machine is in operation. The only exception would be if you are making a rabbet cut, but honestly, who uses their jointer for rabbeting anymore? That is what routers are for.

And lastly, when using your jointer you’ll always want to use push sticks or push blocks to keep your hands away from the cutterhead.

Pretty simple stuff!


***

The jointer is a must-have tool in your woodshop, there’s no arguing this point. All of your furniture and cabinet projects require straight, flat workpieces, and since most lumber doesn’t come without these imperfections, it’s key to the central operation of your shop.  

We hope that this guide has helped you to decide which jointer to add to your shop and given you tips that you can use on your next project. And for all you expert-woodworkers out there, let us know what jointing tips we may have missed in the comments!


Organize Your Home in a Snap!

The Fix App makes it easy to manage all your stuff in one place. Just snap a photo and we'll find and store your user manuals, receipts, and product information in one easy-to-find place!

"Like magic. I took a picture of the model number on my refrigerator, and the app identified it right away ... Very convenient. I'm impressed."
★★★★★ -Clever Jeff ★★★★★

eReplacementParts.com
7174 South 400 West
Suite 5
Midvale, UT 84047
visa mastercard discover american express PayPal