


How to Restore The Plastic on Your Power Tools
If you are looking to bring an old tool or accessories back to life, check out our step-by-step process below or watch our video as Dave restores an old drill and screwdriver. Most tools and workshop accessories today are housed in plastic, and unfortunately, plastic tends to wear and scratch over time and might require some restoration. Luckily, restoring plastic back to its shiny, smooth self is not difficult. Whether you are working on automotive plastic, such as bumpers on cars or even steelwork, it is all a similar process, so these techniques are a great skill to have in your back pocket!

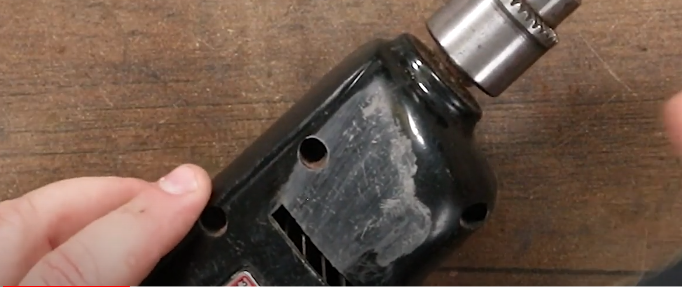
Step 1: Assess the Damage
Before you begin, examine the scratch, and determine how severe or deep the damage is. The grit you'll need will depend mostly on the depth of the scratch. For typical damage on a plastic tool, a 220-grit sandpaper is a great starting point.
Step 2: Sand the Plastic
Start sanding the plastic using your 220-grit sandpaper. As you start sanding you will notice a difference in color. Where you see the lighter shade, this is exposing the problem areas. These divots are now more visually obvious because they are holding the plastic residue. Continue to sand until you see a uniform color.
Tip: In-between sanding and the removal of layers, wipe it clean using an isopropyl rubbing alcohol. This will remove any kind of wax or other sanding residue. Do not skip this step!
Step 3: Up Your Grit
Once you have completed the sanding job with the first grit choice, you will want to up it once more. It can be tempting to skip the multiple grits and just jump from 220 to 2000, but using multiple levels, will save you sanding time. The more levels of sandpaper you use, the faster it will sand. Also, by using multiple grits, they will only get used for a short period of time so the sandpaper itself will also last longer and will be easier to clean at the end.
By sanding in multiple levels of increasing grits, you will remove the marks the last one left behind. As you continue to sand you will notice the color is getting closer and it starts to become much more obvious where you have sanded and where you have not. It will also start to feel much smoother. At this point, you aren’t looking for the deep scratches but the small ones that the last sandpaper left behind. Don’t forget to continue to wipe the surface clean as you go.

Step 4: Buff the Plastic
Assemble the Buffing Wheel and Apply Compound
Prepare the buffing wheel (meant to put on bench grinders) by screwing in a mandrel to the center and attach it to a drill. Once it is attached to your drill, you will need to put some compound on the buffing wheel itself. The compound is essentially a wax with grit in it. The compounds generally come in different grits, which are differentiated by color. Apply the compound to the buffing wheel by holding it sturdy with one hand and holding it against the buffing wheel as it spins.
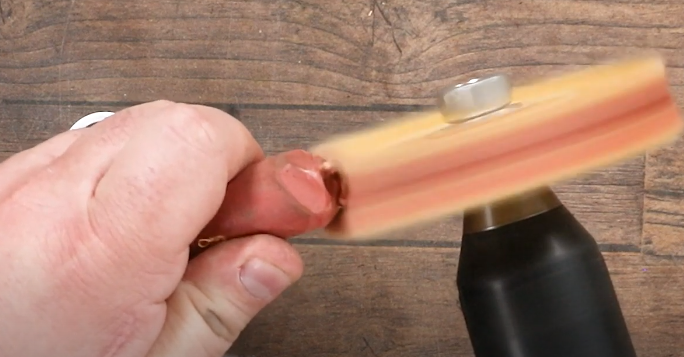
Buff the Plastic
Now you can start to buff the plastic for roughly two to three minutes. Once you have buffed the area, wipe it clean with your cloth. You should notice the larger scratches have disappeared and it should be pretty shiny by now. If you would like to improve the shine even more, you will just go back to the sandpaper and go through the stages of stepping up from grit to grit once again.

Increase Buffing Compound Grit
Once you are satisfied, buff the plastic with the first grit compound, and then change the buffing wheel and use the next level of grit (polishing), and then finally apply car wax to finalize the look. You’ll then wipe down the surface with your cloth.

The Results!
We applied these same steps to the head of our plastic screwdriver and check out the results below!


This is such a simple process that anyone can do, and it will have your tools looking as good as new again! Check out our video above and leave a comment letting us know how yours turned out. If your refurbished power tools require replacement parts, we have you covered, just check out our extensive library of OEM parts. Good luck with your transformation!

WRITTEN BY
EREPLACE CONTENT TEAM
Comprised of creative, experienced video producers, writers, and graphic designers, the eReplacementParts.com Content Team is focused on using their diverse knowledge base to create high-quality informative content to achieve our simple mission: Help the world fix things. Whether it be through tips, guides, or hacks, we ensure that every piece of content includes only expert knowledge, to guarantee that you can do the job right the first time!