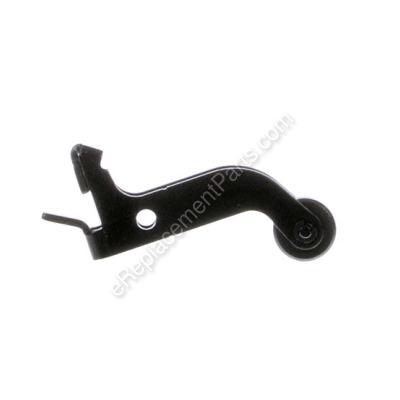
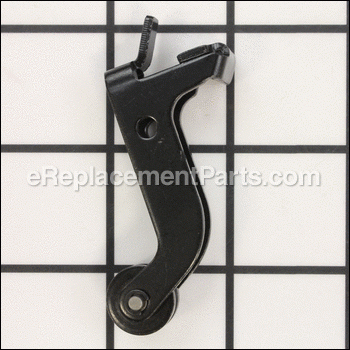
This authentic item that is supplied by the original equipment manufacturer for use with Ryobi jig saws. It is an identical replacement for a missing or a faulty blade guide assembly that was installed on a new unit. Please make sure to refer to the appropriate diagrams of your model for the correct location and application of this hardware. Keep in mind this high-quality part is made of durable metal is sold individually. Note, the #692670001 Compression Spring for the guide is sold separately.
Assembly Guide Holder 305061005
OEM part for: Ryobi
Part Number: 305061005
Jump To:
Frequently Purchased Together ?
Compatibility
This part will fit the following 3 machines
Ryobi
This item works with the following types of products:
- Jig saw Parts
- Saw Parts
This part replaces obsolete part #: 305061001
Customer Part Reviews ?
- 1
Questions & Answers ?
Our customer Service team is at the ready daily to answer your part and product questions.

Ask our Team
We have a dedicated staff with decades of collective experience in helping customers just like you purchase parts to repair their products.
Does this fit my product?Questions & Answers for Assembly Guide Holder
Customer Repair Instructions ?
All our customer repair instructions are solicited directly from other customers just like you who have purchased and replaced this exact part.
Missing lock washer securing the pin on the wheel of the blade guard assembly.
Tool Type
Jig saw
Difficulty
Easy
Time
15-30 minutes
Tools Used
Screwdriver
Parts Used
Lost a clip on the blade glide.
Tool Type
Jig saw
Difficulty
Easy
Time
15-30 minutes
Tools Used
Screwdriver
Parts Used
I broke the pin that holds the wheel on the blade guide
Tool Type
Jig saw
Difficulty
Medium
Time
30-60 minutes
Tools Used
Screwdriver
Parts Used
2. Remove the broken guide assembly (it held in place by a pin)
3. Replace the part making sure the spring is taking tension.
4. Make sure all parts are still where they should be and all moving parts move
5. Close the shell and screw it down
Wheel on blade guide assembly broke
Tool Type
Jig saw
Difficulty
Easy
Time
15-30 minutes
Tools Used
Screwdriver, Pliers
Parts Used
The spring had to be wrapped back around. It was at this point I discovered I had purchased the wrong part (I didn't verify model number prior to purchase).
The guide assembly was close enough to the right size to work though and I was able to get the jigsaw back up and functioning.
Roller on blade guide assembly broke off. Then entire assembly had to be replaced.
Tool Type
Jig saw
Difficulty
Medium
Time
15-30 minutes
Tools Used
Screwdriver
Parts Used
2. Remove the old blade guide assembly. Note how the spring is seated before removing.
3. Insert the new blade guide assembly. The only tricky part entails re-inserting the steel spring under tension. Took a little time to figure out how to do this. The spring is small and ends up being under a lot of tension.
4. Be sure that the two small pieces used to bolt the bottom plate of the jig saw get replaced in the dust chute when reassembling.
Put blade in backwards and chewed up guide wheel.
Tool Type
Jig saw
Difficulty
Easy
Time
Less than 15 minutes
Tools Used
Screwdriver, Power Drill
Parts Used
2) use supplied hex key with saw or your own (if you can't find it) to remove metal saw guide/angle of cut adjuster with built in dust collection attachment (1 screw)
3) remove all phillips screws on side of saw, used screw driver for deep screw and power drill for the rest. Do not try and remove the metal part of the shell when it comes lose as it has one screw inside holding it on and doesnt need to be removed
4) split shell with hands or flat head screw driver being very careful of spring loaded detent for the metal angle adjustment
5) watch the spring orientation and free floating pin on the guide before removing and reuse on the new guide. Also pay close attention to the blade gaurd which may fall out/needs to be put in with plastic spreader/retainer piece between the ends of the gaurd where it mounts in the plastic tool body
6) put shell back together in reverse order and reattach the metal saw guide/angle adjuster. If using power drill to reinstall screws on plastic shell be mindful not to over torque
Guide blade assembly. Rollers were broke.
Tool Type
Jig saw
Difficulty
Hard
Time
More than 2 hours
Tools Used
Screwdriver
Parts Used
OEM stands for Original Equipment Manufacturer and means the part you’re buying is sourced directly from the manufacturer who made your product. At eReplacementParts, we sell only genuine OEM parts, guaranteeing the part you’re purchasing is of better design and of higher quality than aftermarket parts.
Our product descriptions are a combination of data sourced directly from the manufacturers who made your product as well as content researched and curated by our content & customer service teams. This content is edited and reviewed internally before being made public to customers.
Our customer service team are at the ready daily to answer your part and product questions. We have a dedicated staff with decades of collective experience in helping customers just like you purchase parts to repair their products.
All our part reviews are solicited directly from other customers who have purchased this exact part. While we moderate these reviews for profanity, offensive language or personally identifiable information, these reviews are posted exactly as submitted and no alterations are made by our team.
All our customer repair instructions are solicited directly from other customers just like you who have purchased and replaced this exact part. While we moderate these reviews for profanity, offensive language or personally identifiable information, these reviews are posted exactly as submitted and no alterations are made by our team.
Based on data from past customer purchasing behaviors, these parts are most commonly purchased together along with the part you are viewing. These parts may be necessary or helpful to replace to complete your current repair.
All our installation videos are created and produced in collaboration with our in-house repair technician, Mark Sodja, who has helped millions of eReplacementParts customers over the last 13 years repair their products. Mark has years of experience in selling and repairing both commercial and residential products with a specialty in gas-powered equipment.
This data is collected from customers who submitted a repair instruction after replacing this exact part. Customers can rate how easy the repair was to complete and how long it took. We aggregate this data to provide a repair rating that allows customers to quickly determine the difficulty and time needed to perform their own repair.


